
Origami Boat (Photo Tutorial)
Most of the tutorials here spell out every fold in words. This one does not, and that is rather the point: it is a photo guide, eight pictures that take you from a flat square to a finished little boat with almost no text in the way. If you are the sort of person who learns by looking at what the paper should be doing, you will probably prefer it.
Take it one picture at a time and match the position of your paper before you commit to each fold. A larger sheet helps the first time through, because several of the steps are about where the edges line up rather than about any complicated move. The result is the familiar paper boat that most people folded as a child, hollow enough to float for a minute or two before the paper finally gives up.

STEP 1. Start with one square sheet and follow the photo to make the first fold.
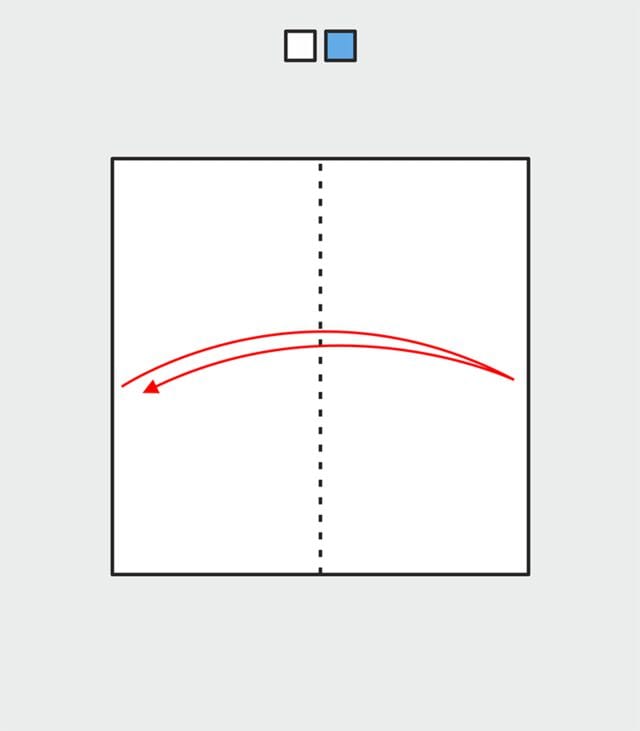
STEP 2. Follow the photo for the second fold.
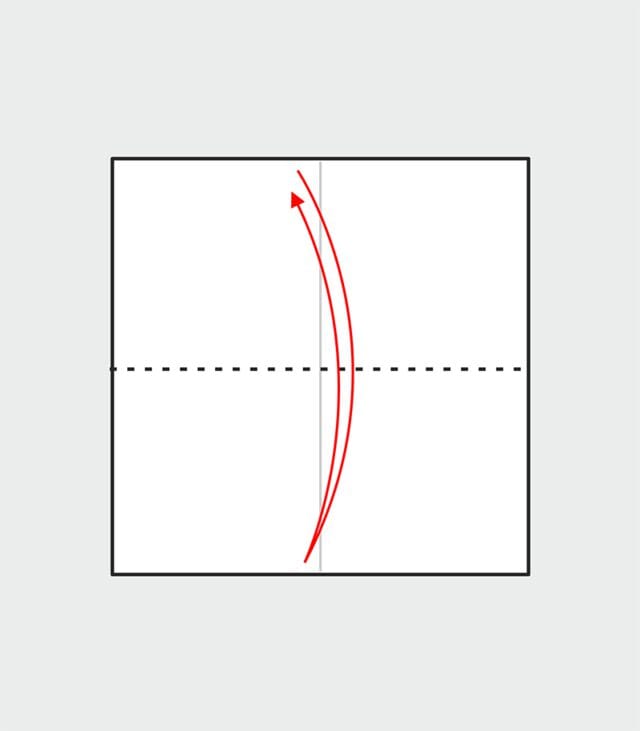
STEP 3. Follow the photo for the next fold.
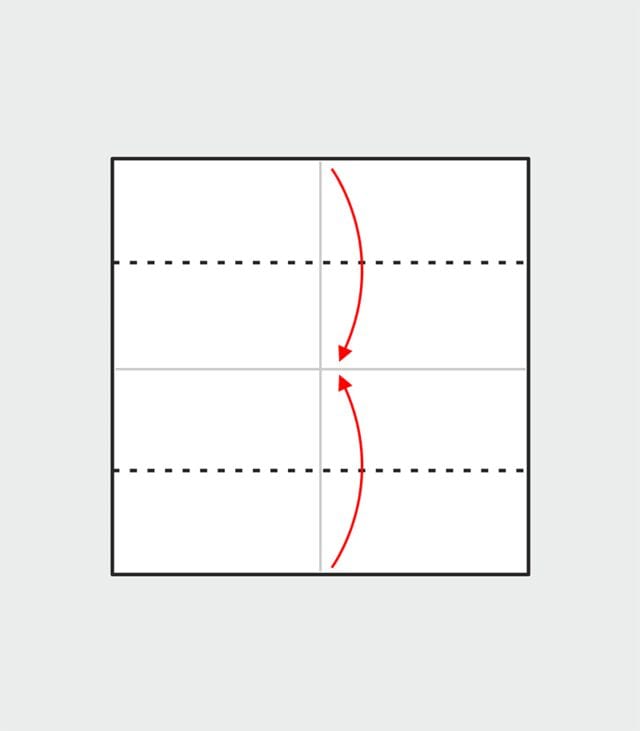
STEP 4. Follow the photo, matching the position of the edges before you crease.
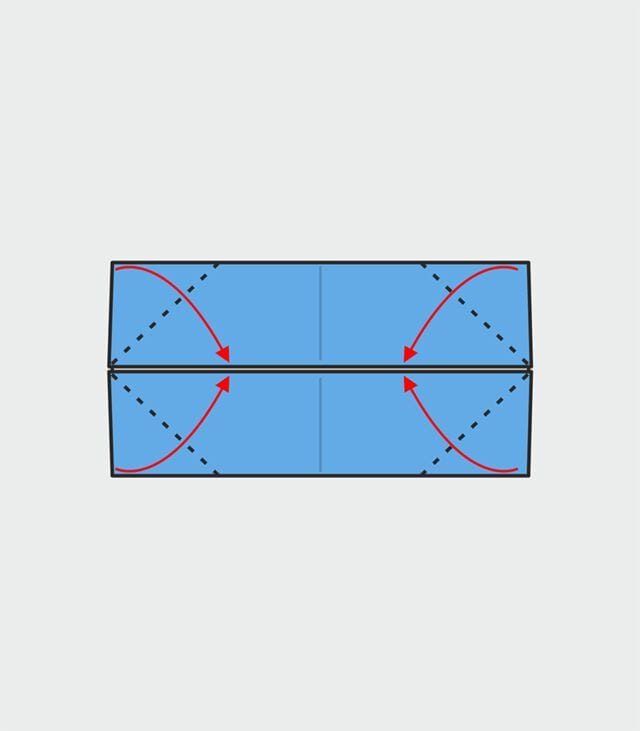
STEP 5. Follow the photo for this fold.
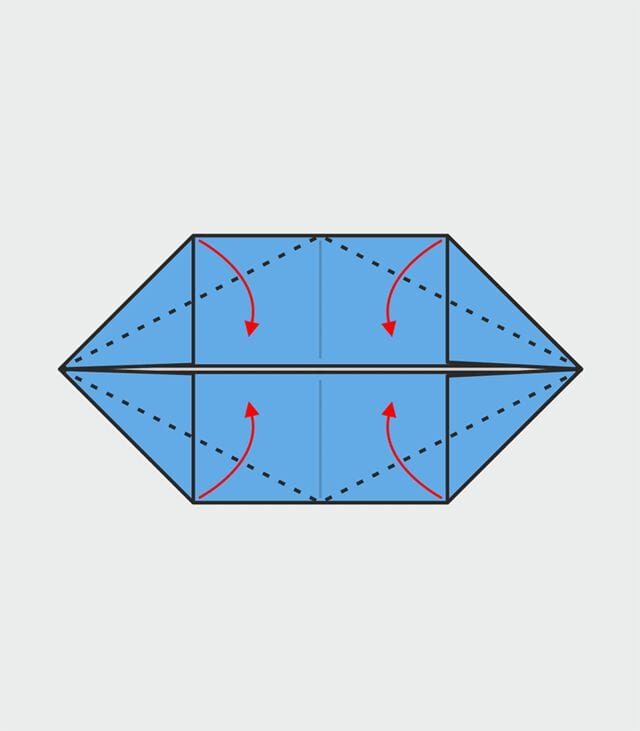
STEP 6. Follow the photo, keeping the folds even on both sides.
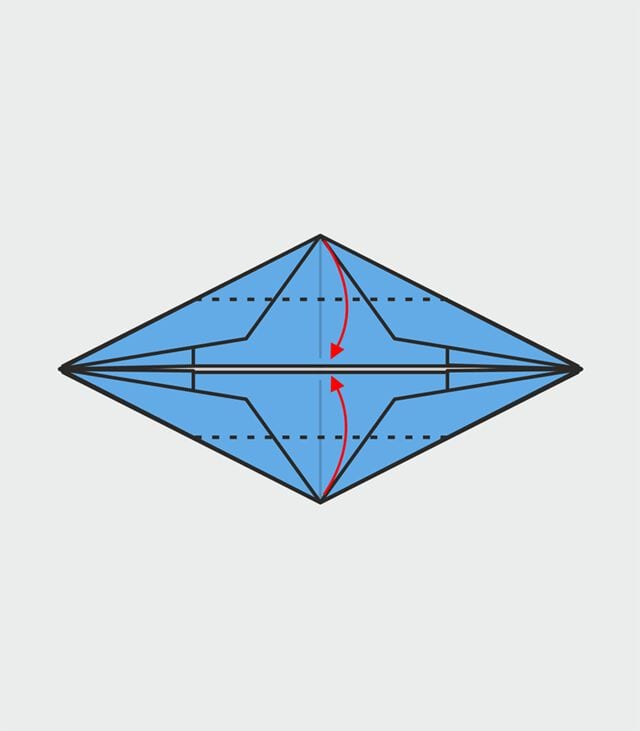
STEP 7. Follow the photo for the next fold.
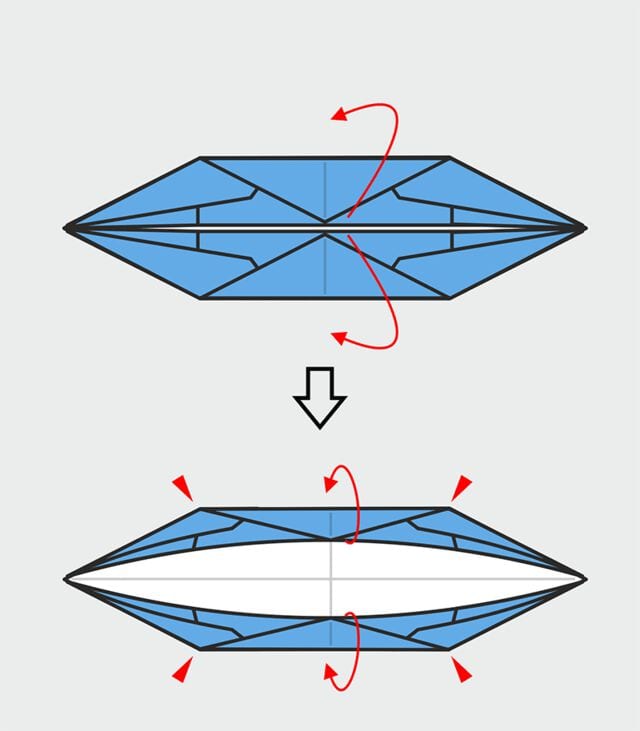
STEP 8. Follow the photo for the last fold, then open the hull out and your paper boat is ready.





