
Origami Dragon (Complete Tutorial)
There’s something instantly satisfying about an origami dragon that actually looks three-dimensional — not a flat silhouette, but a creature with a raised head and wings you can pose. This tutorial is built for exactly that: a single square of paper, a steady pace, and a camera documenting every fold so you never lose your place.
If you’ve folded a crane or a basic bird base before, a lot of the early moves will feel familiar, but don’t rush the shaping steps near the end — that’s where the dragon’s character comes from. Set aside roughly ten minutes, pick a paper color you love, and let’s bring this one to life.
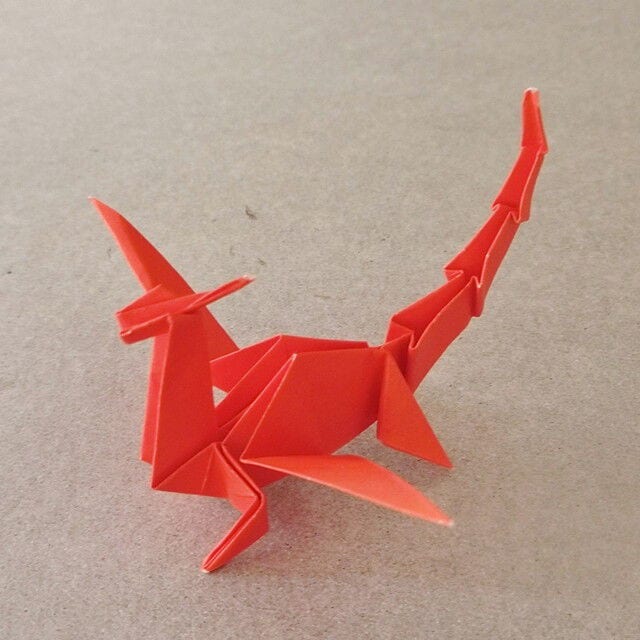 This time I’ll show you how to fold a cool, three-dimensional origami dragon.
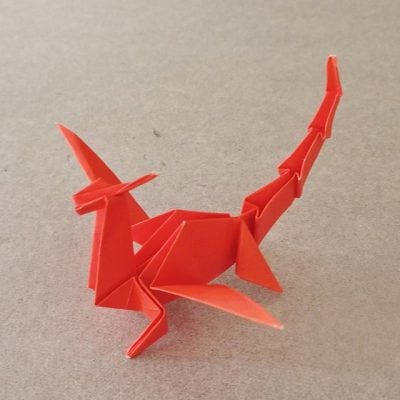 Even though it’s grouped under “easy” folds, it’s a little more challenging than it looks — that label is just a rough way of sorting dragon tutorials.
As always, I’ll walk you through every stage with clear photos of the actual folds, so take your time and give it a try!
The video folds slowly, so the whole model should take about ten minutes.
(By the way, my son once spent several hours on an origami robot!)
How to Fold an Origami Dragon
This time I’ll be folding with a single sheet of origami paper.
Pick whichever color you like.
Let’s start folding!
STEP 1.
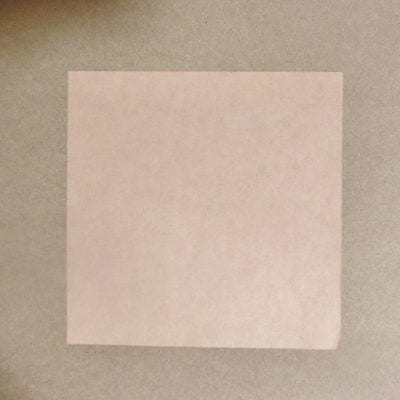
Prepare a square sheet of paper.
 STEP 2.
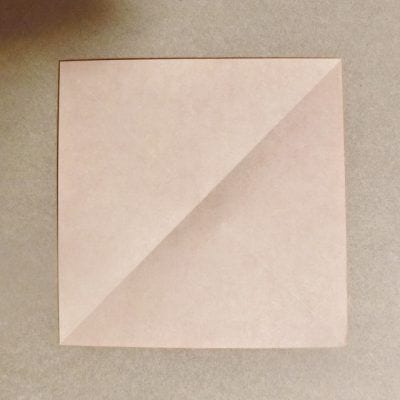
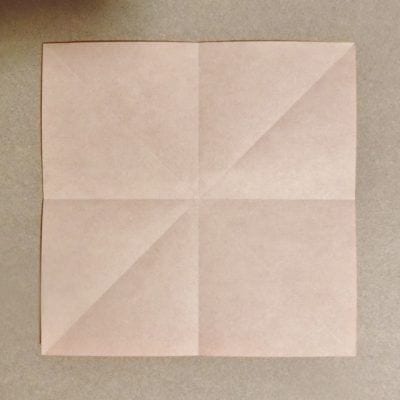
Fold it diagonally to make a crease, then unfold.
 STEP 3.
Fold it in half vertically and horizontally to make creases, then unfold.
 STEP 4.
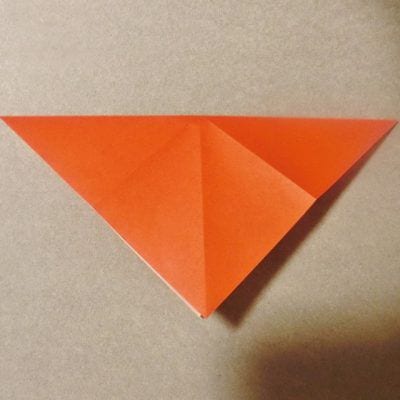
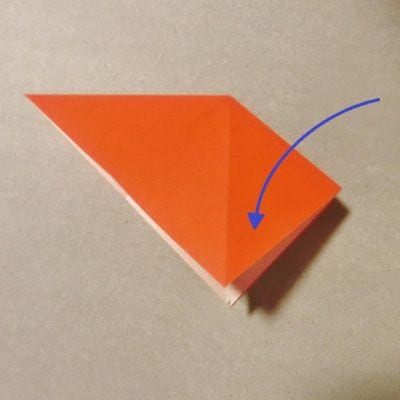
Fold it into a triangle, then use the crease to fold the right half into a square.
 STEP 5.
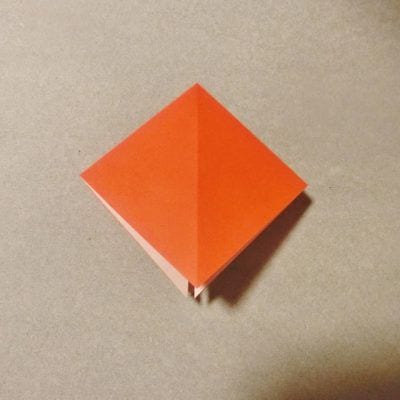
Fold the left half back in the same way.
 STEP 6.
Bring the lower-right and lower-left edges to the center and fold. Do the same on the back.
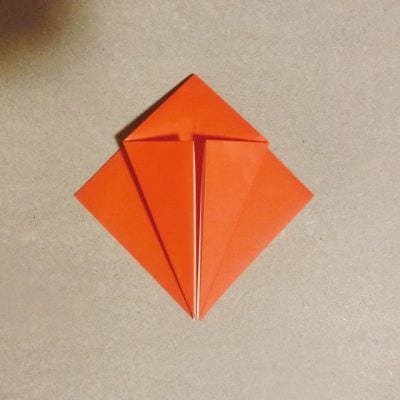
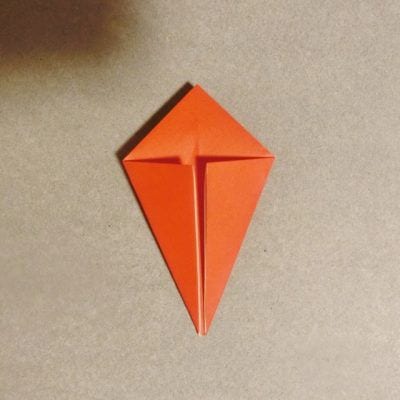 STEP 7.
Fold the top triangle down, then unfold it back to the square.
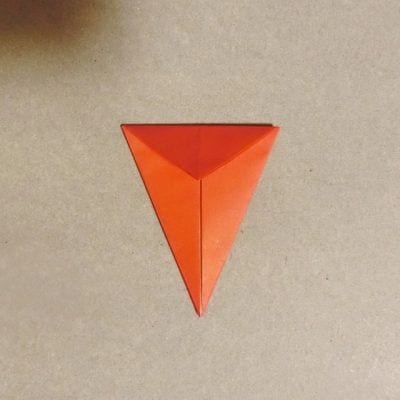
 STEP 8.
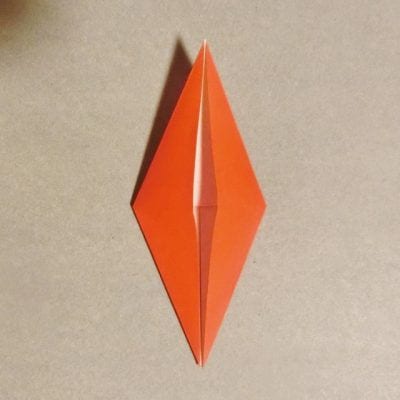
Using the crease, lift the bottom corner up by one layer. Do the same on the back.
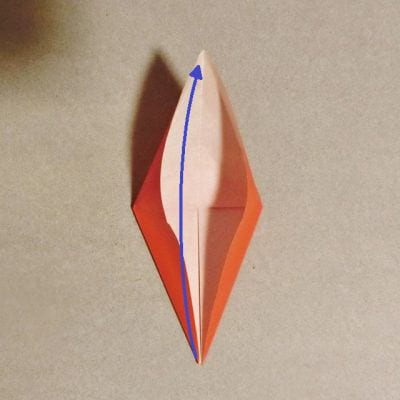
 STEP 9.
Fold the lifted corner back down to the bottom. Do the same on the back.
 STEP 10.
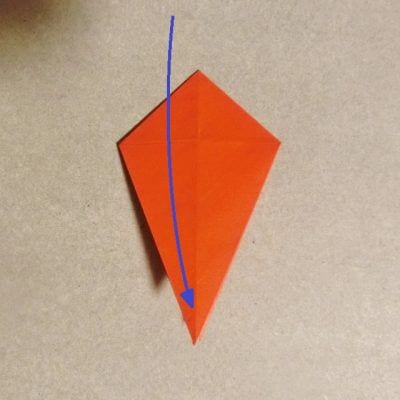
Align the top corner with the crease and make a crease.
 STEP 11.
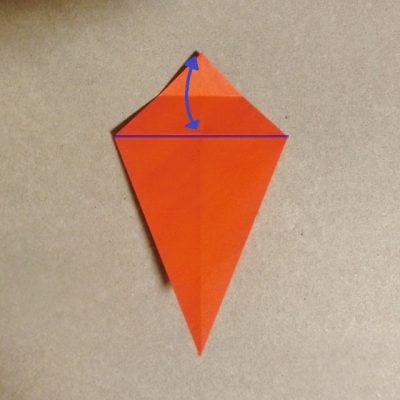
Pull the front and back lower corners to inflate the top triangle.
 STEP 12.
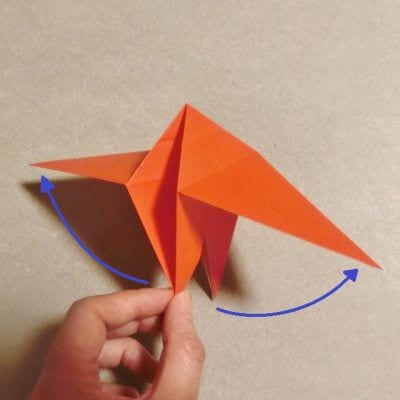
Using the crease, pinch the upper part of the triangle inward as shown. After pinching, fold it back.
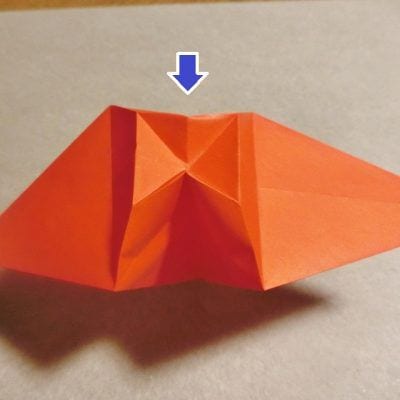
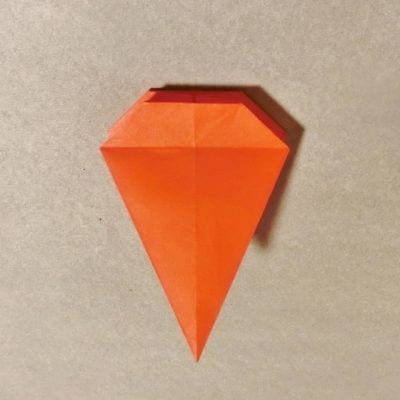 STEP 13.
Fold the top corner as shown in the photo. Do the same on the back.
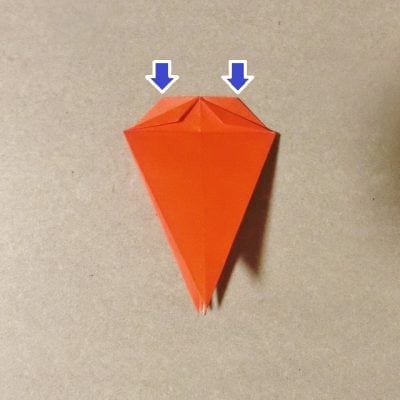
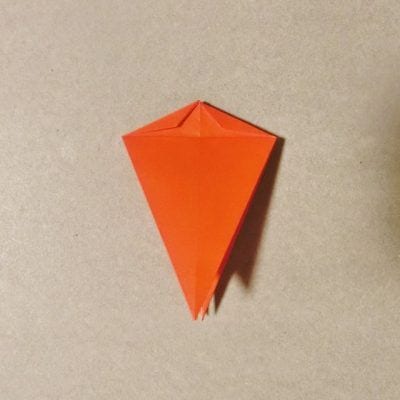 STEP 14.
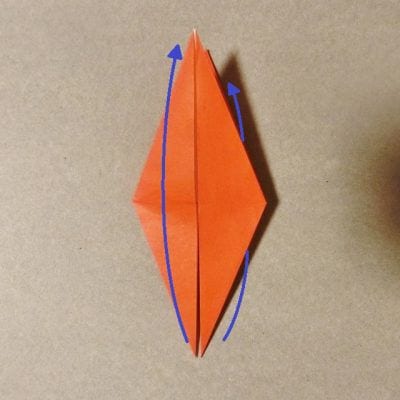
Lift the front and back lower corners up by one layer.
 STEP 15.
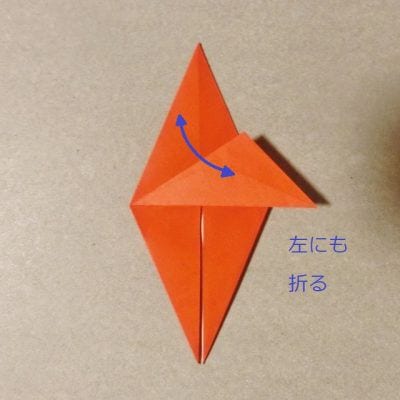
Fold the raised flaps to the left and right to make creases.
 STEP 16.
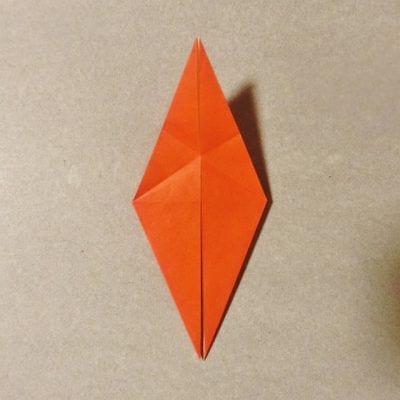
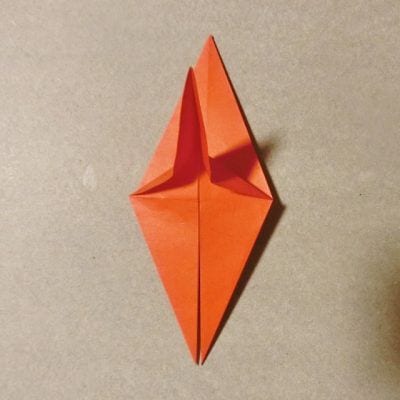
Using the crease, bring both ends to the center so the top corner points to the side. (It doesn’t matter which way it faces.)
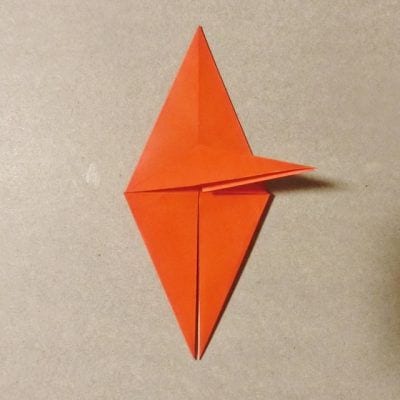 STEP 17.
Fold the back side in the same way.
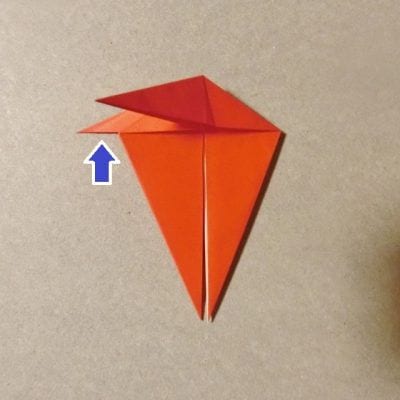 STEP 18.
Fold the bottom corner to the left and right, then fold it in half along the crease.
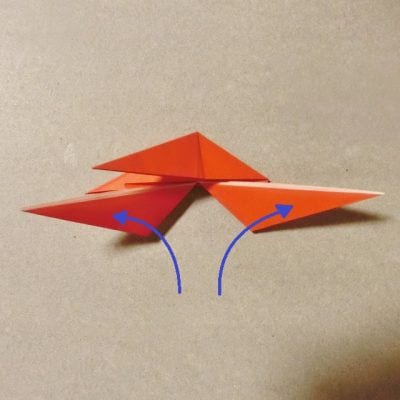
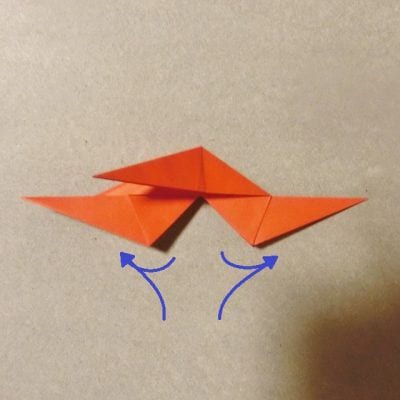 STEP 19.
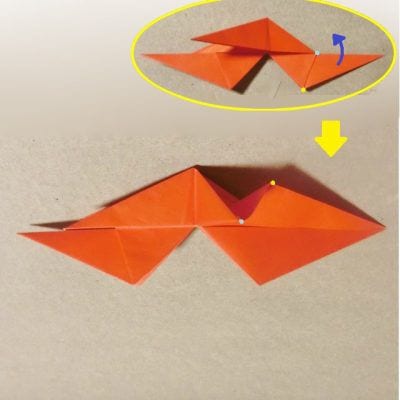
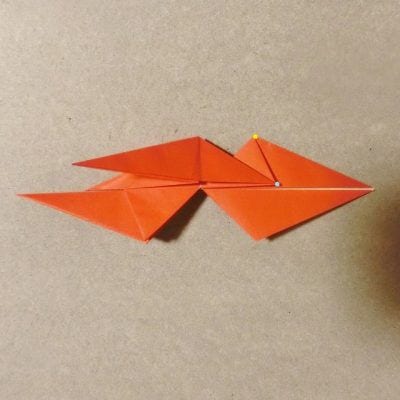
Open the area shown in the photo and fold it upward.
 STEP 20.
Fold the lower half back.
 STEP 21.
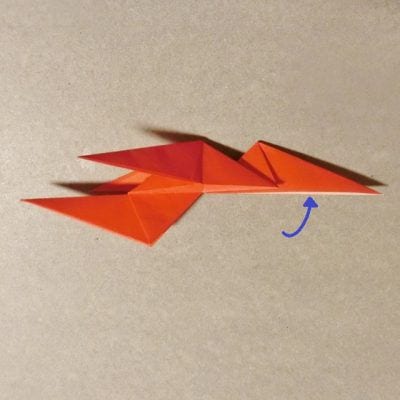
Fold the left side in the same way.
 STEP 22.
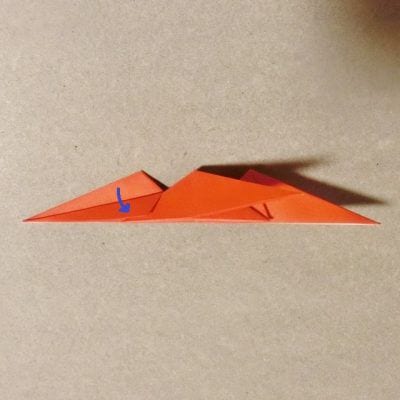
Fold the left side along the bottom edge. Do the same for the back-left side and the front-and-back on the right.
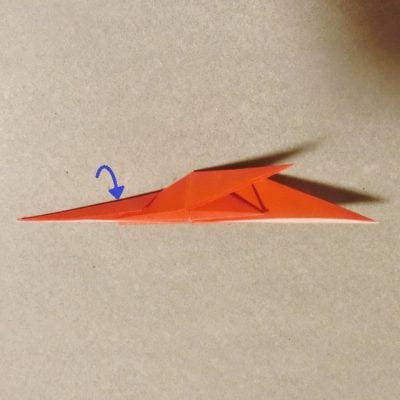
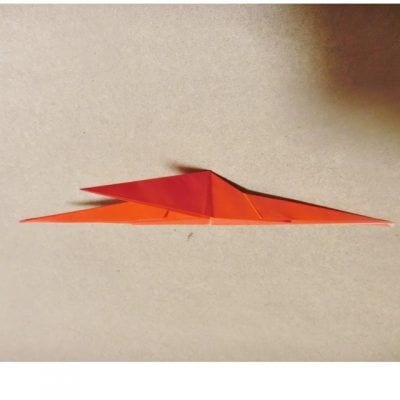 STEP 23.
Lift the folded section once and fold it onto the other side of the foreground triangle.
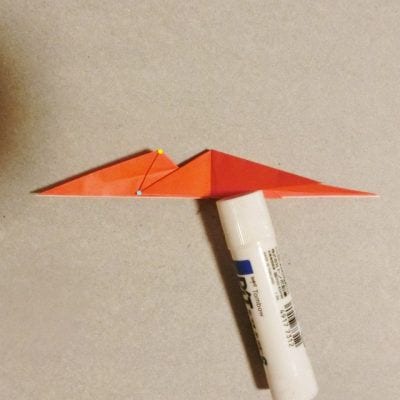
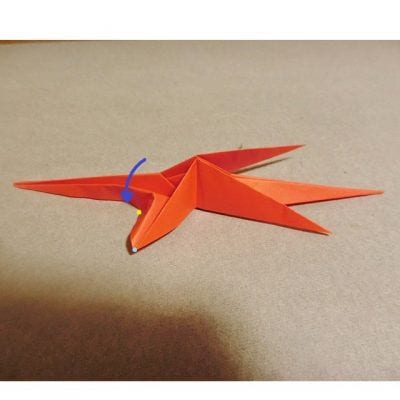
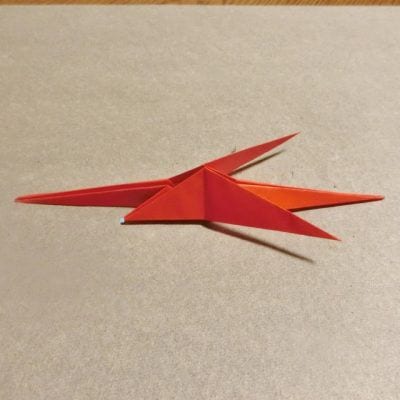 STEP 24.
Fold the other three sections in the same way.
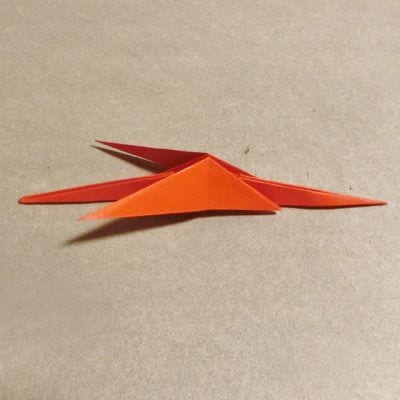 STEP 25.
Viewed from directly above for clarity, lift the section shown in the photo in the opposite direction.
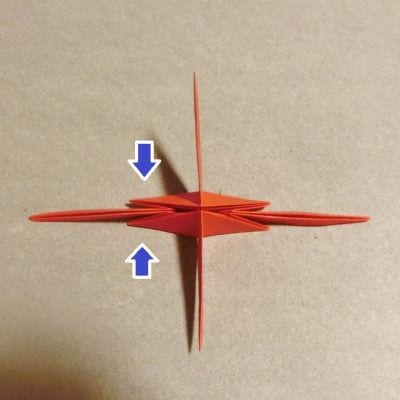
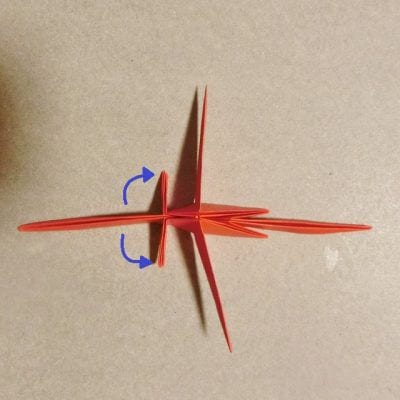 STEP 26.
Back to the original angle: fold the left side of the raised tip along the line shown in the photo.
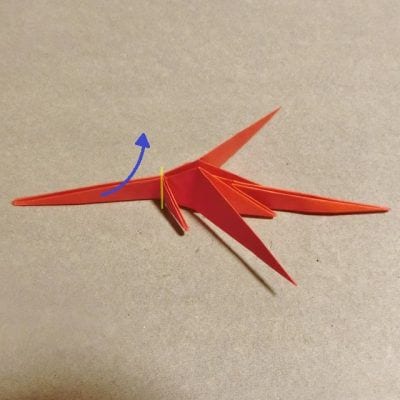
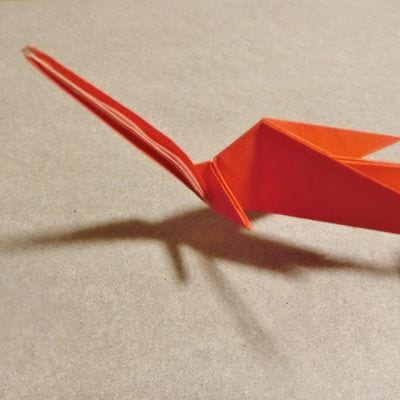 STEP 27.
Fold it in half along the crease.
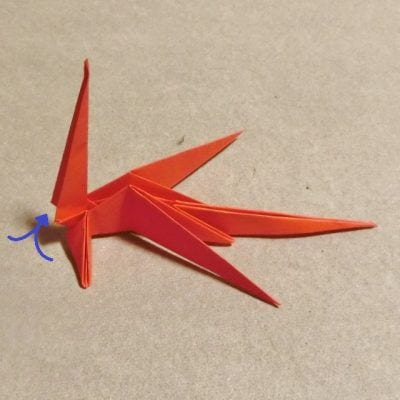 STEP 28.
Fold it down in the middle, then fold it up so it sticks out a little.
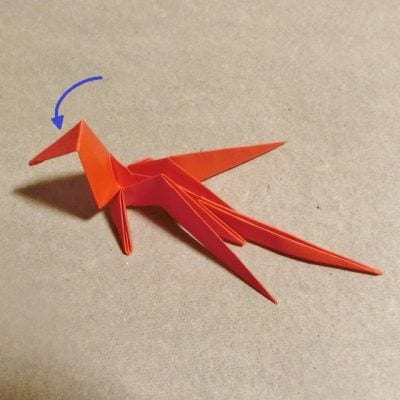
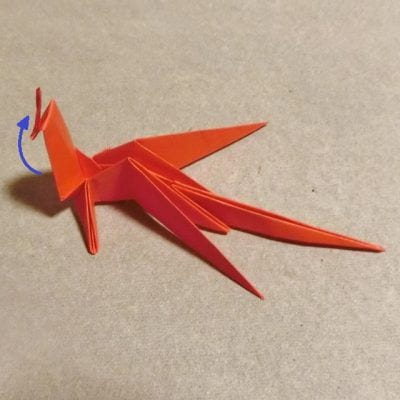 STEP 29.
Lift it slightly as shown and close it by pinching both sides.
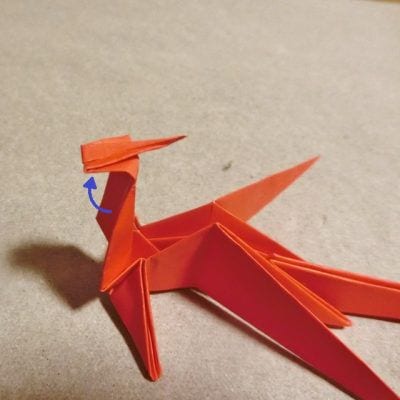
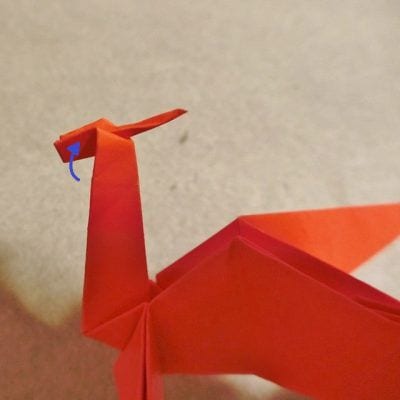 STEP 30.
Wrap one of the triangles around from the middle, in the opposite direction, as shown in the photo.
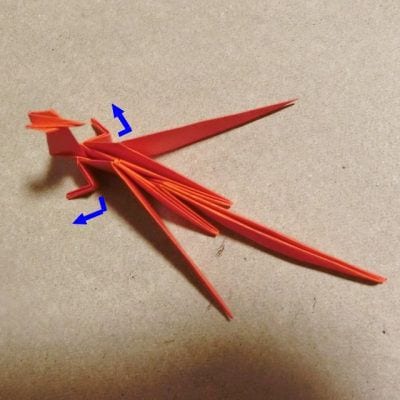 STEP 31.
Lift the two triangles shown in the photo in opposite directions and fold them along the lines in the photo.
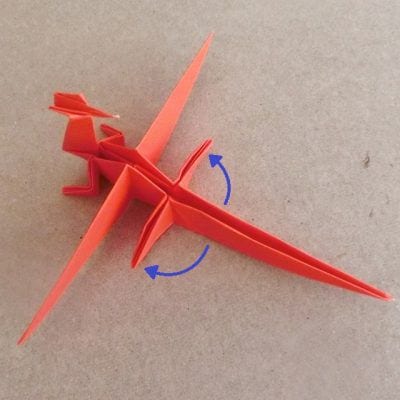
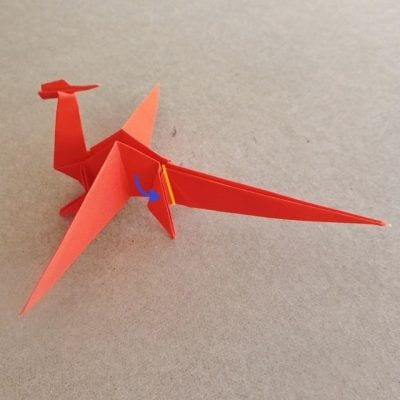 STEP 32.
Open the back section and form a corner as shown in the photo.
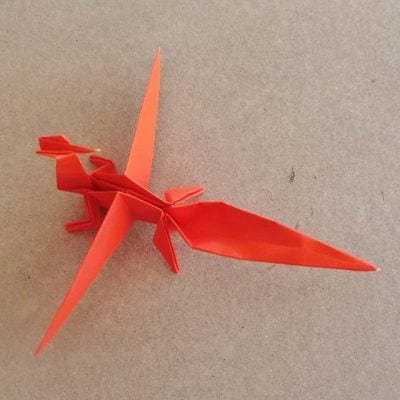
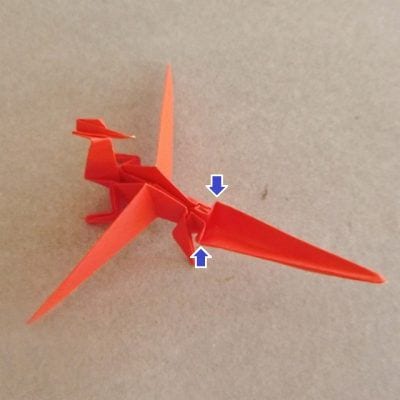 STEP 33.
Push it forward to create a step fold.
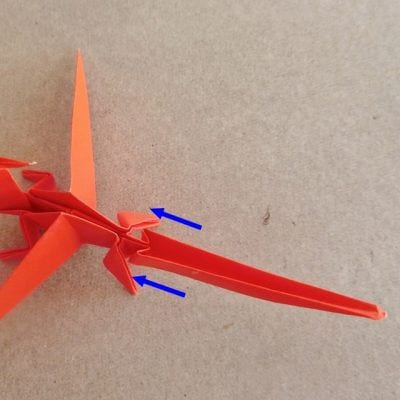 STEP 34.
After that, make three more step folds.
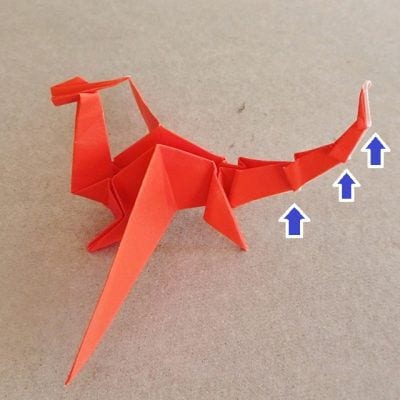 STEP 35.
Fold the wings upward along the lines in the photo.
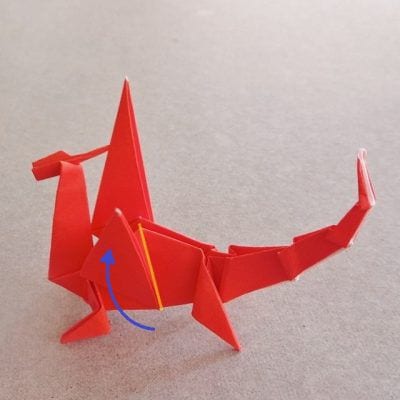 STEP 36.
Spread the wings slightly and shape the model — and you’re done!
Well done!
How did it turn out?
Pretty cool, isn’t it?
How to Fold a More Challenging Origami Dragon
Unlike the dragon above, this one stands on its own.
If you can fold this one, you’re a hero!
Give it a try when you’ve got a leisurely weekend.
I feel like I can’t break any of these like this (laughs).
I fold quite a bit of origami myself, but I’m tempted to give up on this one — it may just not be doable.
That said, you might manage it with a larger sheet of paper.
If you double the size, it becomes foldable, so if you want to try, prepare a large sheet of origami paper.




