
Jet Paper Airplane
A paper jet is the kind of plane that looks fast even sitting still — sharp nose, squared wings, and a straight, steady flight. This one is built from a non-square sheet, so grab any A4 or letter paper you have handy.
In this tutorial we work through 17 steps that begin much like the rocket paper airplane, then shape the fuselage and lift the wings into a clean perpendicular angle. If you know your valley- and mountain-folds, you're all set — let's fold a jet that really goes.
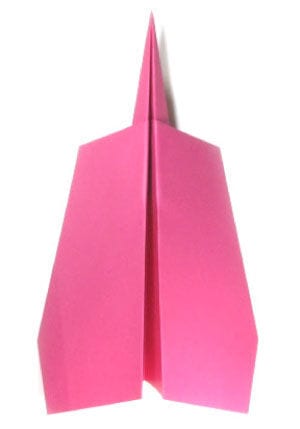
How to Fold a Jet Paper Airplane
This jet paper airplane shares its opening folds with the rocket paper airplane, and like the rocket it flies in a straight line. One thing to keep in mind: it needs a non-square sheet, so standard origami paper won’t work — use any letter-size or A4 paper instead.
Before you start, you should know what a valley-fold and a mountain-fold are. If you’re comfortable with those two basics, you’ll have no trouble with this plane.
If you’re ready, let’s get started.
You can use any paper, but here I’m using A4-size origami paper.
This is the front side of the paper. Any non-square sheet works well — I’m using A4-size origami paper.
This is the back side.
STEP 1: Start with the back side of the paper facing up. Mountain-fold in half vertically, then unfold.
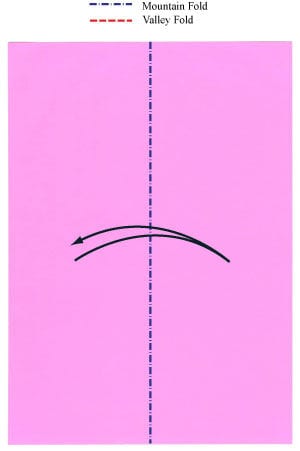
STEP 2: Mountain-fold in half vertically as before, then unfold. Apply two valley-folds.
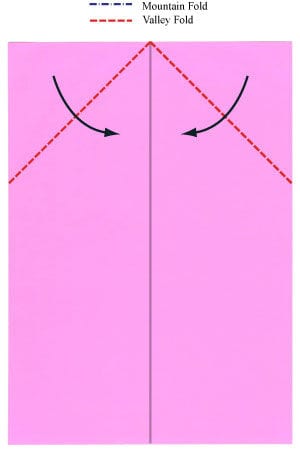
STEP 3: Apply the two valley-folds from step 2. Apply two more valley-folds.
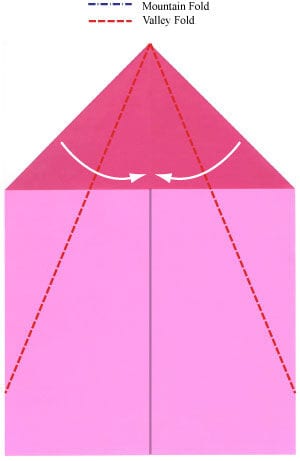
STEP 4: Apply the two valley-folds from step 3. Valley-fold in half horizontally.
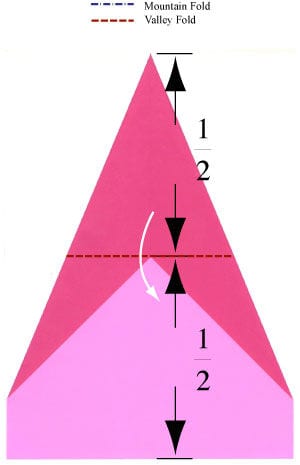
STEP 5: Valley-fold in half horizontally. Apply a horizontal valley-fold.
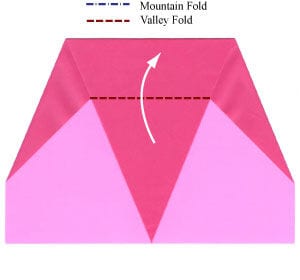
STEP 6: Apply the horizontal valley-fold from step 5. Turn the paper plane over.
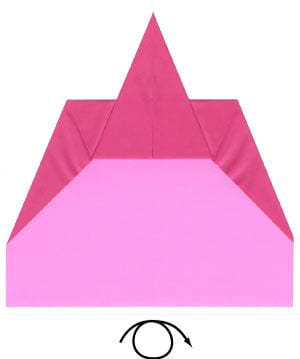
STEP 7: Turn the paper plane over. Apply a vertical valley-fold.
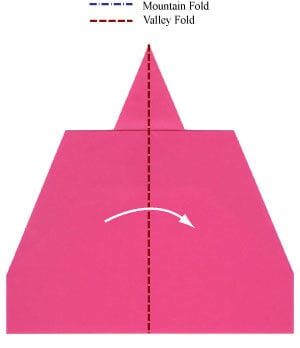
STEP 8: Apply the vertical valley-fold from step 7. Apply another valley-fold.
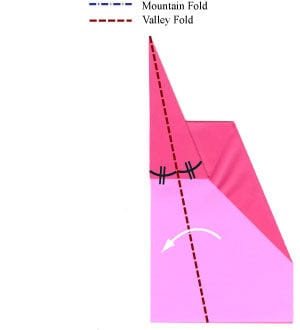
STEP 9: Apply the valley-fold from step 8. Turn the paper plane over.
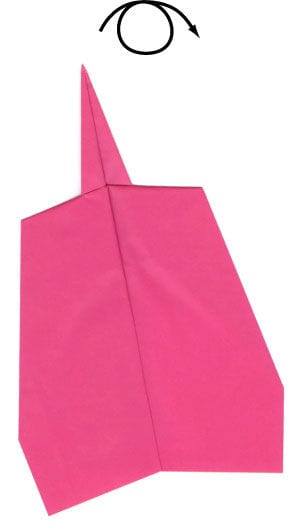
STEP 10: Turn the paper plane over. Apply a valley-fold.
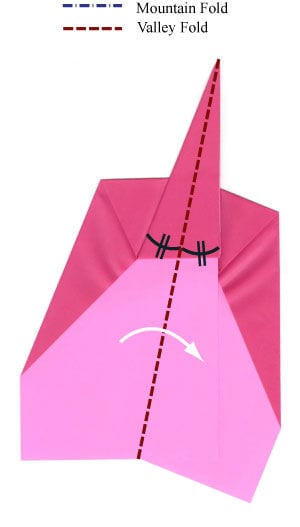
STEP 11: Apply the valley-fold from step 10. Rotate the model by 90 degrees.
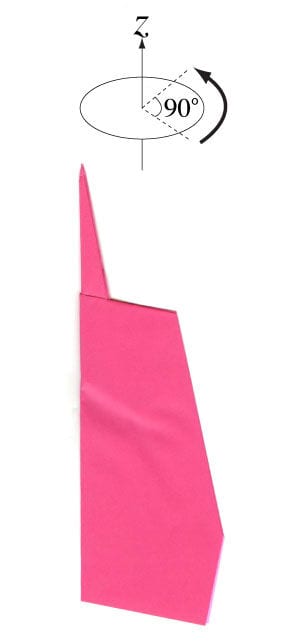
STEP 12: Rotate the model by 90 degrees. Rotate the model by 90 degrees again.
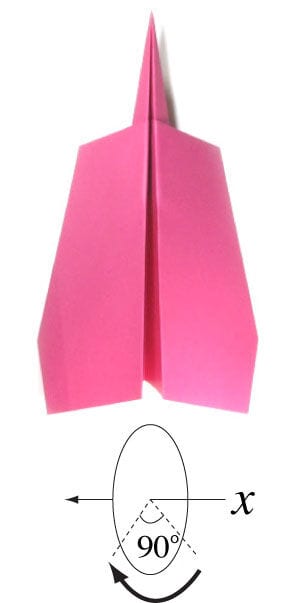
STEP 13: Rotate the model by 90 degrees. Lift the two wings so they are perpendicular to the plane body.

STEP 14: Lift the two wings so they are perpendicular to the plane body. Rotate the model by 90 degrees.
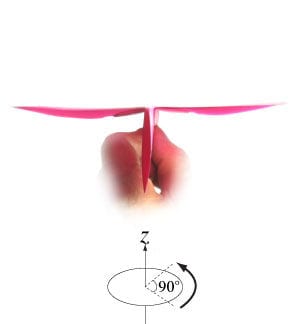
STEP 15: Rotate the model by 90 degrees. You can now throw the jet paper airplane in the direction of the arrow — it will fly straight.
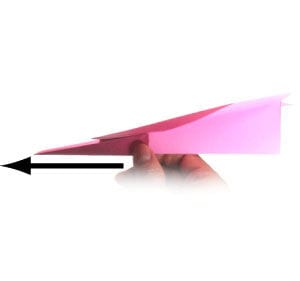
STEP 16: This is the top view of the jet paper airplane.
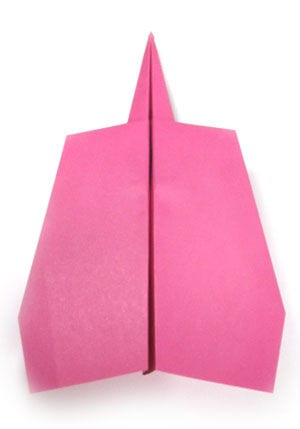
STEP 17: This is the bottom view. Congratulations — you’ve completed your jet paper airplane!





