
Beautiful Accessory Case
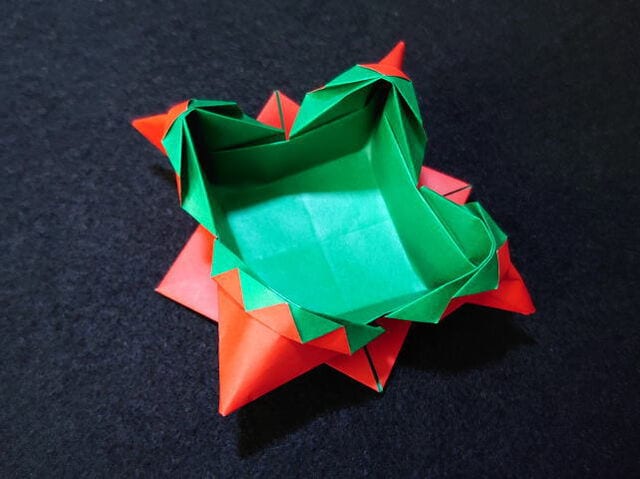
There's something irresistible about a tiny handmade box — and this little origami pouch is as pretty as it is practical. With a few clever folds it becomes a small container that can hold a piece of candy, a tiny gift, or whatever your imagination suggests.
In this tutorial we'll build a delicate square pouch from a single sheet, working through 16 steps of creases that finally pinch into a three-dimensional shape. Use a slightly larger sheet than usual if you'd like more room inside, and try water-resistant paper if you plan to tuck in something juicy like a grape.
How to Fold
STEP 1: Place the paper pattern-side up and crease the square in half.
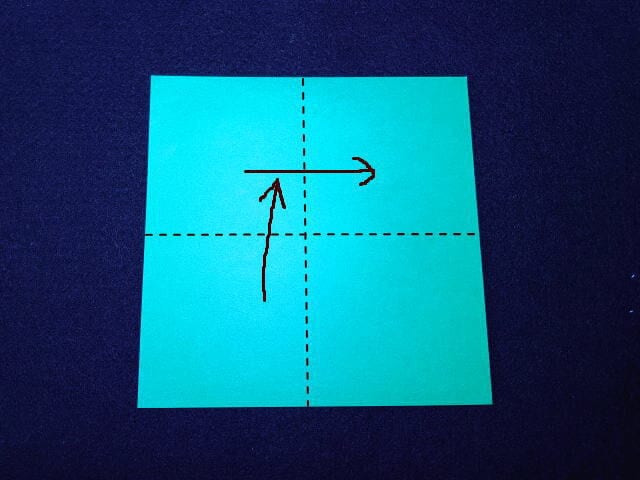
STEP 2: Crease from the outside edge toward the center.
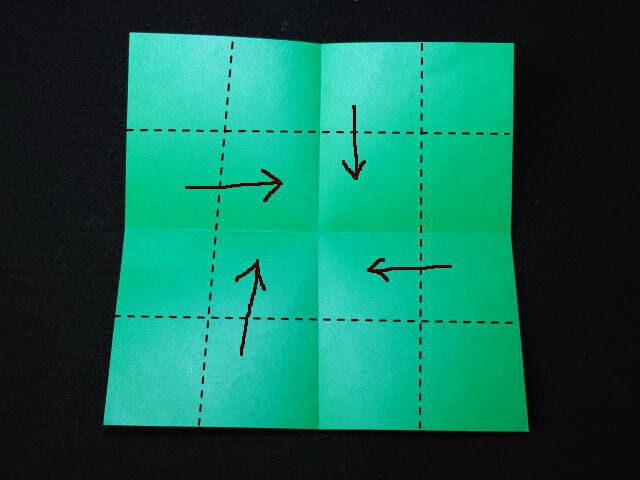
STEP 3: Continuing, fold it along the crease to the marked point.
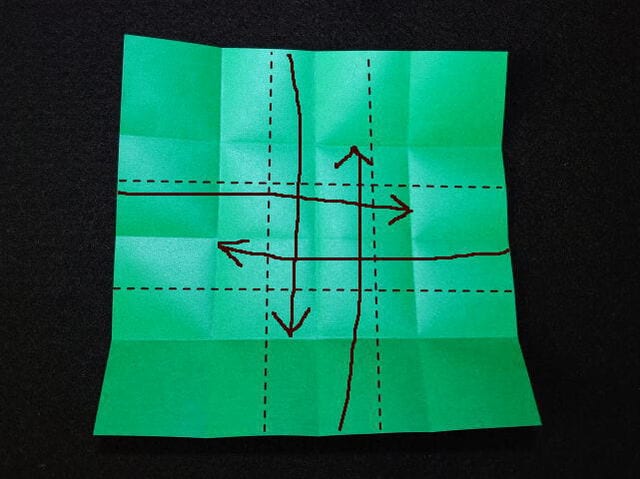
STEP 4: Once creased, fold each of the four corners toward the center.
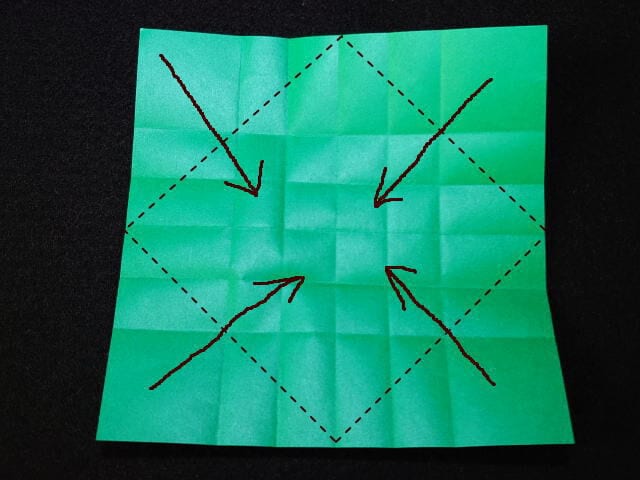
STEP 5: Once folded, turn the paper over.
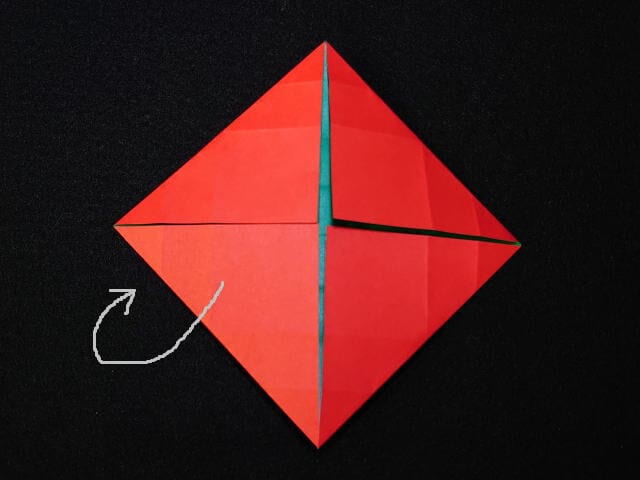
STEP 6: Fold around the four corners.

STEP 7: Fold from the center out toward the edges.
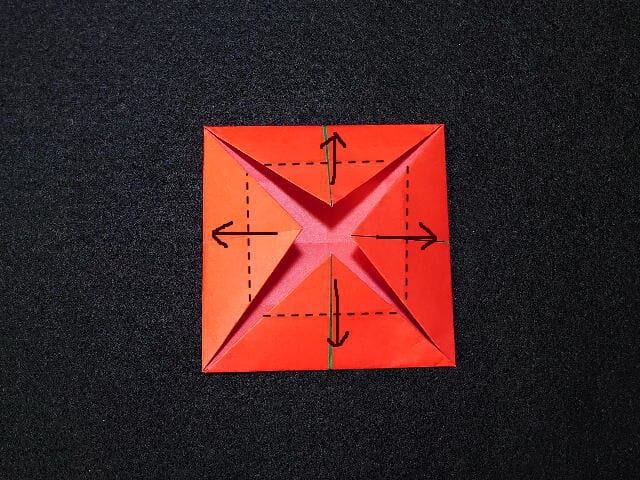
STEP 8: Once folded, turn the paper over.
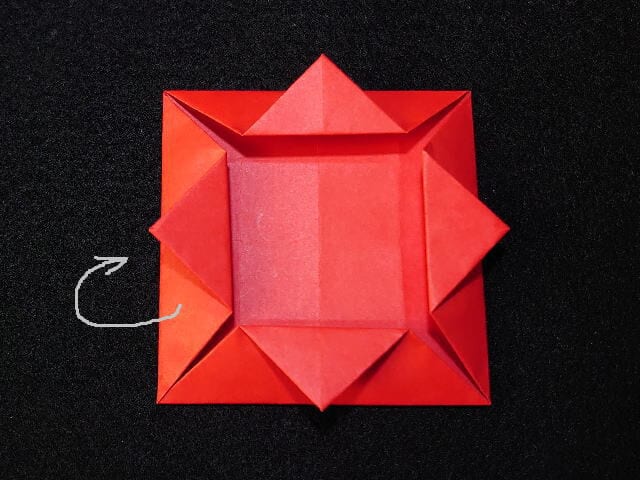
STEP 9: Fold from the center out toward the edges.
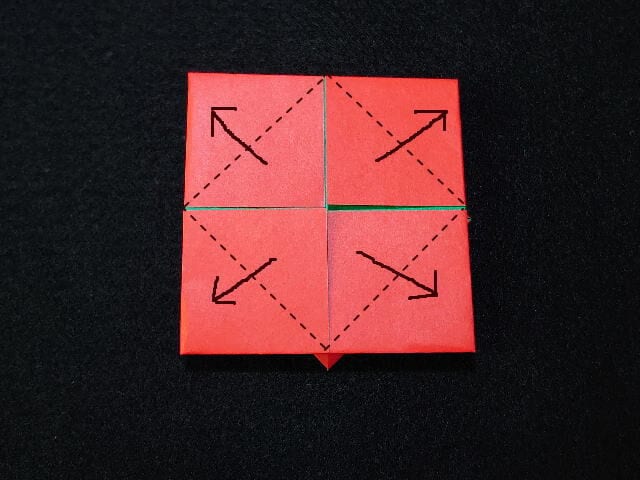
STEP 10: Fold the corners in to meet the creases.
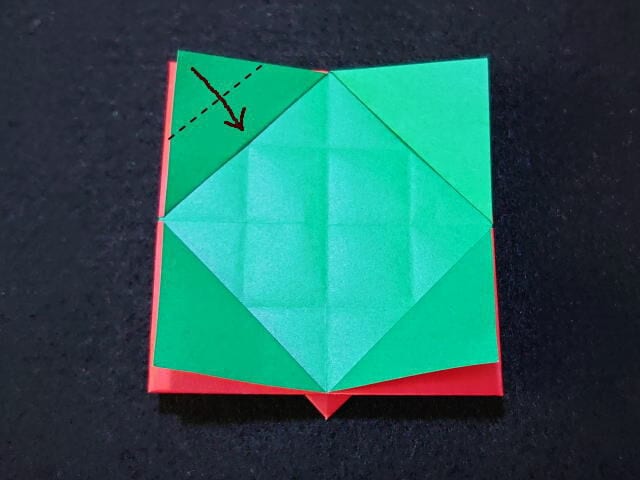
STEP 11: Fold it further in to the crease.
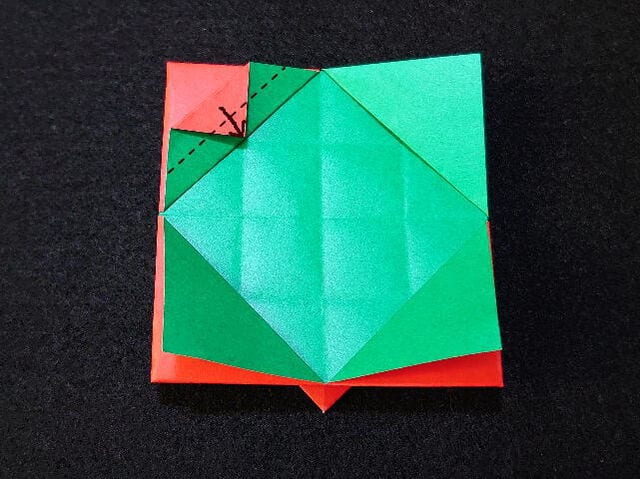
STEP 12: Once folded, unfold it.
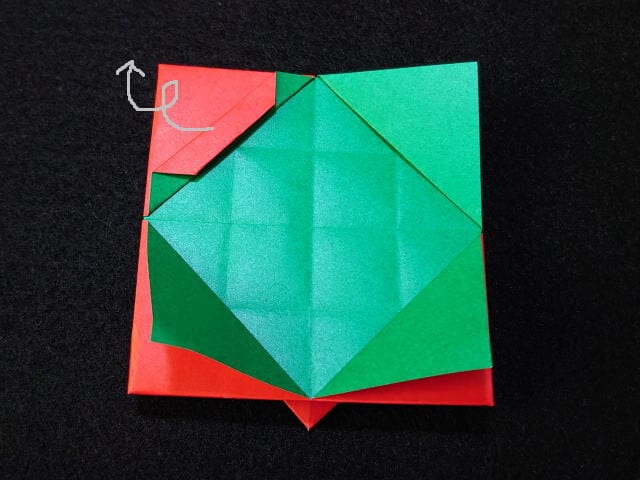
STEP 13: Fold from the bottom line toward the center, following the creases and alternating front and back. Repeat the same on the other corners.
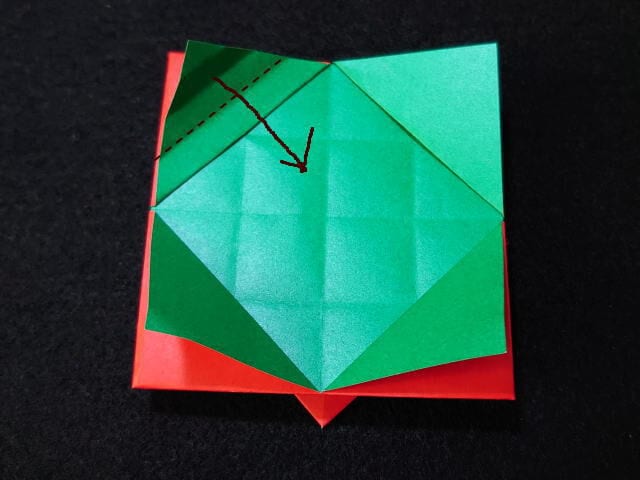
STEP 14: When all four corners are folded, pinch them from the outside to give the box a three-dimensional shape.
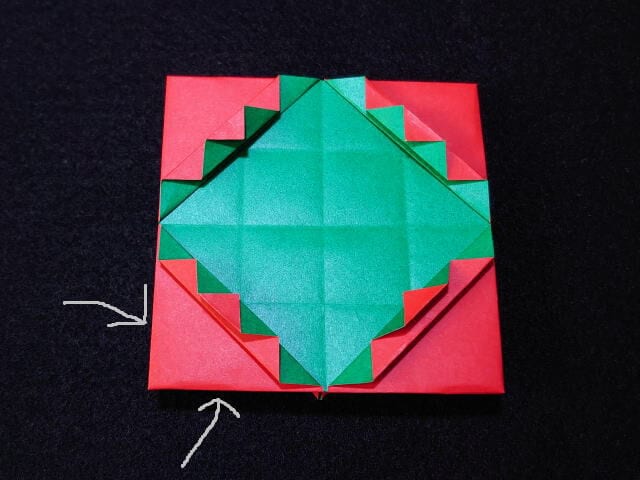
STEP 15: Shape it so the inside forms a square crease.
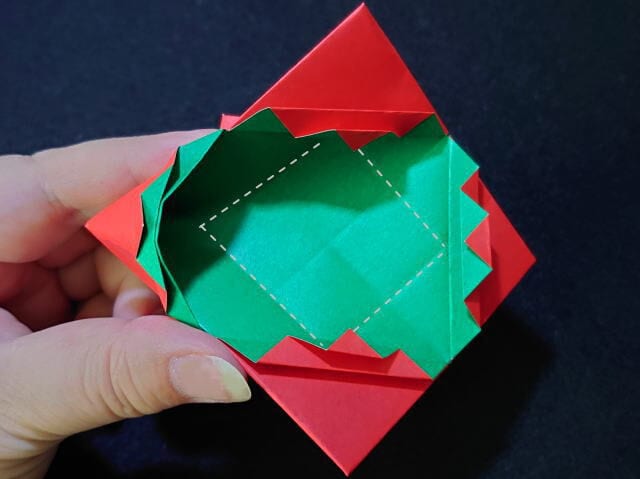
STEP 16: Your little pouch is ready!
Folding Tips
If you make that first crease firm and crisp, the final shaping will be much easier and the result will look beautifully neat.
Standard origami paper is on the small side, so if you fold this with slightly larger paper you’ll have more room inside for little things like individually wrapped candies.
If you use water-resistant paper, you can even tuck in small fruits like grapes. Try folding it with all kinds of familiar papers.




