
Traditional Boat
There's a paper boat somewhere in almost everyone's childhood — the one you fold from a notebook page and float in a puddle, hoping it survives the journey. This is that classic, and it's even easier than you remember.
The lovely twist: it doesn't start from a square. Any rectangle of paper will do, so a sheet of printer paper is perfect. In about nine quick steps you'll have a little canoe with a proper hull, ready for the next rain puddle or kitchen-table regatta. Let's fold one.
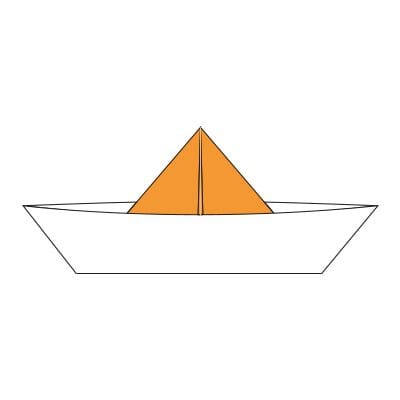
These instructions will show you how to fold an easy traditional origami boat. Most models begin with a square sheet of paper, but this one uses a rectangle. A sheet of regular printer paper works fine, and you don’t need to worry too much about the exact shape of the rectangle you use.
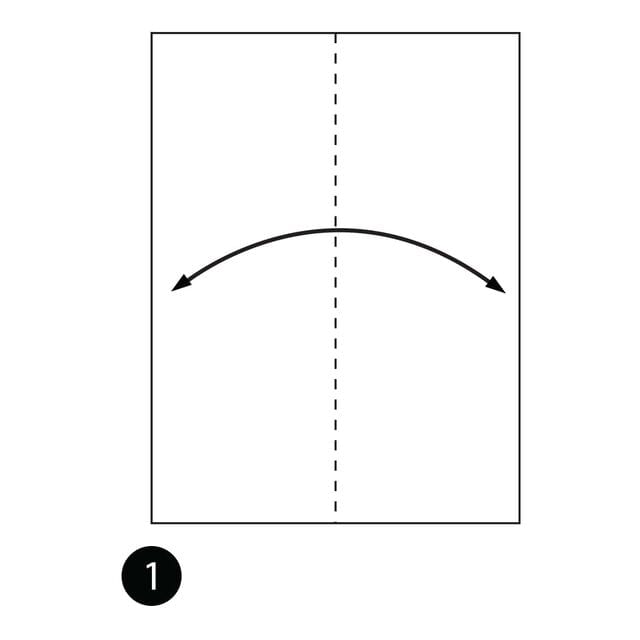
STEP 1. Fold the paper in half and then unfold it.
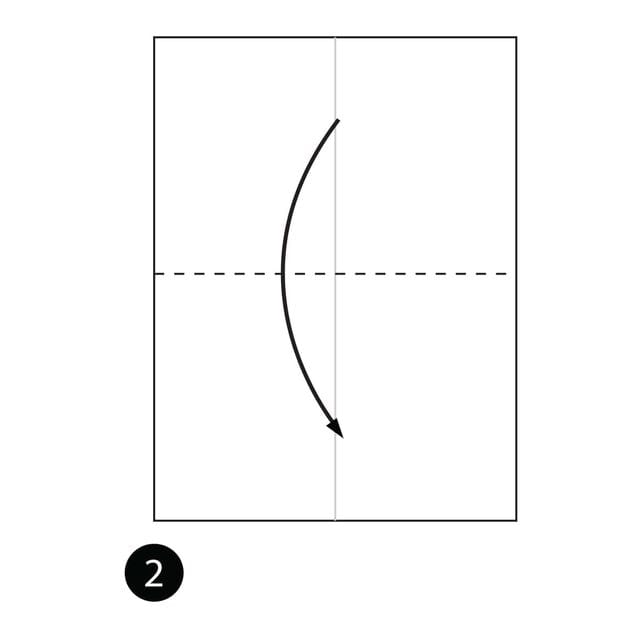
STEP 2. Fold the paper in half the other way.
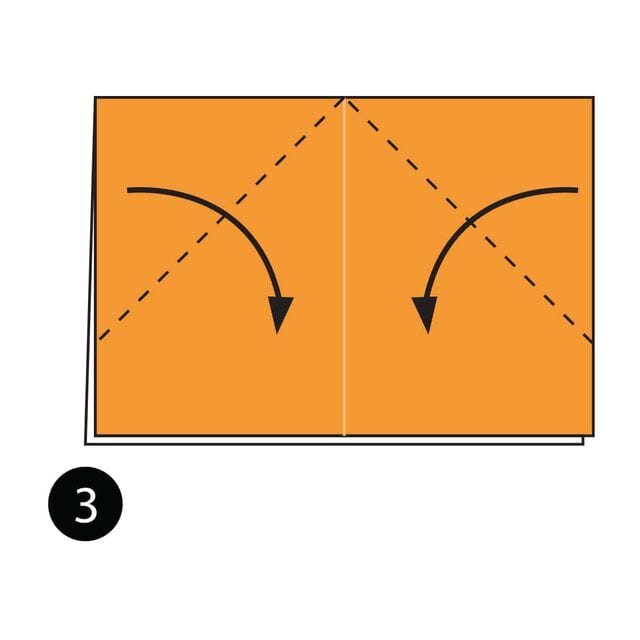
STEP 3. Fold the top corners down and to the centre.
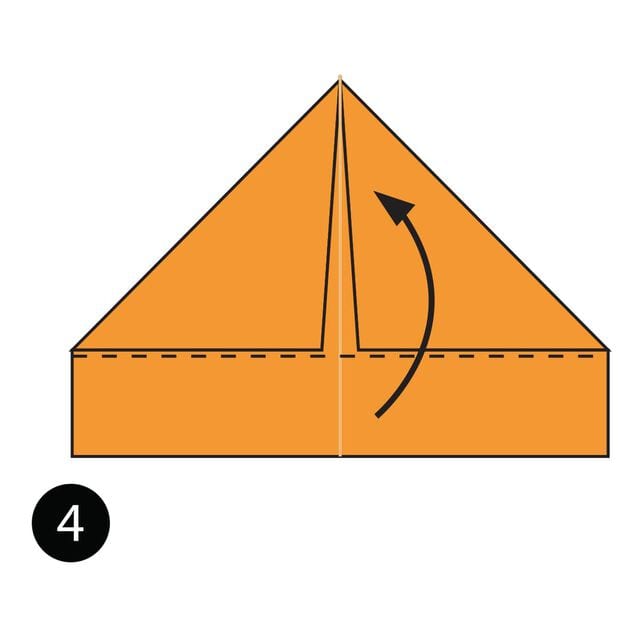
STEP 4. Fold the top layer of paper up along the dotted line.
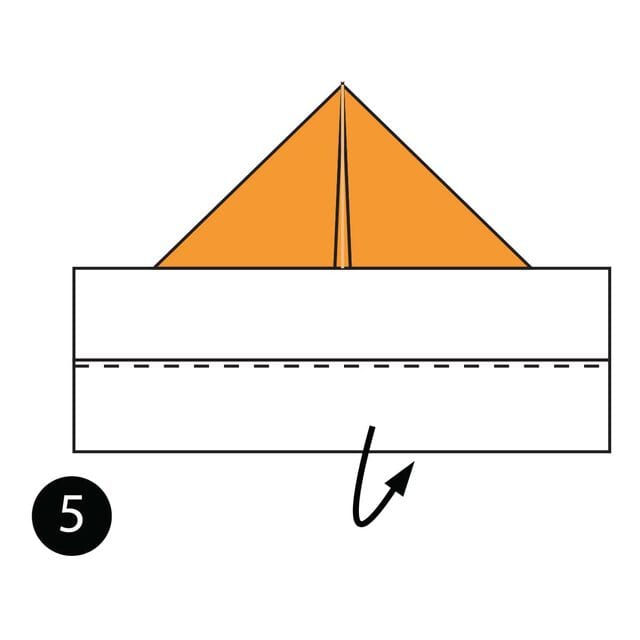
STEP 5. Fold the bottom layer of paper up and behind the model.
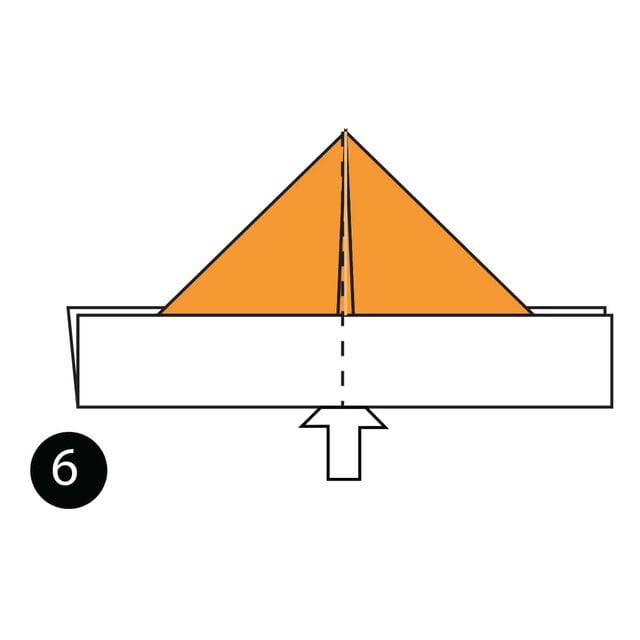
STEP 6. Open up the paper in the middle. Push in the sides while pulling the middle forward and back. Flatten everything.
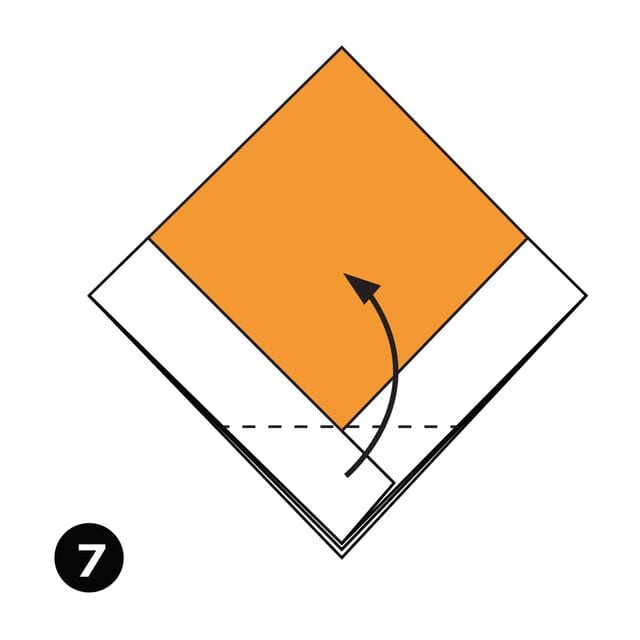
STEP 7. Fold the top flap of paper up along the dotted line, then repeat behind.
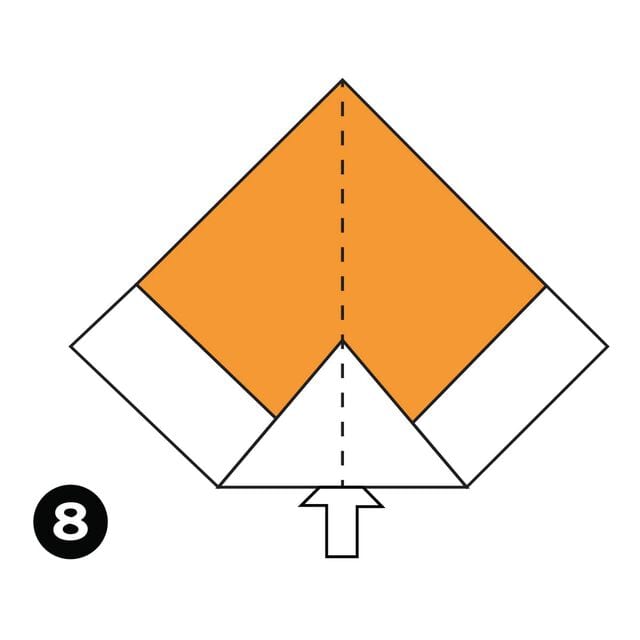
STEP 8. Pull the paper back out like you did in Step 6.
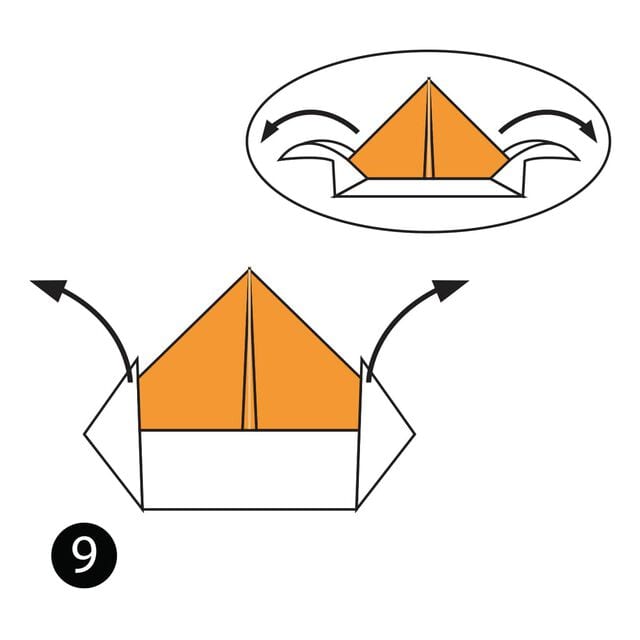
STEP 9. Pull both ends out.
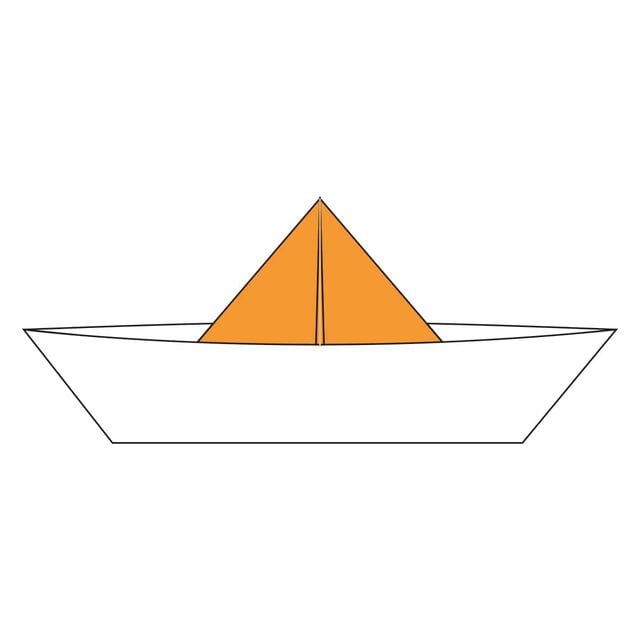
The completed traditional origami boat




