
Traditional Easy Origami Shirt
The origami shirt is one of those old models that nearly everyone folds at some point, and it is much closer to the traditional origami chair than you might expect. Both are built around the same move, the cushion fold, which is worth learning once because it turns up in dozens of classic designs.
Here that cushion fold happens three times, with the paper turned over in between, and by the end you have four little pockets waiting to be opened. Those pockets are the fun part: the bottom one becomes the collar, and the two side ones unfold into sleeves. Fold it from paper with a different color on each side and the collar and cuffs stand out nicely. Slip the finished shirt onto a folded card and it makes a surprisingly thoughtful Father's Day or thank-you gesture.
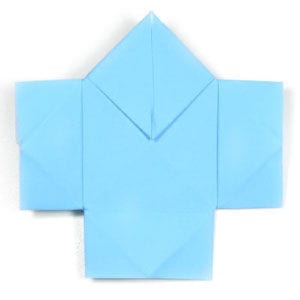
This page is for anyone who wants the instructions to fold a traditional easy origami shirt.
This model is very similar to the traditional origami chair. You will need to apply a cushion fold three times, turning the paper over before each one.
Before you start, make sure you know what a valley fold and a mountain fold are. Once you are comfortable with those two techniques, you will have no trouble with this shirt.
If you are ready, then let us get started.
You can use almost any kind of paper for this shirt, although it is a little easier if the front and back sides differ slightly, whether in texture or in color.
Make sure the paper you start from is square, with four equal sides and four right angles. The paper used here is a standard 15 cm x 15 cm sheet of origami paper.
This is the front side of the paper.

This is the back side of the paper.

STEP 1.
Start with the back side of the paper facing up. Prepare to rotate the paper by 45 degrees.
STEP 2.
Rotate the paper by 45 degrees. Prepare to valley fold it in half horizontally and then unfold.
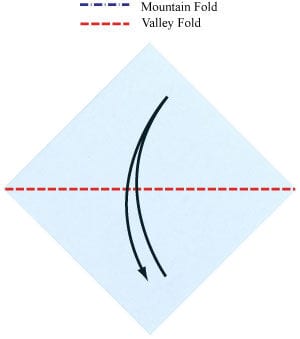
STEP 3.
Valley fold the paper in half horizontally and then unfold. Prepare to valley fold it in half vertically and then unfold.
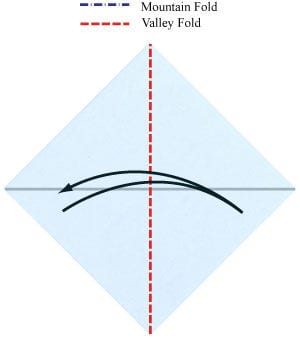
STEP 4.
Valley fold the paper in half vertically and then unfold. Prepare to apply a cushion fold, the same move that turns a square into a plump cushion shape.
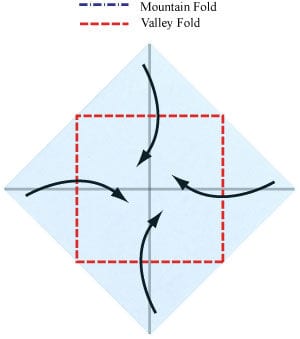
STEP 5.
Apply the first cushion fold prepared in step 4. Prepare to turn the model over.
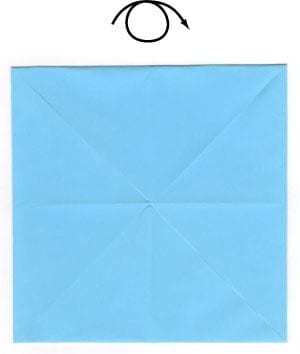
STEP 6.
Turn the model over. Prepare to rotate it by 45 degrees.
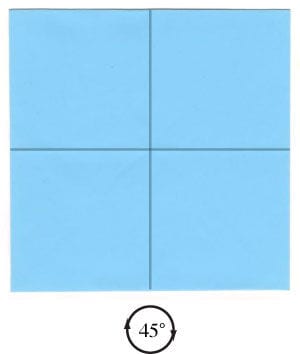
STEP 7.
Rotate the model by 45 degrees. Prepare to apply another cushion fold.
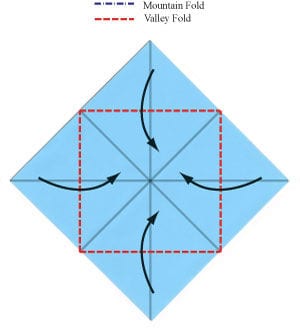
STEP 8.
Apply the second cushion fold prepared in step 7. Prepare to turn the model over.
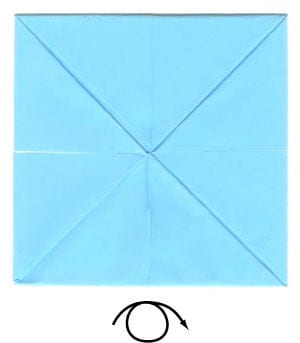
STEP 9.
Turn the model over. Prepare to rotate it by 45 degrees.
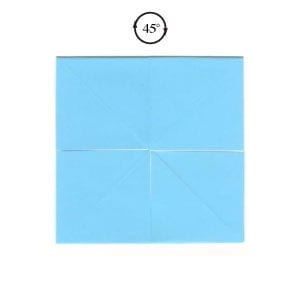
STEP 10.
Rotate the model by 45 degrees. Prepare to apply another cushion fold.
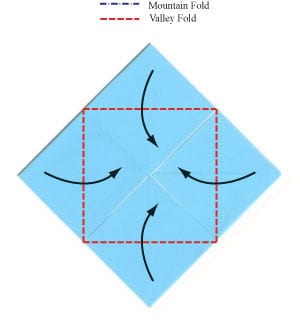
STEP 11.
Apply the third cushion fold prepared in step 10. Prepare to turn the model over.
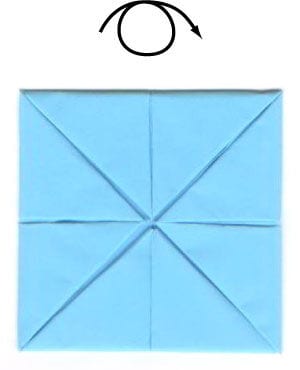
STEP 12.
Turn the model over. Prepare to rotate it by 45 degrees.
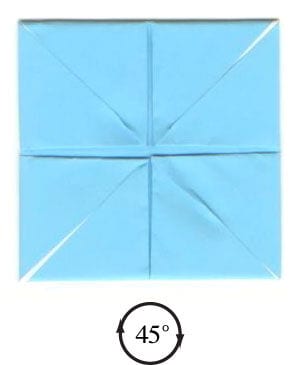
STEP 13.
Rotate the model by 45 degrees. There are four pockets: top, left, right and bottom. Prepare to open the bottom pocket using two mountain folds and four flat folds.
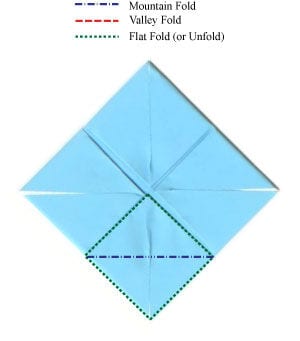
STEP 14.
Start opening the bottom pocket.
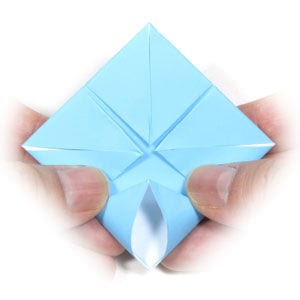
STEP 15.
Continue opening the bottom pocket.
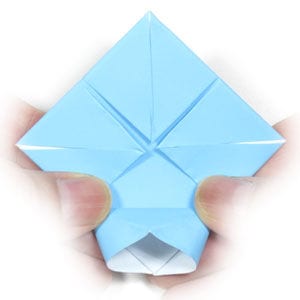
STEP 16.
Finish opening the bottom pocket with the two mountain folds and four flat folds from step 13. This is the collar of the shirt.

STEP 17.
Prepare to open the left and right pockets.
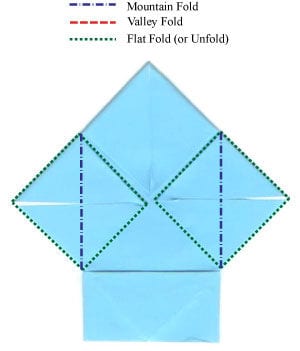
STEP 18.
Open the left and right pockets. These become the two sleeves.
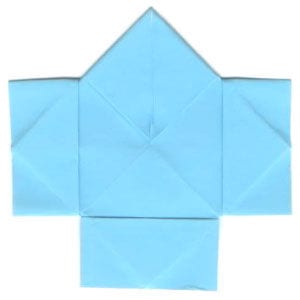
STEP 19.
Congratulations! You have completed the traditional easy origami shirt.




