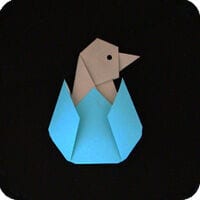
Origami Chick N Egg
There’s something irresistibly cheerful about a chick hatching from its egg, and this clever one-sheet fold captures that moment perfectly. It’s a quick, satisfying make that’s great for spring, Easter, or brightening a rainy afternoon.
All you need is a single square of paper and a few minutes. Follow the nine photo steps below — and if you’d like, add tiny dot eyes at the end to give your chick some character.
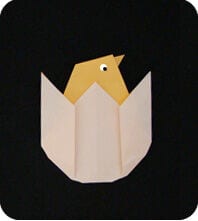 by Sarah Wooden
This Chick N Egg origami model is fabulous! It was created by Sarah Wooden, whose website “Sarah’s Origami” is no longer online. Unfortunately, I have been unable to contact her, but I hope she permits me to show her model in the photos below. Send your good wishes and thanks to Sarah.
Origami Chick N Egg Instructions
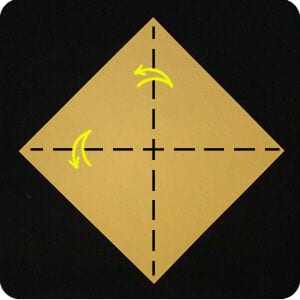 STEP 1.
Start with a square sheet of paper with the colored side facing up. Position it in “diamond” position (balanced on one of its corners).
Fold and unfold the paper in half both directions (top to bottom; then left to right).
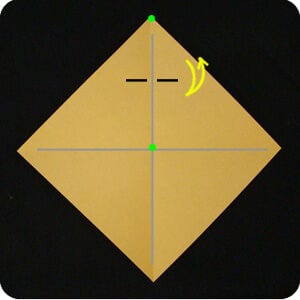 STEP 2.
Make a pinch fold at the 1/4 mark. To do this, bring the top corner to the middle of the paper, press down but don’t crease across the width of the paper. Unfold.
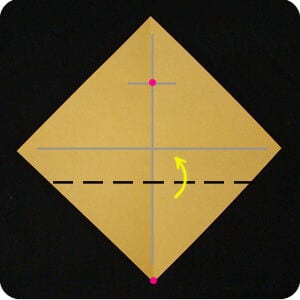 STEP 3.
Fold up the bottom corner of the paper so it meets the pinch crease made in step 2.
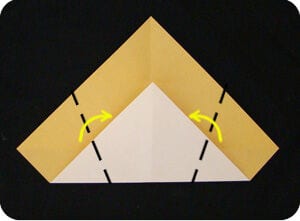 STEP 4.
Fold in the left and right corners of the paper so the shape is like a pentagon.
Turn the paper over.
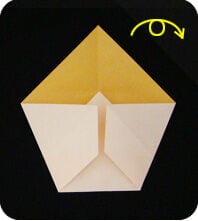
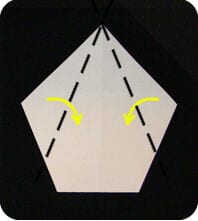 STEP 5.
Fold in the top-left edge and the top-right edge of the paper so they meet in the middle.
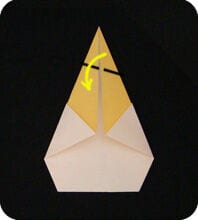 STEP 6.
Fold down the top corner at an angle. This will be the chick’s head.
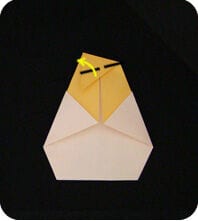 STEP 7.
Fold a small segment of this corner toward the side and a little pointing upward. This will be the chick’s beak.
Turn the paper over.
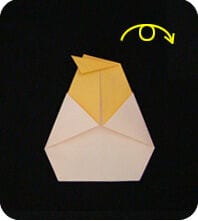
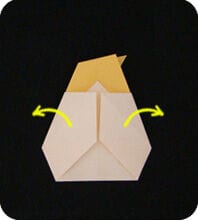 STEP 8.
Gently ease open the sides of the egg so it looks as if the egg has been cracked and the chick is emerging.
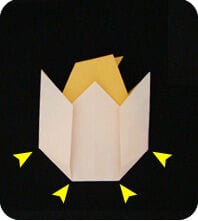 STEP 9.
Round the corners and the Chick N Egg is done.
Optional: decorate with eyes.
You can also make this model using two sheets of paper. In this case, it is called Chicken and Egg.