
Origami Birthday Cake
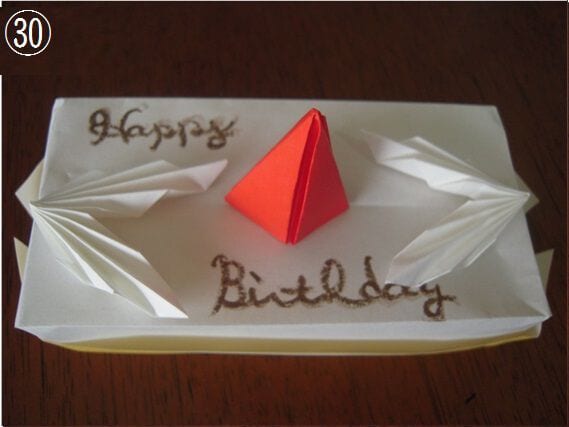
A birthday cake is really three small projects sharing one plate. Fold a yellow sponge box, pleat a couple of white cream swirls, squash a few red strawberries, and then stack them all together until it looks like something you would find at a party in miniature. None of the parts are difficult, which makes this a good long-fold for an afternoon when you want a finished model that feels like more than the sum of its folds.
The sponge is the workhorse: a square that becomes an open box in nine steps. The cream and strawberries are each tiny, and that smallness is where the charm comes from, because the whole cake ends up the size of a palm. If you write a message on the sponge paper before you begin, the letters stay on the outside of the box - the closest thing origami has to a chocolate pen.
How to Fold
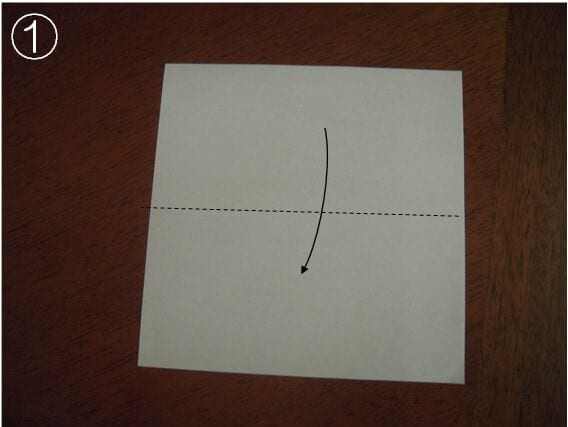
STEP 1. First, make the sponge with yellow origami paper. Fold it in half.
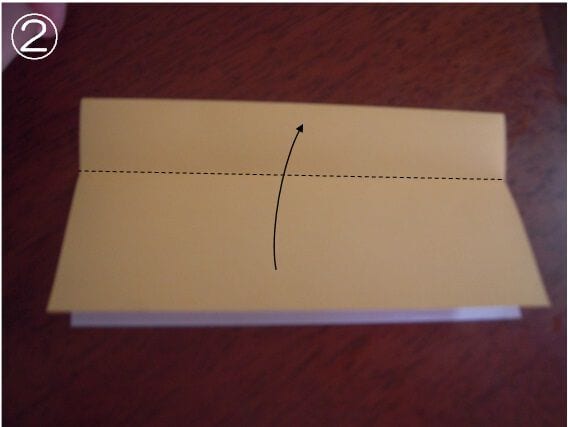
STEP 2. Fold up to a point about one third from the top.
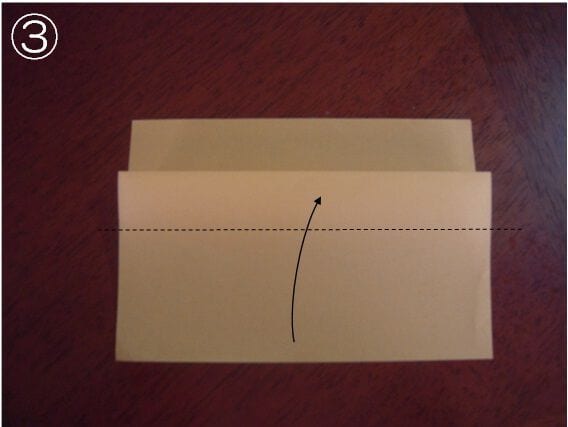
STEP 3. Fold the other side up in the same way.
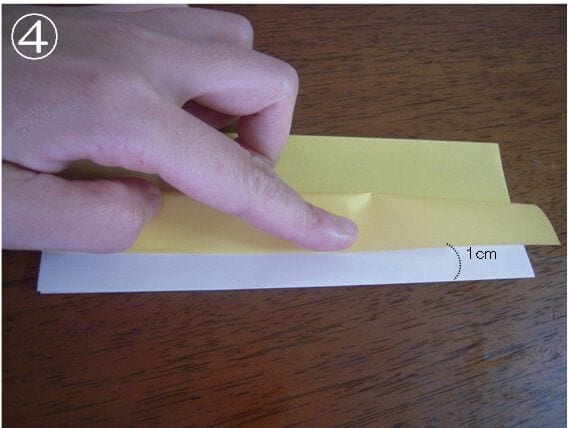
STEP 4. Now fold down until about 1 cm of white shows, make a crease, and return it. Do the same on the other side.
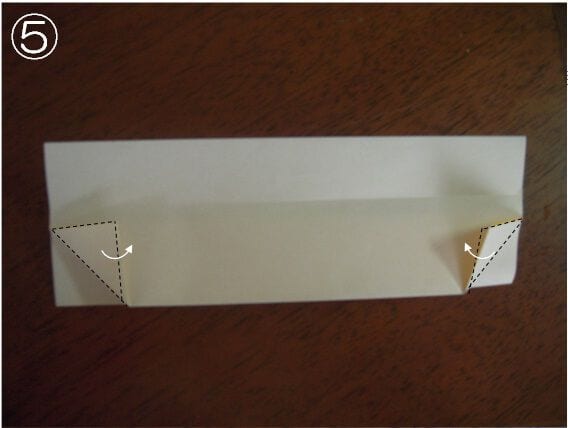
STEP 5. Fold the corners.
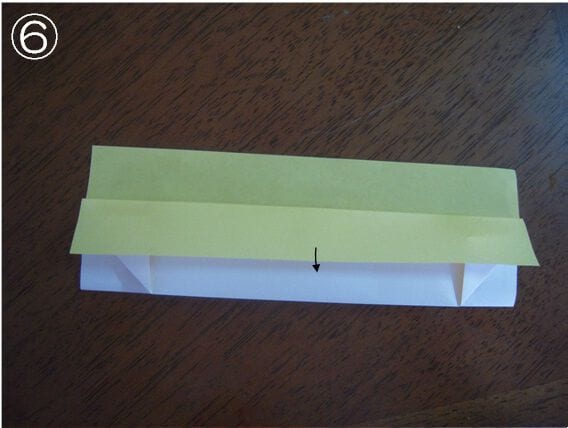
STEP 6. Fold down along the crease you made earlier. Do the same for the back.
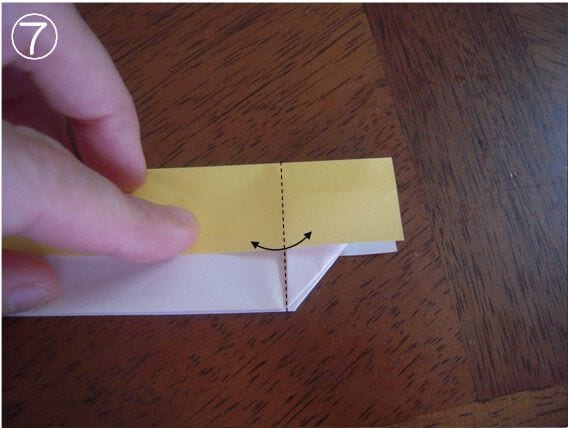
STEP 7. Make a crease on the dotted line.
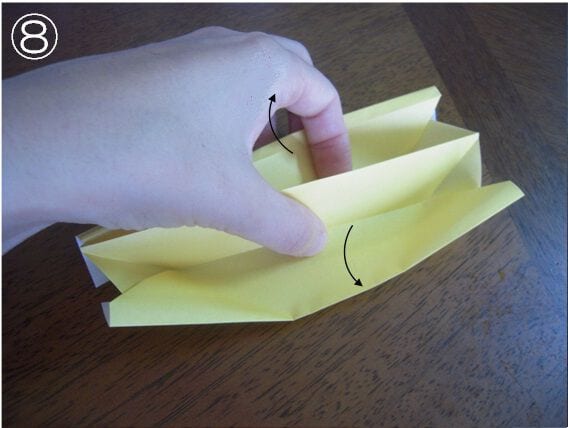
STEP 8. Spread the coloured surface so it looks like a box.
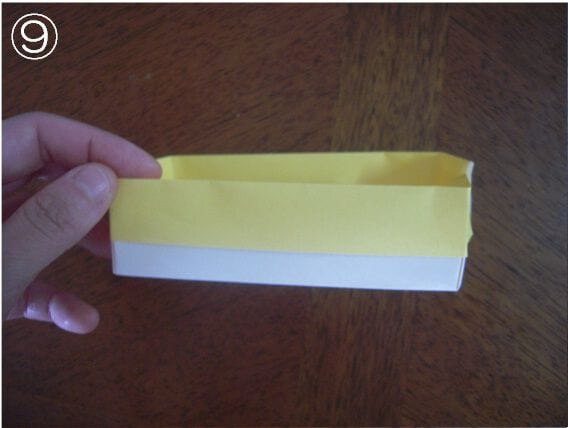
STEP 9. When you have a box like this, the sponge is ready.
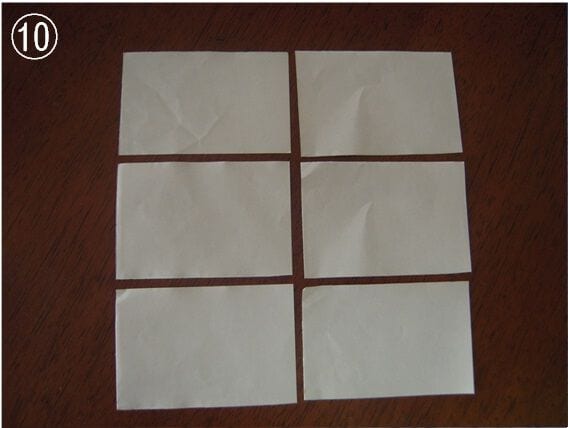
STEP 10. Next, make the cream with white paper cut to one sixth of its size.
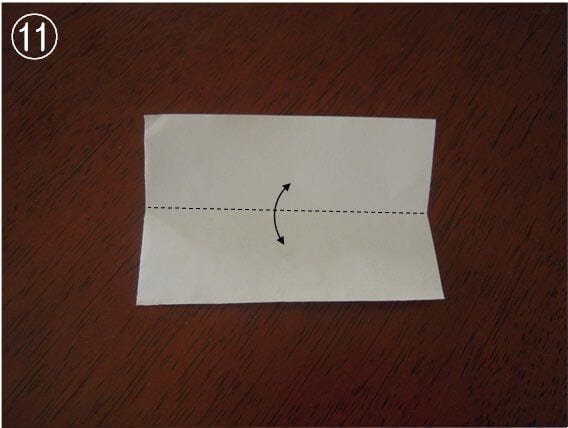
STEP 11. Fold it in half and make a crease, then open it back to its original shape.
STEP 12. Fold along the yellow line so the four corners align.
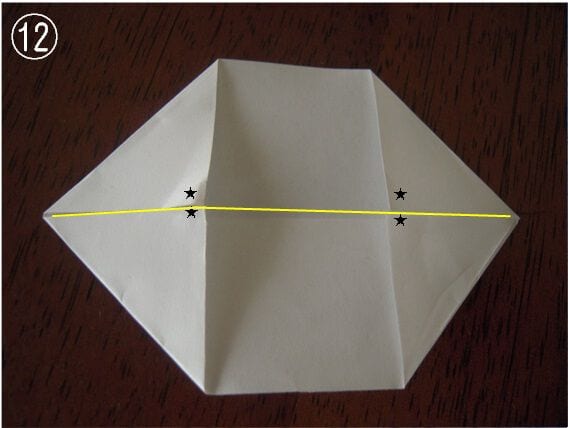
STEP 13. Turn it over, align the green line with the yellow line, make a crease, then open and return it.
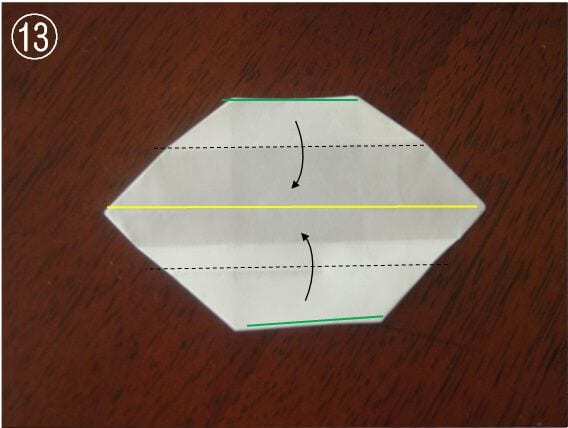
STEP 14. Now make a crease so the green line matches the red line, then return it.
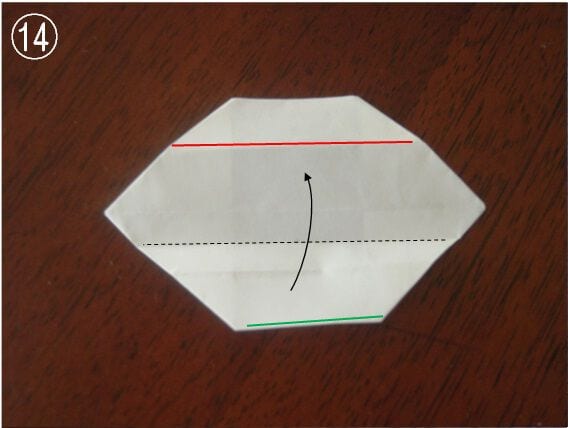
STEP 15. Align the red and green lines, make a crease, and open it back.
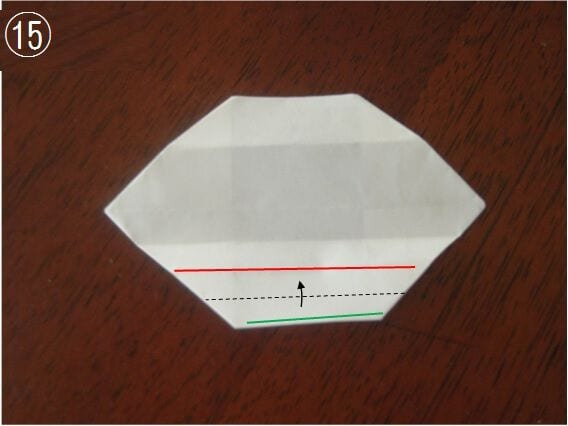
STEP 16. Make more creases in the same way, aligning the green line with the red line.
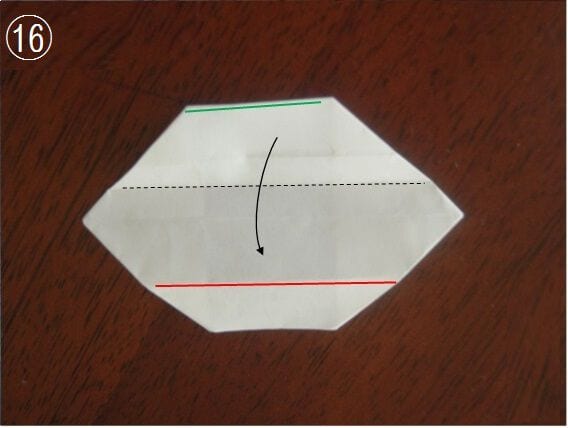
STEP 17. Make a crease so the green and red lines align.
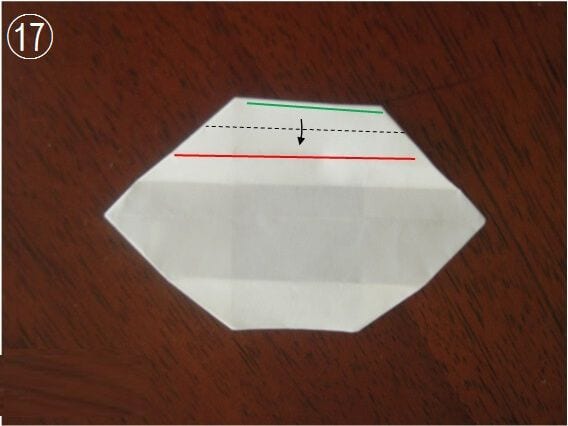
STEP 18. Seven main lines are now complete.
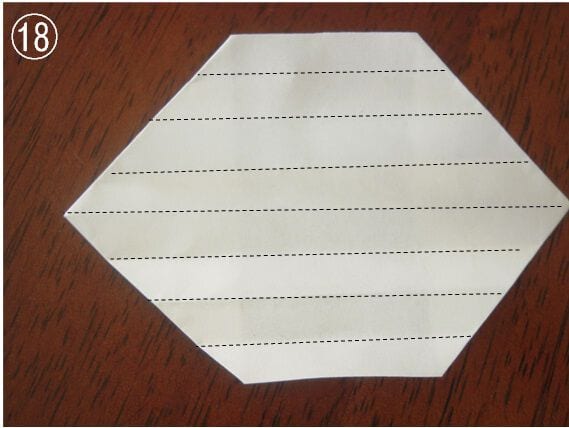
STEP 19. Fold it into a bellows (accordion) along these lines.
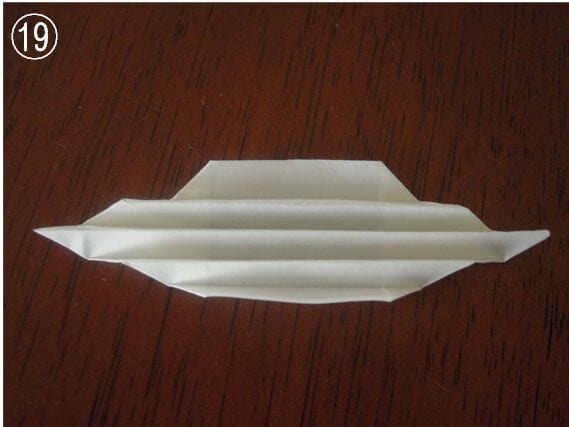
STEP 20. Fold it in half and you have whipped cream. Make another one just the same.
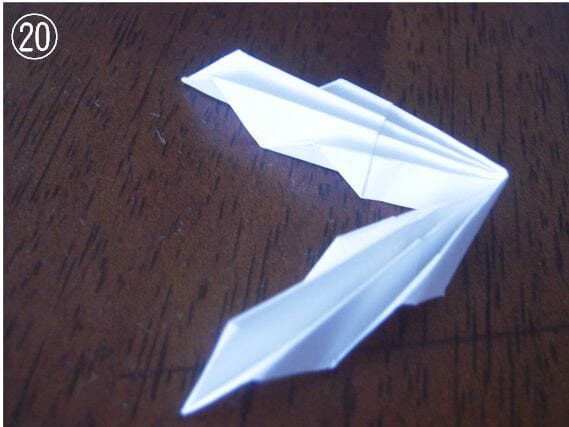
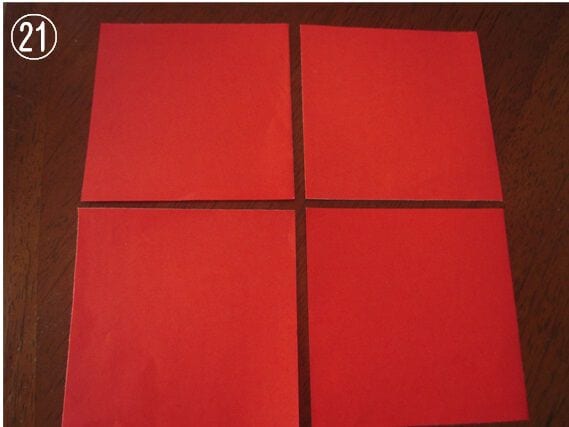
STEP 21. Last, the strawberries. Prepare origami paper cut to a quarter of its size.
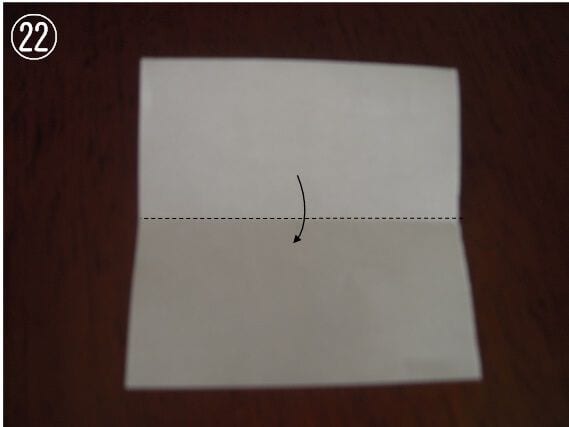
STEP 22. Fold it in half.
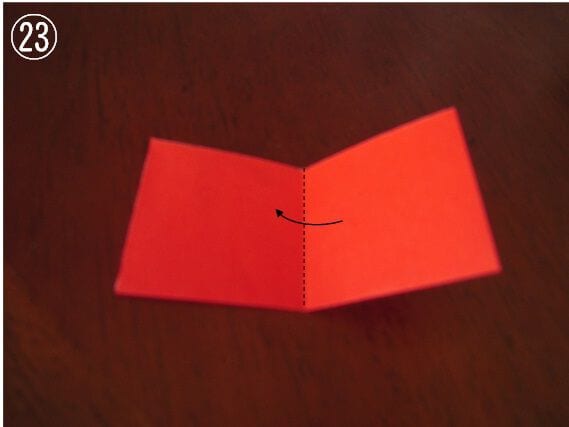
STEP 23. Fold it in half again.
STEP 24. Open the pocket and squash it into a triangle. Do the same on the back.
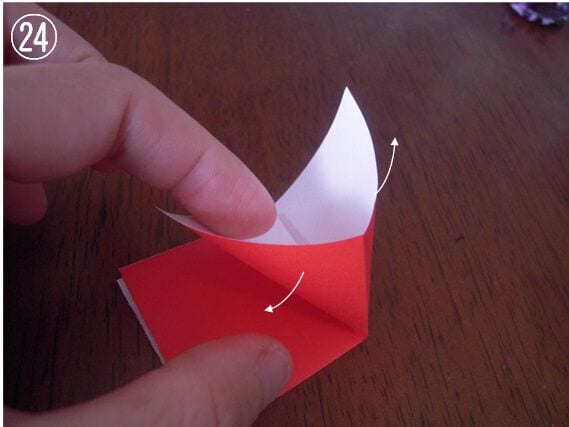
STEP 25. Fold so the yellow line meets the green line, and fold the back in the same way.
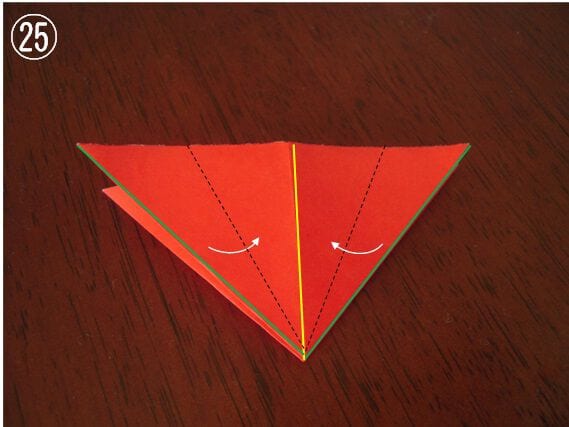
STEP 26. Fold it inward along the dotted line.
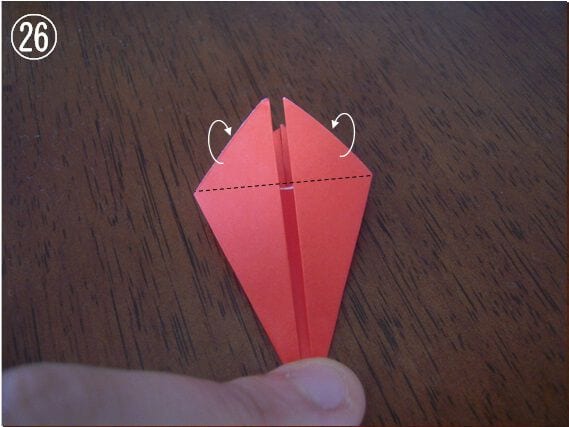
STEP 27. It tucks in like this. Do the same on the back.
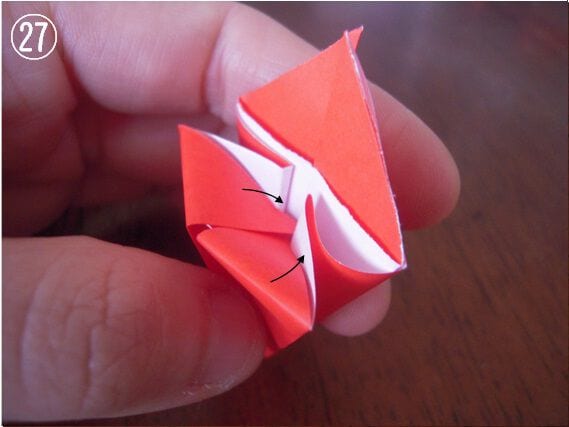
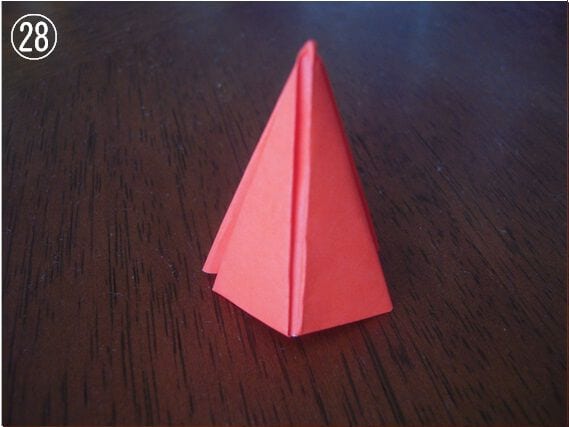
STEP 28. Spread it open a little and the strawberry is ready!
STEP 29. Put the whipped cream and strawberries on the sponge. The cake is complete!
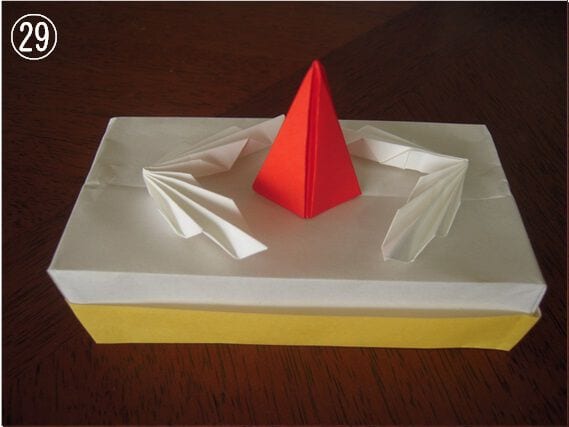
You made a cute cake. If you draw letters before folding the sponge, it will look like a message written with a chocolate pen.
Tips When Folding
You can make the cream and strawberries smaller and increase their number.




