
Money Box with Handle
There is a long tradition of folding a dollar bill into something more than money, and the money box with a handle is one of the best-loved of these tricks. Out of a single crisp note you get a tiny box — complete with a handle on top — that actually stays shut by itself. The clever part is how a few intersecting creases let the bill collapse into walls, leaving just enough paper to form the handle. You can make the handle big, small, triangular, or tuck it away entirely, which means no two boxes have to look the same. It is a wonderful little project to slip a gift card or a few coins into, or simply to impress a friend with a bill that becomes its own container. Grab a crisp dollar (or any rectangular paper) and let's build one.
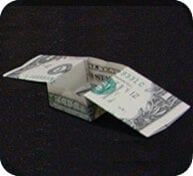
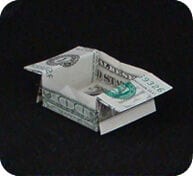
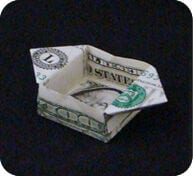
This Money Box with Handle is a classic design. It can be made from a rectangle of different dimensions to give a handle of different sizes. With a dollar bill, the handle can be large (left), folded in half for a medium-sized handle (middle), made into a triangle (right), rolled into a scroll, pleated, or folded down completely so there is no handle at all.
Instructions for the Money Box with Handle

STEP 1. Start with a crisp dollar bill with the black side facing up.
Fold it in half lengthwise and crosswise, then unfold.

STEP 2. Fold the top and bottom edges of the bill toward the center crease.

STEP 3. Fold up the right side of the bill so the bottom edge lines up with the vertical crease (it looks like a backwards "L").

Unfold.

STEP 4. Repeat on the left side of the bill, folding up like a letter "L".

Unfold.

STEP 5. In the center you will see creases that look like the letter "X".
Fold the right side of the bill toward the left so the new crease lands at the right corners of the "X".

Unfold.

STEP 6. Repeat on the left side of the bill, folding it across using the left corners of the "X" as a guide.

Unfold.

STEP 7. On the right side of the model, peel the two layers of paper open and fold along the creases made in Steps 3 & 4.

Let the right side of the model swing to the left.

Keep going.

Flatten it down evenly.

STEP 8. Valley-fold (fold forward) the top and bottom parts of the model so they do not extend beyond the central portion.

STEP 9. Fold the top flap of the model back toward the right side.

STEP 10. Repeat Step 7 on the left side of the model: peel the layers open.

Fold the left side toward the right.


STEP 11. Repeat Step 8: fold the top and bottom parts of the model toward the center.

STEP 12. Repeat Step 9: fold the top layer back toward the left.

STEP 13. Almost done: pull the left and right edges apart from one another.


Shorten the handle by folding the large flap in half.


The trick to hiding the handle is rather cute: fold the flaps back toward the bottom of the box, then insert one end into the other. This locks the paper in place so it will not unravel.






