
Three-Dimensional Origami Cat
Ready to level up from a flat paper cat to one that actually sits up? This three-dimensional origami cat is the charming, slightly more advanced cousin of the simple version — and the payoff is a little cat that stands on its own.
It takes twenty-five photo steps and a bit of patience, but every fold is shown clearly, so don't be intimidated. Brew a cup of tea, clear some table space, and let's bring this little guy to life.
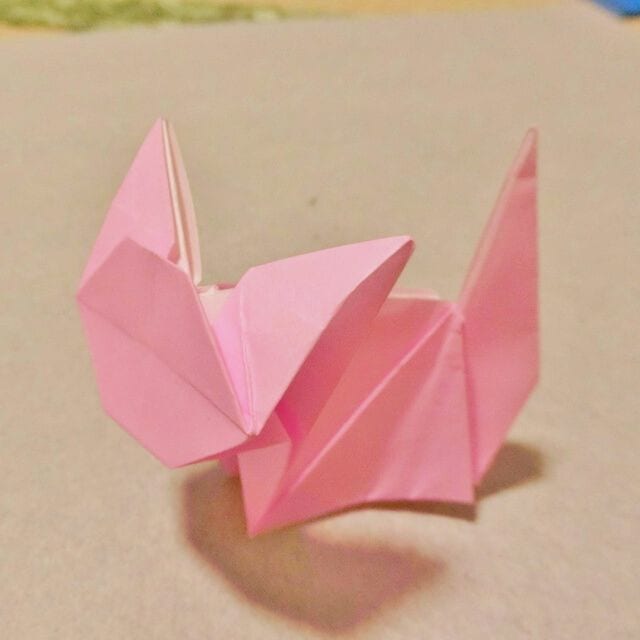
Hello! Earlier I showed you how to fold “Gigi” and the “simple flat cat” from Kiki’s Delivery Service. This time, let me show you how to fold a three-dimensional (standing) origami cat.
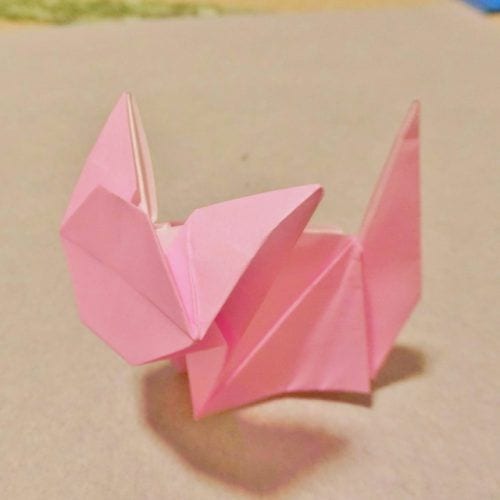
To make it easy to follow, I will explain with both a video and photos of the actual folding.
The finished cat looks really cute, so don’t get discouraged — give it a try!
How to Fold a Three-Dimensional Origami Cat
As before, we will use a single sheet of origami paper.
Let’s start folding!
Step 1: Prepare one sheet of origami paper.
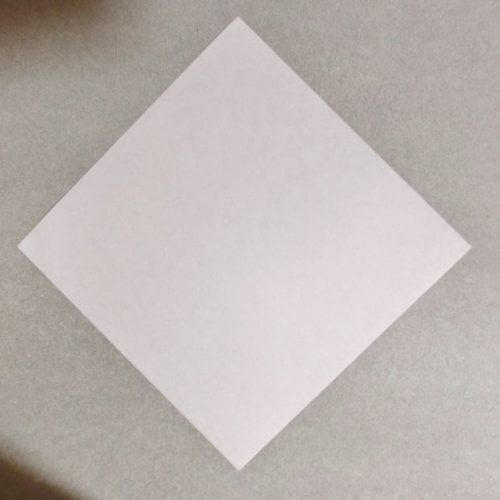
Step 2: Make a crease along the diagonal.
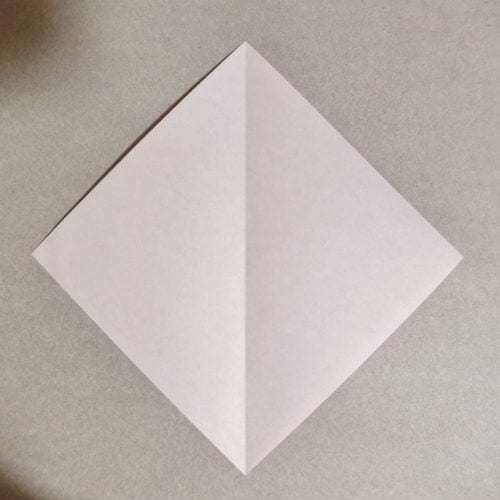
Step 3: Fold the left and right edges of the bottom side in along the crease line.
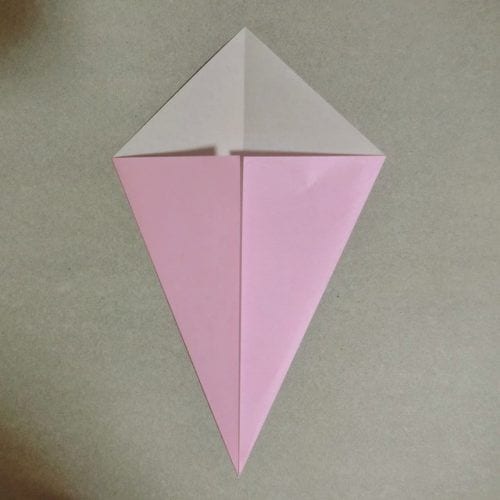
Step 4: Fold the bottom corner up to meet the top.
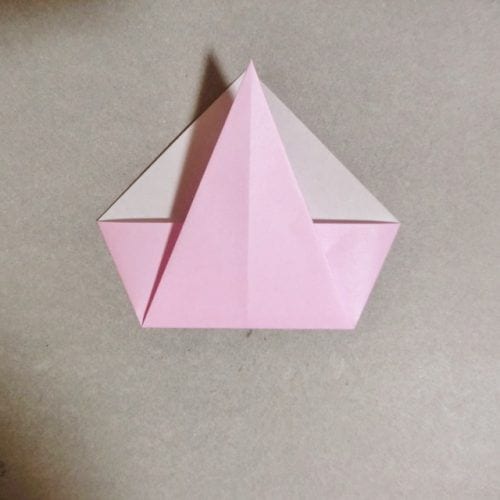
Step 5: Fold the left and right corners toward you.
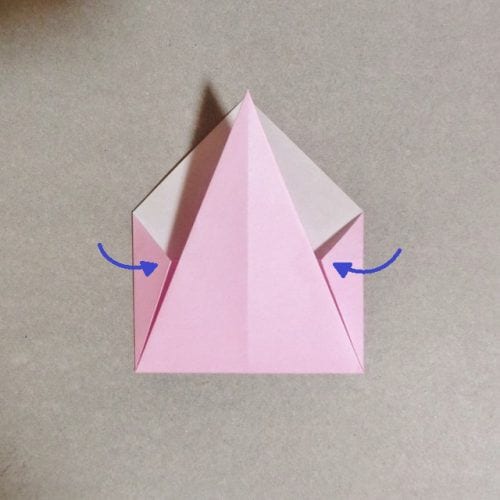
Step 6: Unfold the corner you folded up, then fold the top corner back down.
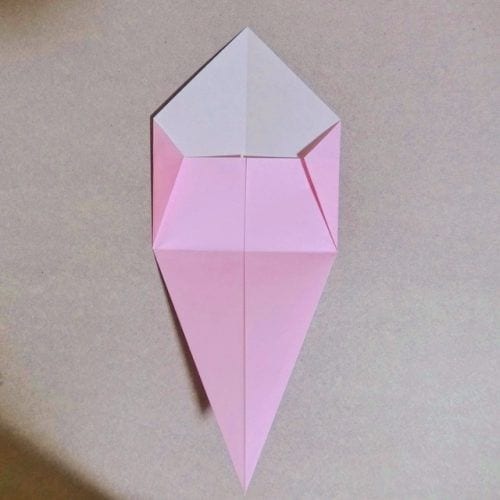
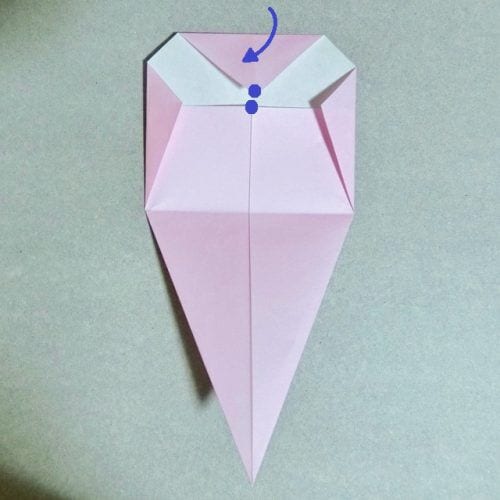
Step 7: Fold the left side in along the crease line and flatten it. Do the same on the right side.
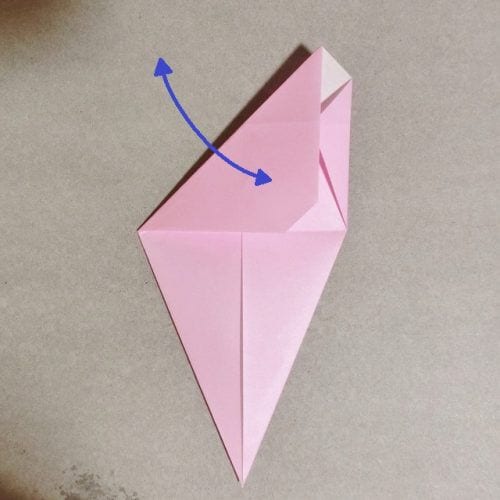
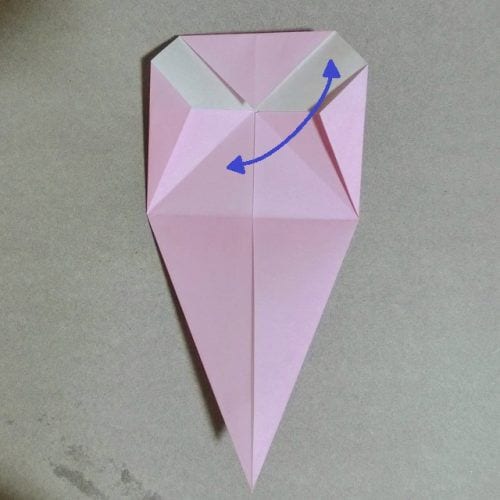
Step 8: Turn the model over and fold it down along the line shown in the photo.
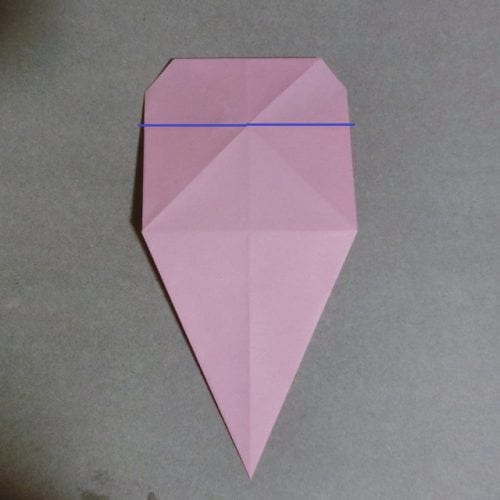
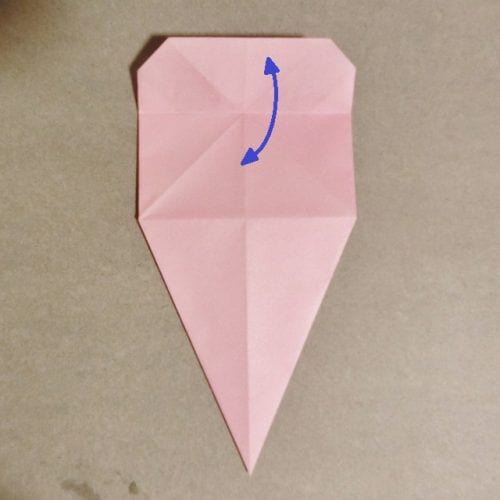
Step 9: Return to the front and fold along the crease as shown in the photo.
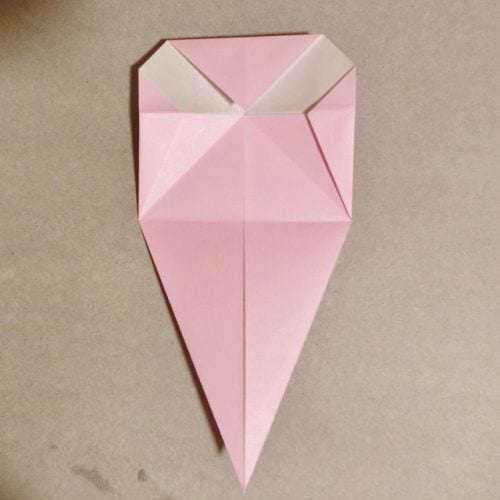
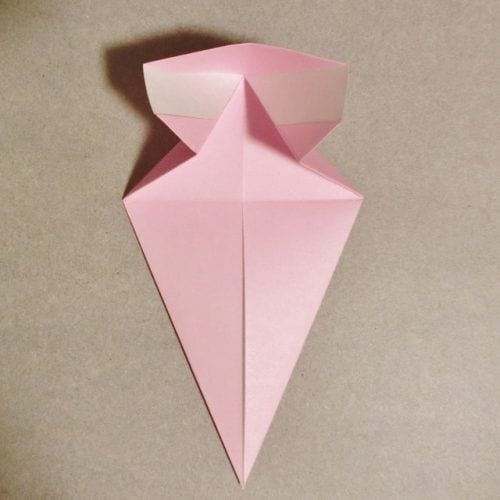
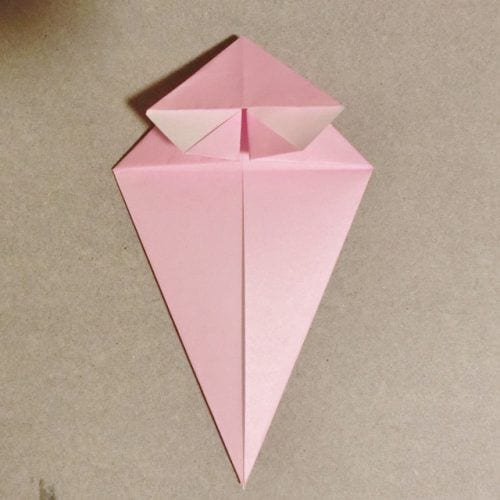
Step 10: Fold the left and right corners of the photo back toward the center.
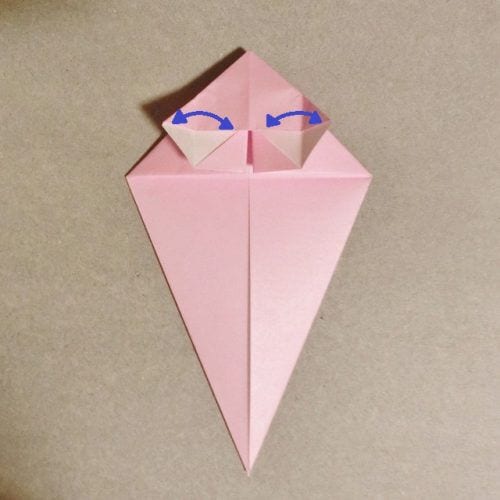
Step 11: Using the crease, fold the piece up as shown in the photo.
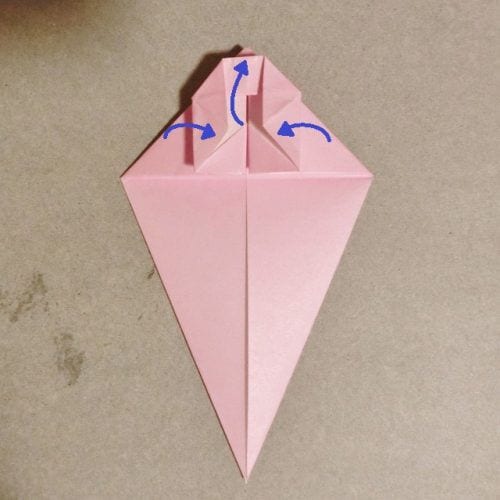
Step 12: Turn to the left and make a crease by aligning the part shown in the photo with the upper right.
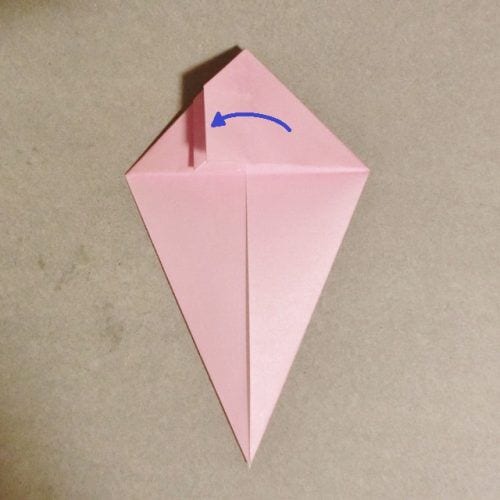
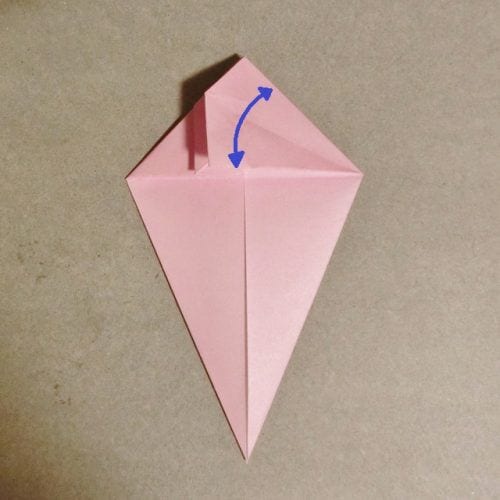
Step 13: Turn to the right and fold it back the same way.
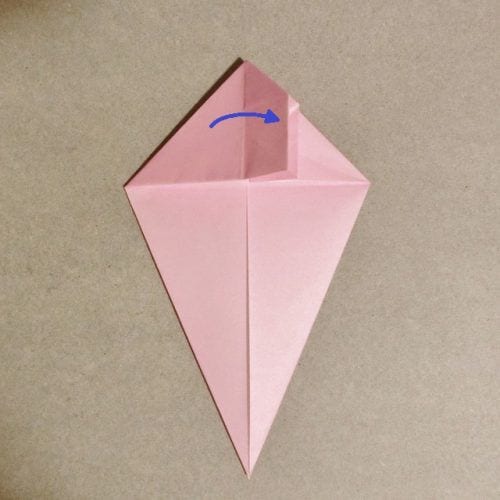
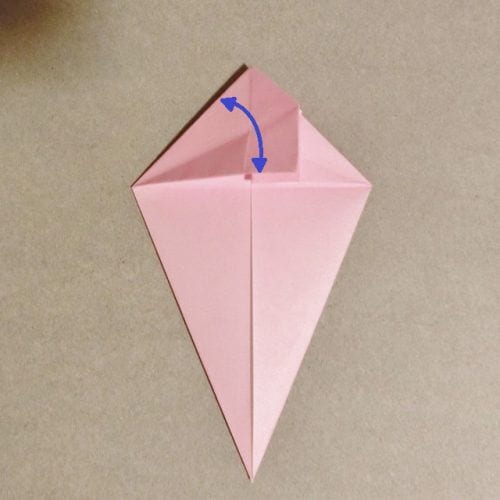
Step 14: Bring the model back to the original front face. Fold the area shown in the photo downward.
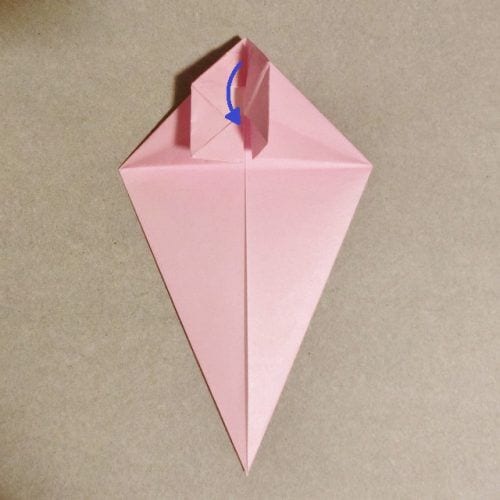
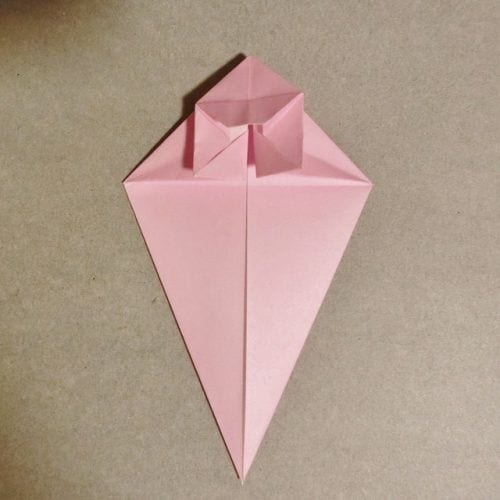
Step 15: Using the crease, fold the area shown in the photo upward. Do the same on the other side.
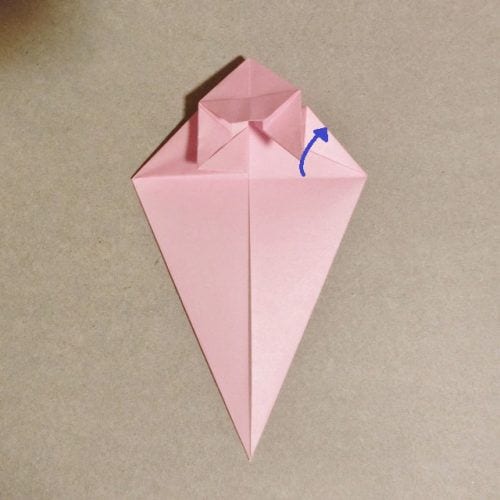
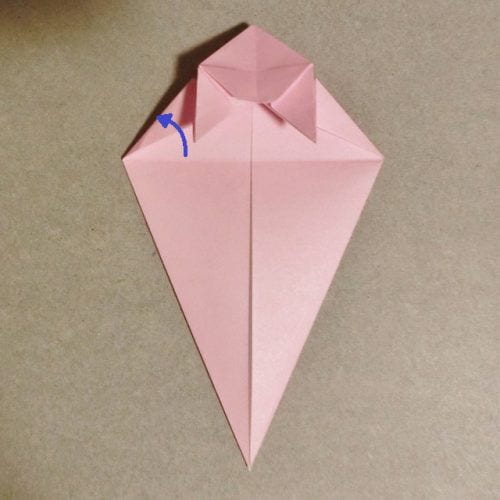
Step 16: Leave the top part as it is and open the right side out once. Fold the upper-right corner along the center line.
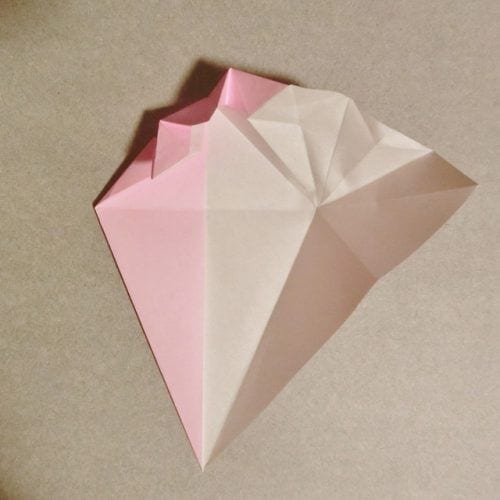
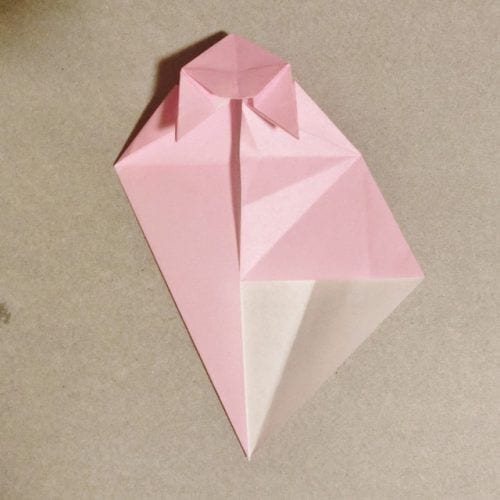
Step 17: Fold the left side the same way.
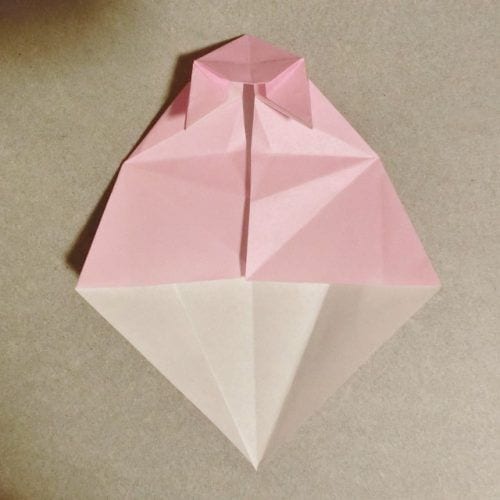
Step 18: Fold the lower-right and lower-left corners along the center line.
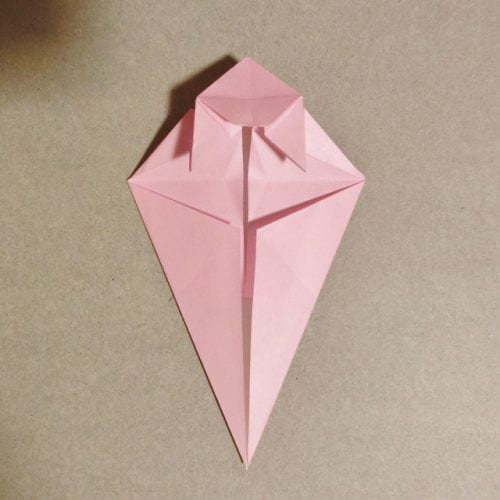
Step 19: Fold the model in half along the center line.
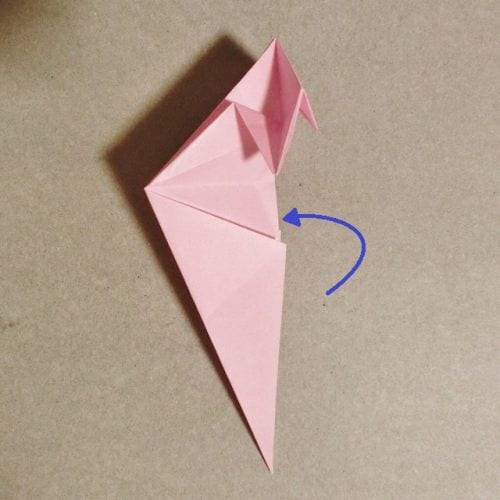
Step 20: Fold the bottom part toward you along the crease, then fold it in half using the creases.
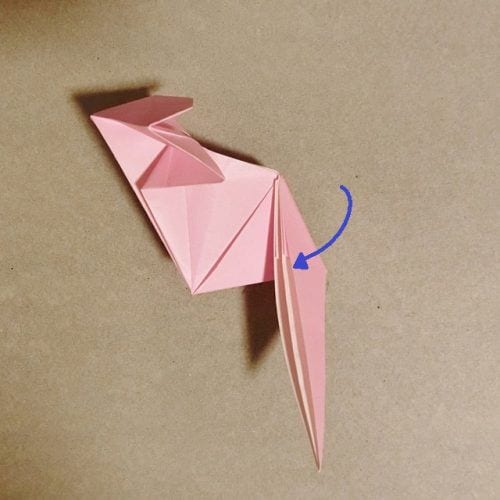
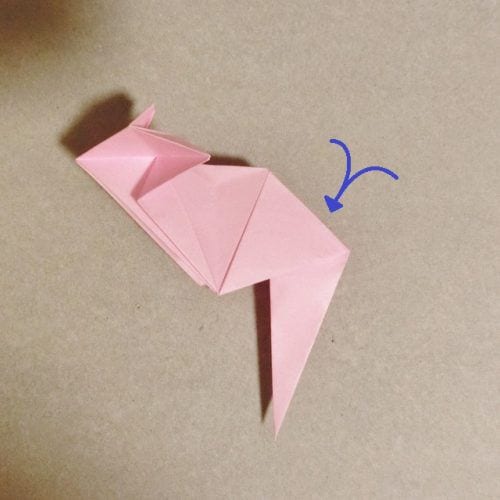
Step 21: Align the upper-right side with the line in the photo and fold it inside. Do the same on the other side.
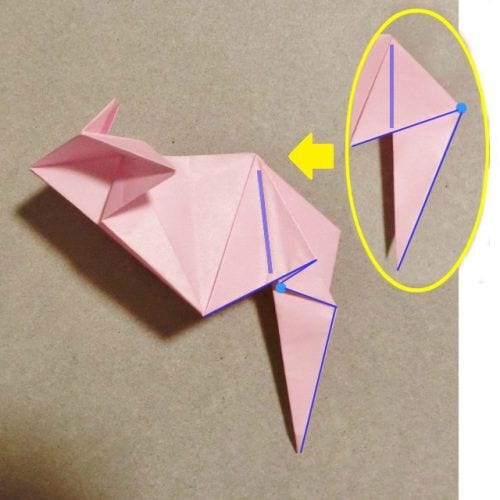
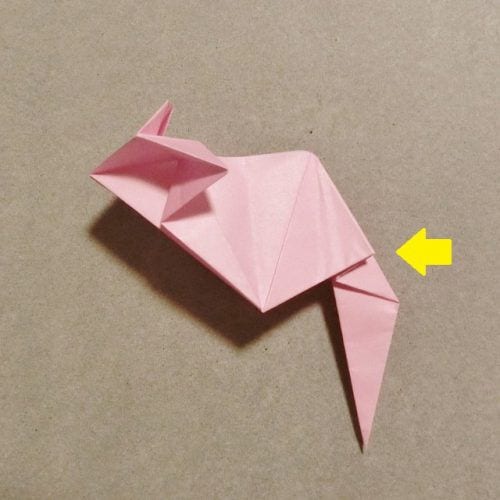
Step 22: This is the view from the right side. Fold the bottom corner upward along the line shown in the photo.
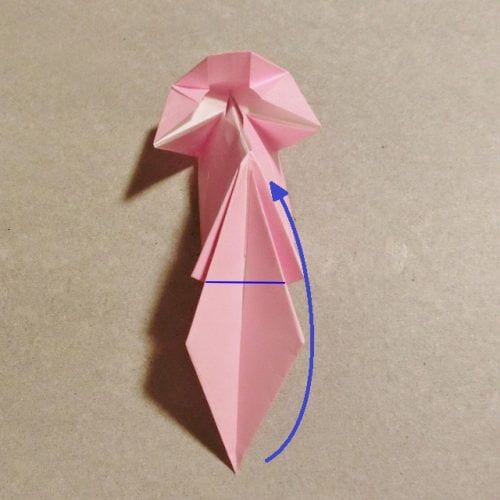
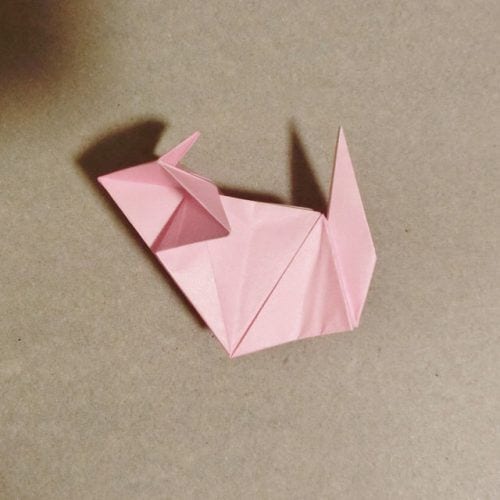
Step 23: Open the area on the left shown in the photo and lower the upper face down.
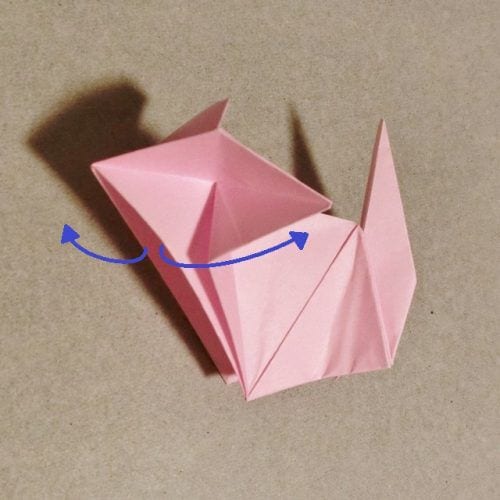
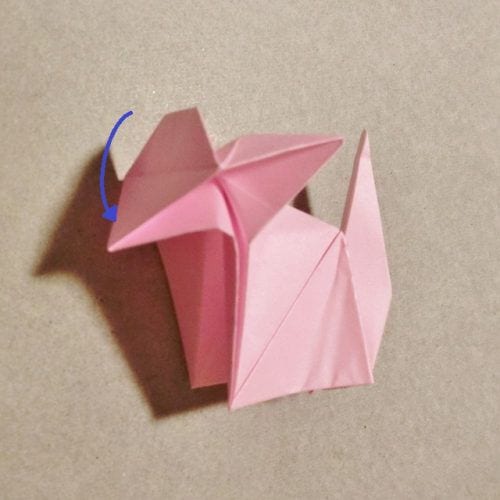
Step 24: Fold the bottom corner of the face.
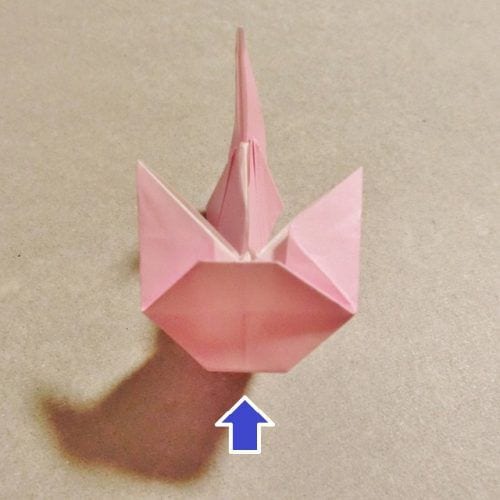
Step 25: Once you shape and adjust it, your three-dimensional origami cat is complete!
Thank you for your hard work. How did it turn out? It looks like many people haven’t seen this one before…

It was really popular back when I was in elementary school… a memory that only those of the same generation will get.




