
Origami Talking Fox
Some origami models are meant to sit still on a shelf, and some are meant to talk. This little fox belongs firmly to the second group: fold it, draw a face on it, then hold it from behind and squeeze, and the snout opens and closes like it is chatting away.
It is a great one to make with children, partly because it only takes a few minutes, and partly because the last step is drawing the eyes, nose and tongue yourself, which is where each fox gets its own personality. Use orange paper if you have it, but any color works, and a slightly larger sheet makes the puppet easier for small hands to hold. Once you have made one, it is very hard to stop at one, so keep a few sheets ready.

The origami talking fox is really easy to make, and kids love it. You will need a marker to draw on the eyes, nose and tongue. Have fun!
This origami talking fox takes about 3 minutes with this tutorial. It is quick to fold and very versatile.
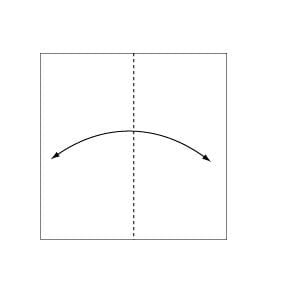
STEP 1.
Fold and crease in the direction of the arrow.
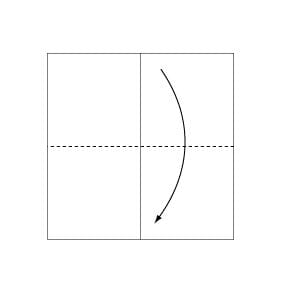
STEP 2.
Fold the paper along the dotted line in the direction of the arrow.
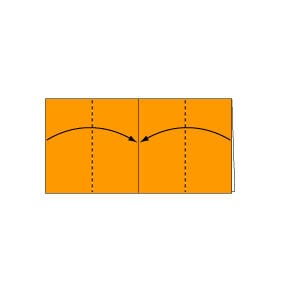
STEP 3.
Fold the paper along the dotted line in the direction of the arrow.
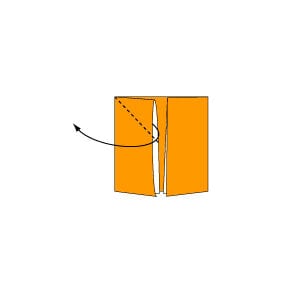
STEP 4.
Open the paper out as shown to create a small pocket, then flatten down the sides of the pocket.
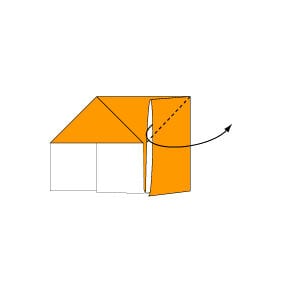
STEP 5.
Repeat the previous step on the other side: open the paper to create a small pocket, then flatten down its sides.
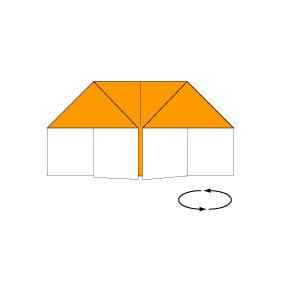
STEP 6.
Turn the paper over.
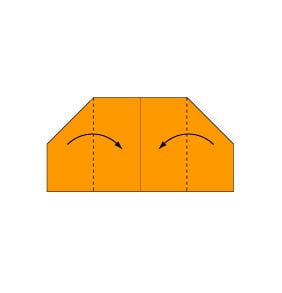
STEP 7.
Fold the paper along the dotted line in the direction of the arrow.
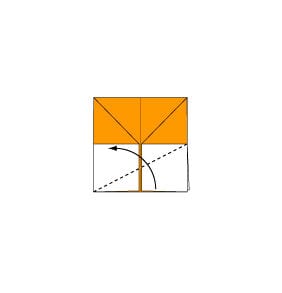
STEP 8.
Fold the paper along the dotted line in the direction of the arrow.
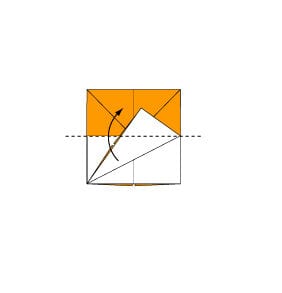
STEP 9.
Fold the paper along the dotted line in the direction of the arrow.
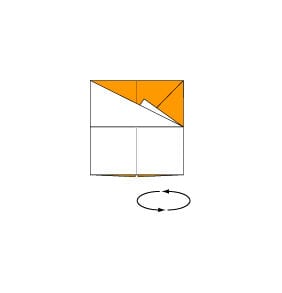
STEP 10.
Turn the paper over.
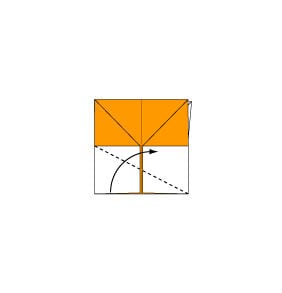
STEP 11.
Fold the paper along the dotted line in the direction of the arrow.
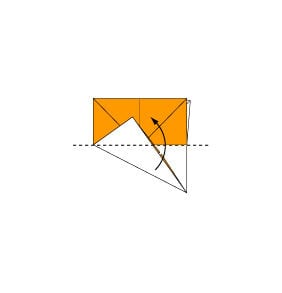
STEP 12.
Fold the paper along the dotted line in the direction of the arrow.
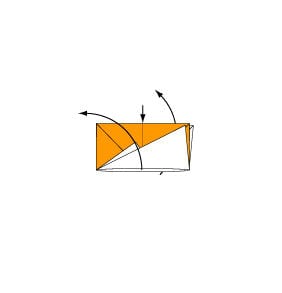
STEP 13.
Open the paper out in the direction of the arrow. This is the part that moves when the fox talks.
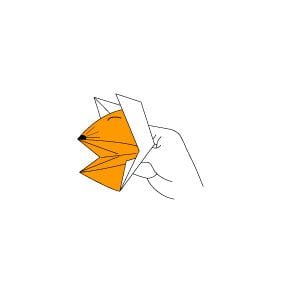
STEP 14.
Draw on the eyes, nose and tongue with a marker, and the origami talking fox is complete.




