
Traditional Origami Ninja Star (Shuriken)
Few origami models are as instantly recognizable as the ninja star. Also called a shuriken, this four-pointed spinner has shown up everywhere from dojo walls to desk drawers, and it remains a rite of passage for anyone learning paper folding. The magic is not in any single tricky crease—it is in how two humble mirror-image modules lock together through a simple flap-into-pocket move. If you can make a valley fold and a mountain fold, you already have everything you need. Grab two squares of paper (slightly different colors on each side look great), and in about seventeen quick steps you will be holding a star that actually feels like it could fly.
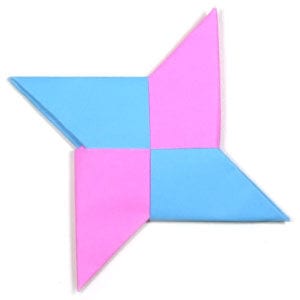
This page is for anyone who wants step-by-step instructions to fold a traditional origami ninja star.
This traditional origami ninja star is made from two square sheets of paper. You will fold two mirror-image modules, and the two modules lock together to form a four-pointed origami star. The clever technique you will learn here is that the modules are joined by inserting two triangular flaps into pockets.
Before you begin, you should know what a valley fold and a mountain fold are. If you are comfortable with those two basic folds, you will have no trouble making the origami ninja star.
If you are ready, let’s get started.
You can use any kind of paper to fold the origami nin
a star. It is a little easier if the front and back of the paper differ slightly in texture or color.
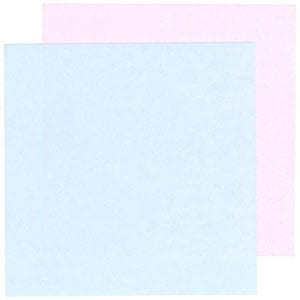
Make sure your paper is square (all sides equal and every angle 90 degrees). The paper I am using here is two typical 15 cm × 15 cm sheets of origami paper in different colors.
This is the front side of the paper.

This is the back side of the paper.
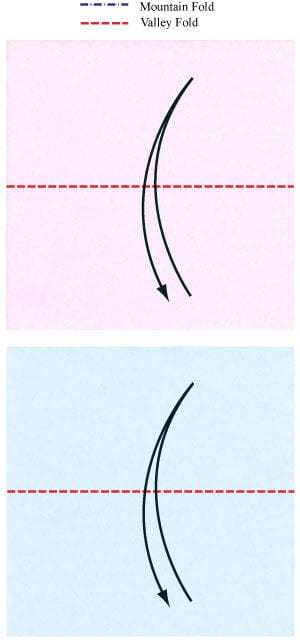
STEP 1.
Start with the back side of the square paper facing up. Valley-fold in half horizontally and then unfold.
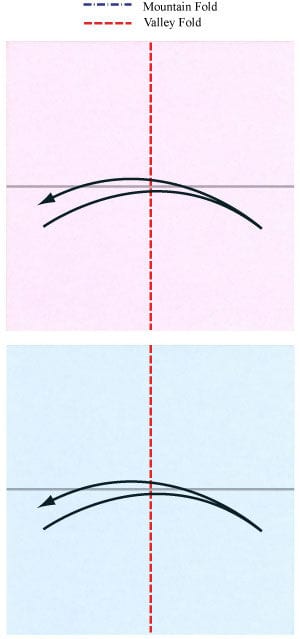
STEP 2.
Valley-fold in half horizontally and then unfold. Prepare to valley-fold in half vertically and then unfold.
STEP 3.
Valley-fold in half vertically and then unfold. Prepare to apply a horizontal “gate-fold”.
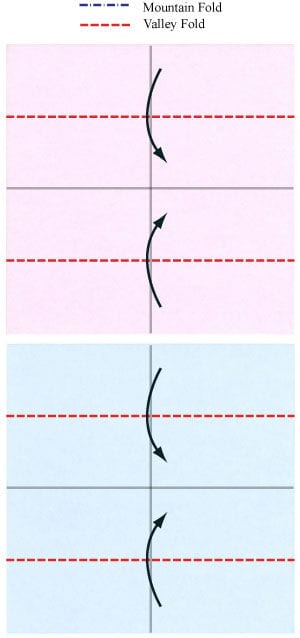
STEP 4.
Apply the horizontal “gate-fold” from step 3. Prepare to apply a horizontal valley-fold.

STEP 5.
Apply the horizontal valley-fold from step 4. Prepare to apply two valley-folds.

STEP 6.
Apply the two valley-folds from step 5. Prepare to apply two more valley-folds.
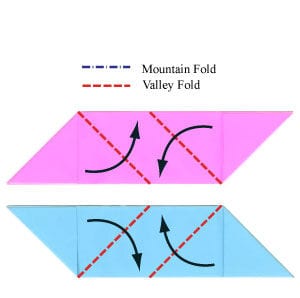
STEP 7.
Apply the two valley-folds from step 6. Prepare to rotate the origami ninja star module 45 degrees counter-clockwise.
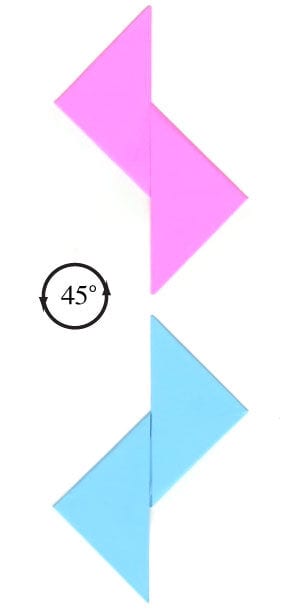
STEP 8.
Rotate the origami ninja star module 45 degrees counter-clockwise. Prepare to turn the lower module over.
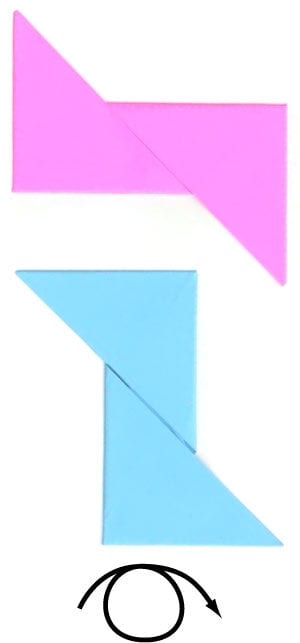
STEP 9.
Turn the lower origami ninja star module over. Prepare to move the upper module on top of the lower module.
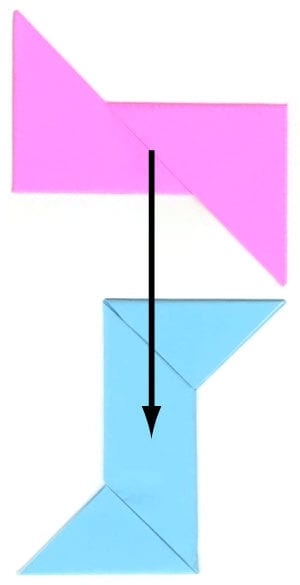
STEP 10.
Move the upper origami ninja star module on top of the lower module. Prepare to apply a valley-fold.
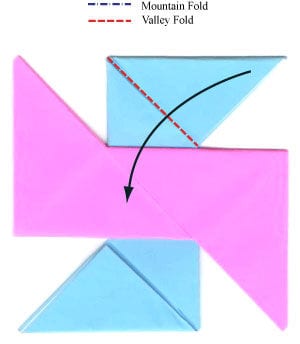
STEP 11.
Apply the valley-fold from step 10. Prepare to insert the triangular flap into a pocket.
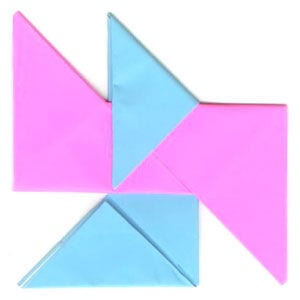
STEP 12.
Insert the triangular flap into the pocket. Prepare to apply a valley-fold.
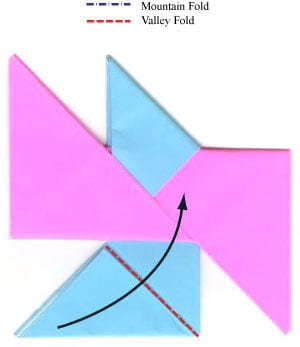
STEP 13.
Apply the valley-fold from step 12. Prepare to insert the triangular flap into a pocket.
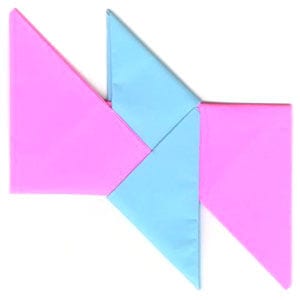
STEP 14.
Insert the triangular flap into the pocket. Prepare to turn the origami ninja star model over.
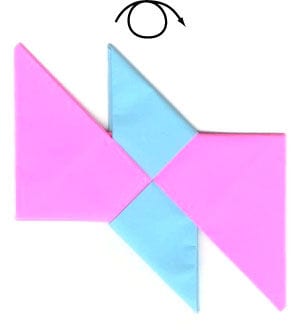
STEP 15.
Turn the origami ninja star module over. Prepare to apply two valley-folds and then insert the two triangular flaps into their pockets.
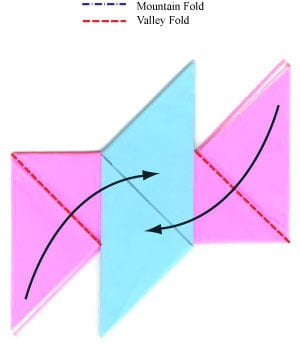
STEP 16.
Apply the two valley-folds from step 15, and then insert the two triangular flaps into their pockets.

STEP 17.
Congratulations! You have just completed a traditional origami ninja star.




