
Tortoise (Version 2)
Slow, sturdy, and a little grumpy-looking—the tortoise is one of those origami animals that just makes people smile. This version is a compact nine-step fold that starts from a simple square and ends with a shell-backed little creature you can set on a desk. The one twist is a single small cut near the end (step 6) that frees the head and legs from the body, so keep a pair of scissors nearby. Apart from that snip, it is all basic valley folds anyone can manage. It is a lovely pick for a rainy-day craft or a first animal for younger folders.

For a printable PDF of the tortoise instructions, click here.
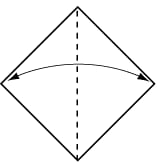
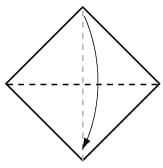
STEP 1. Start with your paper white side up.
Fold in half, as shown, and open.
STEP 2. Now fold the top corner down to the bottom corner.
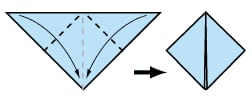
STEP 3. Fold the outside corners in to the centre line.
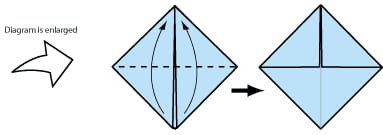
STEP 4. Fold these same triangles upwards to the top point.
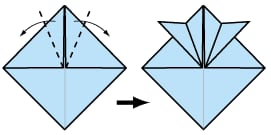
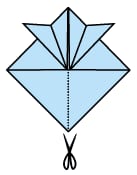
STEP 5. Fold only the uppermost layers outwards, as shown.
STEP 6. Cut only the top layer up to the centre of the model.
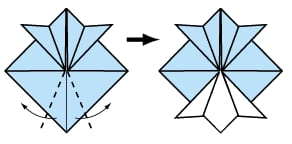

STEP 7. Fold out the bottom flaps as you did in step 5.
STEP 8. Fold the two sides in to the centre, and fold the top point downwards, as shown.
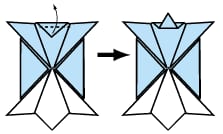
STEP 9. Now fold up.
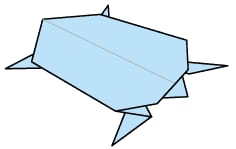
Turn the model over—your tortoise is finished!





