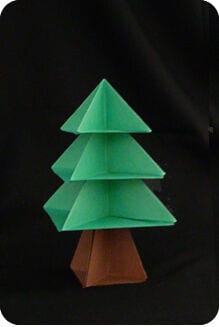
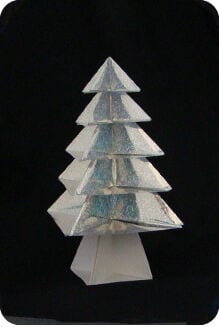
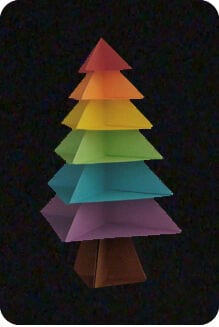
Origami Tree (Pyramid Tree)
Most folded trees are flat silhouettes — a triangle, some pleats, done. The pyramid tree is something else entirely: it genuinely stands up, tier stacked on tier, each level stepping in from the one below like a conifer that has been sharpened into geometry. Lined up on a mantelpiece in a couple of sizes, they look almost too deliberate to be made only of paper.
Part of the appeal is how much repetition buys you. Each tier is the same unit folded from a slightly smaller square, so once you have the sequence in your hands the rest is barely-thinking relaxation. And the little structure that gives the shape its depth — a platform pulled down from the edge with a triangle tucked behind it to lock everything — is one of those tricks you keep finding excuses to use afterwards.
A note on the design: although it is often presented as a traditional model, this tree was in fact created by Makoto Yamaguchi, so we keep the name the designer gave it.
Paper sizes: if you are using 6″ origami paper, then squares of 6″, 5″ and 4″ work well. Remember that the underside of each tier will be white — use paper that is coloured on both sides if you want to avoid that.
If you are using computer or photocopy paper then the largest square you can cut is 8.5″. Squares of 8.5″, 7.5″, 6.5″, 4.5″ and 3.5″ will give you a six-tier tree. The units become difficult to fold once the paper is much smaller than 3″.
If you want a taller tree, cut large sheets of wrapping paper down to the sizes you need.
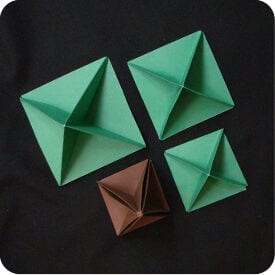
The trunk of the tree is made from a square the same size as the largest square used for the top of the tree. In this example everything is photocopy paper: one 6″ brown square for the trunk, and 6″, 5″ and 4″ green squares for the tiers.
Cut your paper to size and start folding with the largest sheet.
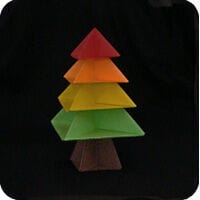
Fold the tiers of the pyramid tree
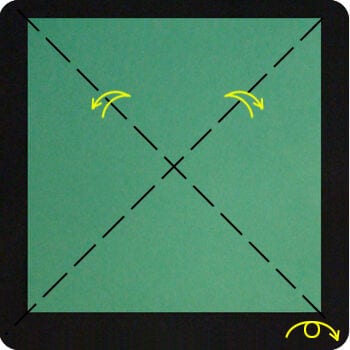
STEP 1. Make a preliminary base. Fold and unfold along both diagonals to leave an X-shaped crease mark, then turn the paper over.
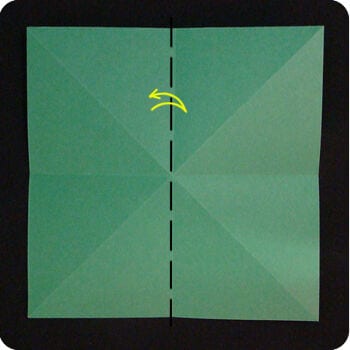
STEP 2. Fold in half from left to right, then unfold.
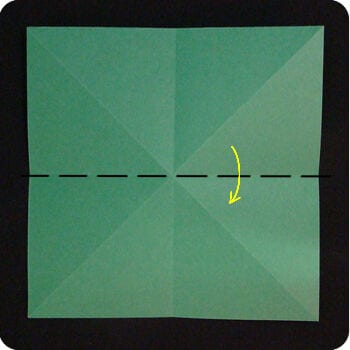
STEP 3. Fold in half from top to bottom.
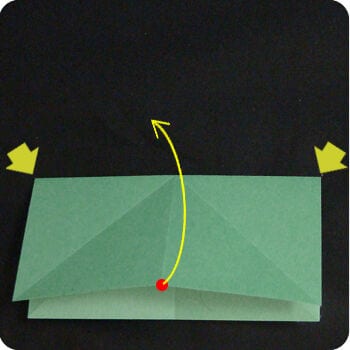
STEP 4. Begin to collapse the model into a preliminary base. Bring the top-left and top-right corners towards each other and let the top section swing up… then keep going until the paper flattens.
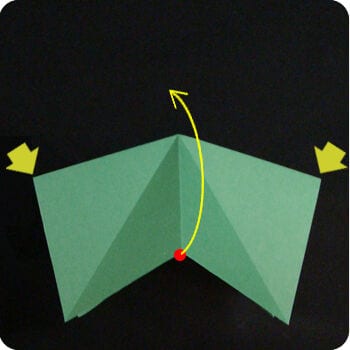
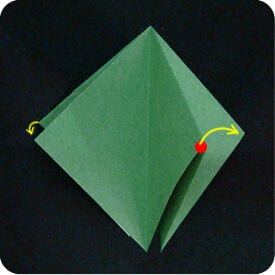
STEP 5. Swivel the top flap towards the right. There is a matching flap behind — fold that one towards the left.
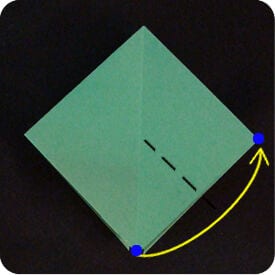
STEP 6. Working with the top layer of paper only, bring the bottom corner across to the right corner as shown.
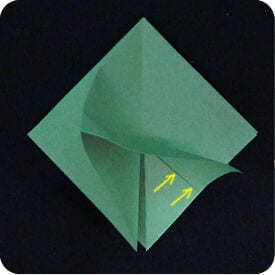
STEP 7. Press the paper at the marked points to establish a crease, then unfold.
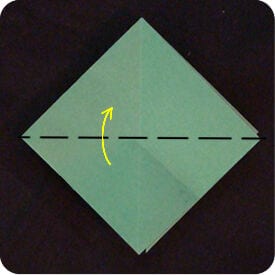
STEP 8. Fold the top layer of paper up so that the bottom corner meets the top corner.
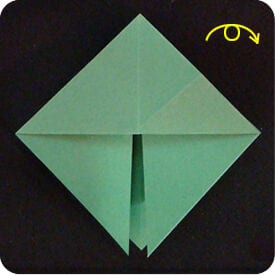
STEP 9. Turn the model over.
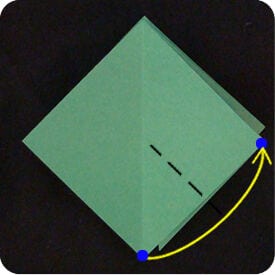
STEP 10. Repeat step 6 on this side: bring the bottom corner across to the right corner.
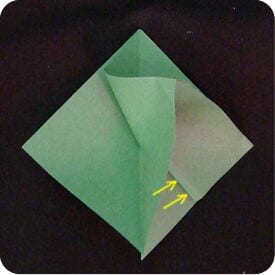
STEP 11. Press the paper where indicated to establish a crease, then unfold.
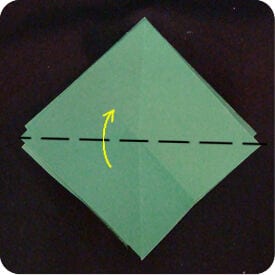
STEP 12. Fold the top layer in half from bottom to top.
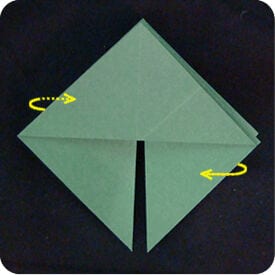
STEP 13. Like turning the page of a book, turn the top-right flap over to the left. Turn the matching flap at the back in the opposite direction.
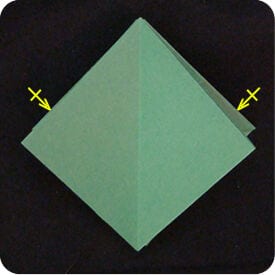
STEP 14. Repeat steps 6 to 12 on the two remaining flaps.
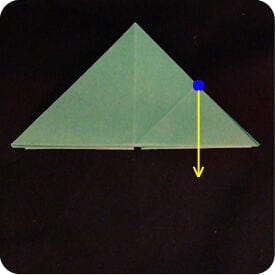
STEP 15. The next few folds make the model three-dimensional, so it will no longer lie flat. Pull the paper down at the point where the crease meets the edge of the paper (blue dot) and bring the corners together (red dots).
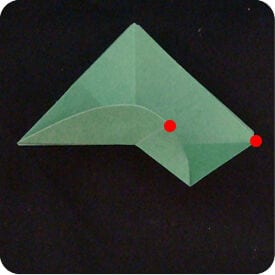
Notice that you form two things: a platform, and a small triangle. Fold the small triangle back so that it wraps around behind.
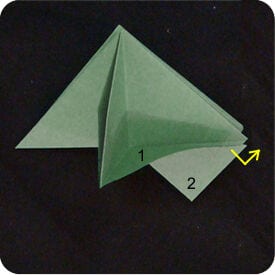
Tuck the small triangle in between the layers of paper. This locks the platform in place and gives the model its three-dimensional structure.

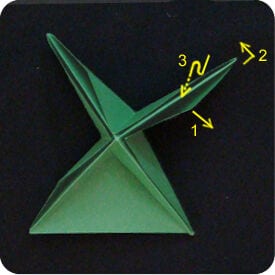
STEP 16. This is what it looks like from the top. Repeat step 15 on the next flap: pull the paper down, wrap the triangle around, then tuck it between the layers.
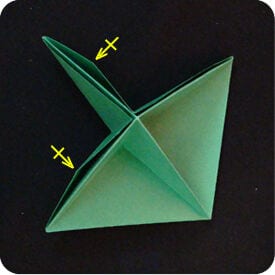
STEP 17. Repeat step 15 on the two remaining flaps.
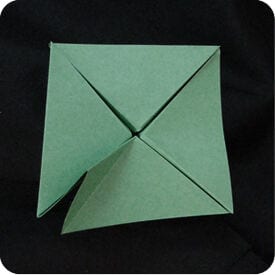
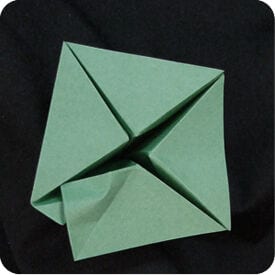
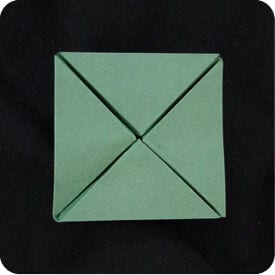
Top view: one tier of the pyramid tree is finished.
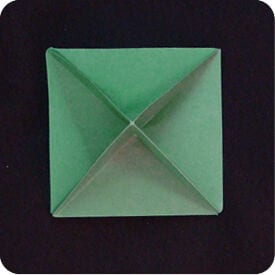
Side view. Fold as many tiers as you need, each one from a square an inch smaller than the last.
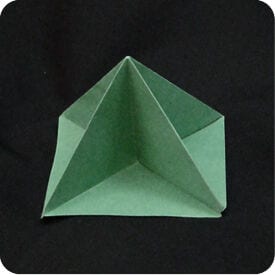
Fold the trunk of the pyramid tree
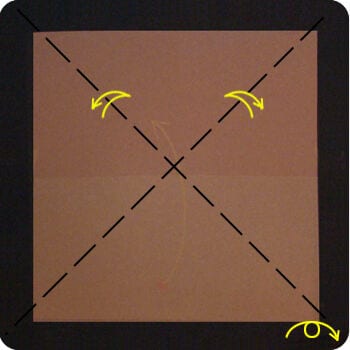
STEP 1. Using the brown square, make a preliminary base. Fold and unfold along both diagonals to leave an X-shaped crease mark, then turn the paper over.
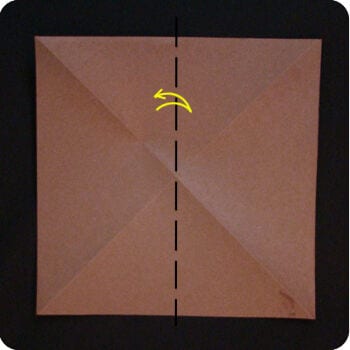
STEP 2. Fold in half from left to right, then unfold.
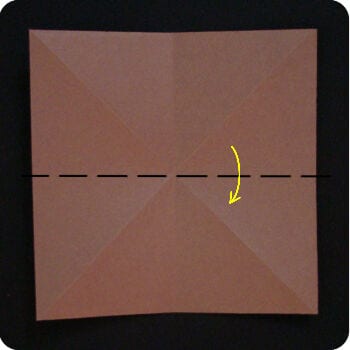
STEP 3. Fold in half from top to bottom.
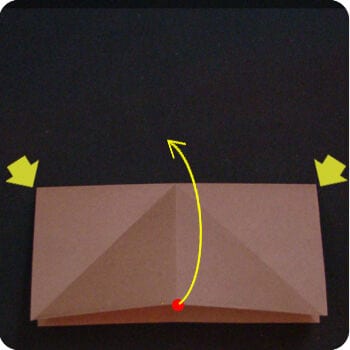
STEP 4. Begin to collapse the model into a preliminary base. Bring the top-left and top-right corners towards each other and let the top section swing up… then keep going until the paper flattens.
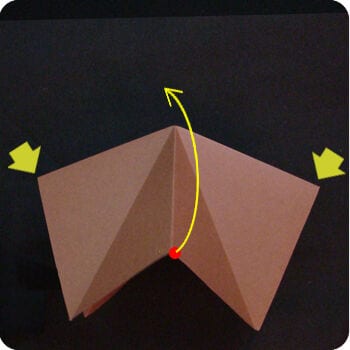
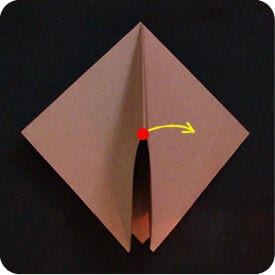
STEP 5. Swivel the top flap towards the right. There is a matching flap behind — fold that one towards the left.
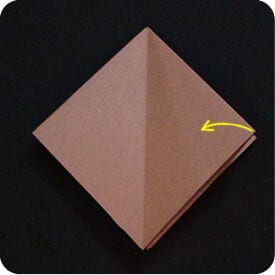
STEP 6. Now make a squash fold: lift the top-right flap and press the tip down so that it squashes flat.
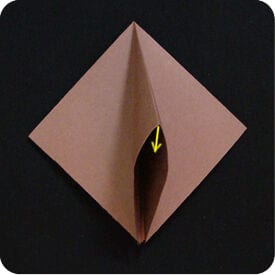
Turn the model over.
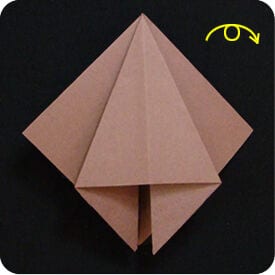
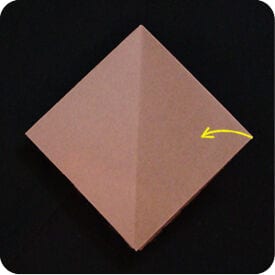
STEP 7. Repeat the squash fold on this side: lift the flap, then press it down evenly.
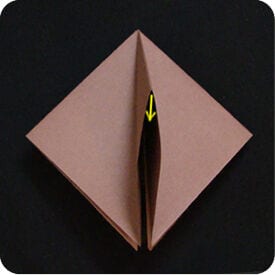
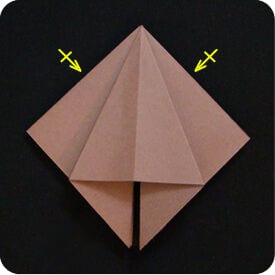
STEP 8. Repeat the squash fold on the remaining two flaps.
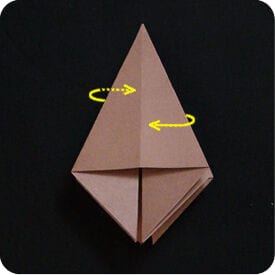
STEP 9. This is what it looks like once all four flaps have been squashed. As if turning the pages of a book, turn the right flap over to the left, and swivel the flap behind the model in the opposite direction.
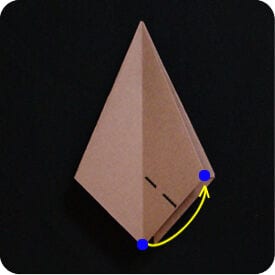
STEP 10. Fold the trunk using the same sequence you used for each tier: bring the bottom corner across to the right corner, press the paper at the marked points to establish a crease, then unfold.
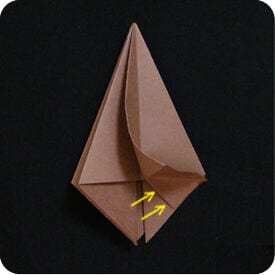
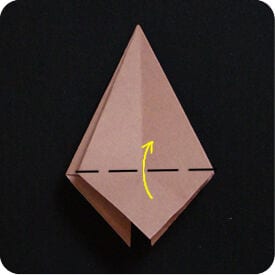
STEP 11. Fold the bottom section up.
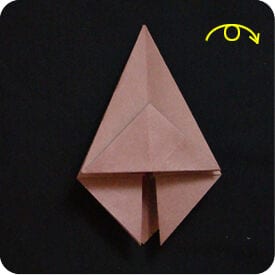
STEP 12. Turn the model over.
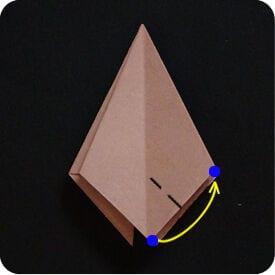
STEP 13. Repeat step 10: bring the bottom corner across to the right corner, establish the crease and unfold.
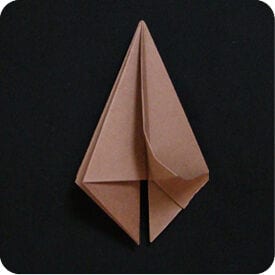
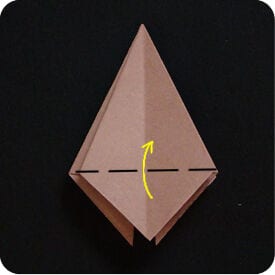
STEP 14. Fold the bottom section up.
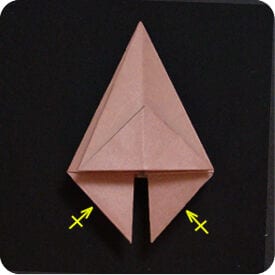
STEP 15. Repeat steps 10 to 14 on the two remaining flaps.
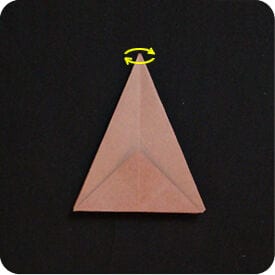
STEP 16. Flare the model open, then pinch the flaps together in pairs (top view).
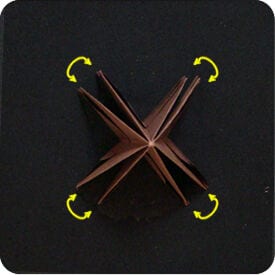
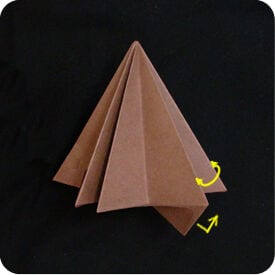
STEP 17. Give the trunk depth using the same platform-and-triangle lock you used on the tiers: pull the paper down, wrap the small triangle behind, and tuck it between the layers. Keep the flaps joined in pairs as you tuck.
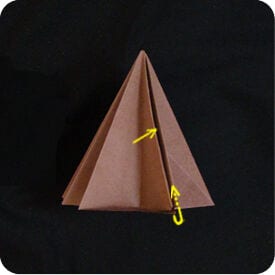
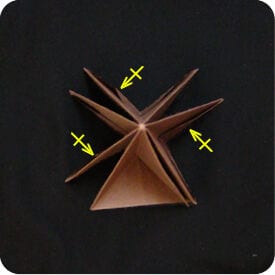
STEP 18. Repeat on the other three flaps.
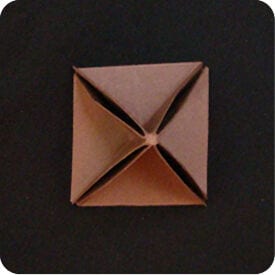
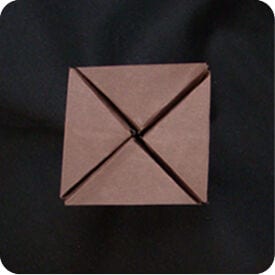
STEP 19. This is what it looks like when all four flaps are done — top view above, bottom view below.
Prepare every tier and the trunk before assembling.
Assemble the pyramid tree

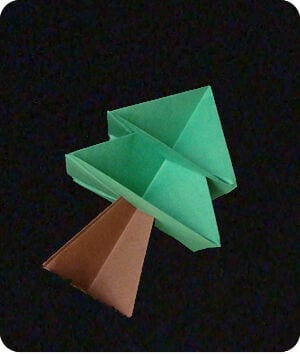
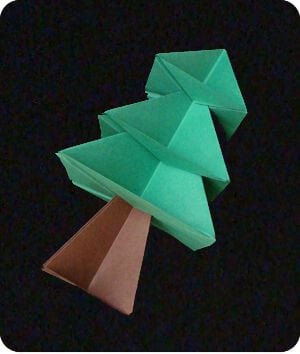
Completed pyramid trees