
Double-bar Origami Envelope
Most paper envelopes you fold are a means to an end — stuff them, lick them shut, forget them. This one is worth folding for its own sake. There is something quietly satisfying about a handmade envelope that actually looks made: a clean rectangle, no tape, no glue, and a double bar across the back that reads like detailing rather than accident.
It is also the nicest way I know to meet the swivel fold. It turns up twice here, at either end of the envelope, and once your fingers understand how the paper pivots around that trapped point you will start spotting it in far more complicated models. Grab a sheet of A4 — the closest thing to hand is fine — and let's fold something you would be happy to hand over.
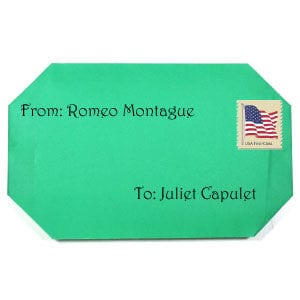
This tutorial folds an origami envelope with a double bar running across the back. Along the way you will pick up a folding technique worth knowing in its own right — the swivel fold.
Before you start, make sure you are comfortable with the two basic folds: the valley fold and the mountain fold. Once you have those, this envelope will give you no trouble at all. I am using A4 paper here, but letter-size paper works just as well, and any non-square sheet is a good choice.
This is the front side of the paper.
STEP 1. Start with the back side of the paper facing up. We will begin with a horizontal Z-fold.
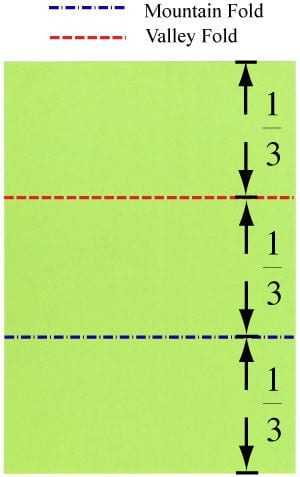
STEP 2. Make the horizontal Z-fold of step 1 and then unfold it again. Next up: a horizontal valley fold.
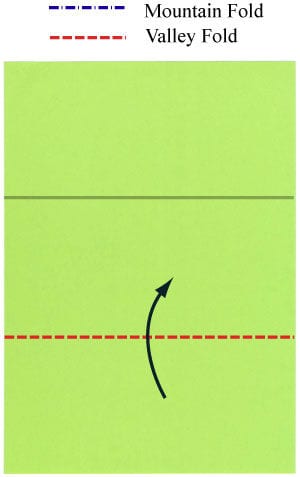
STEP 3. Make the horizontal valley fold of step 2. Get ready for another horizontal valley fold.
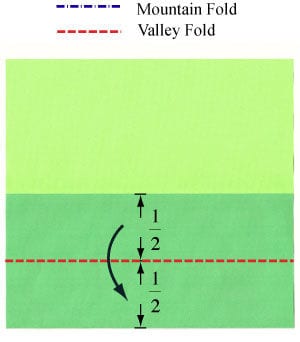
STEP 4. Make the horizontal valley fold of step 3. Get ready for another horizontal valley fold.
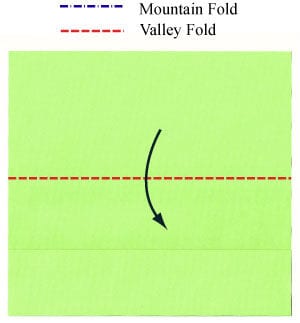
STEP 5. Make the horizontal valley fold of step 4. Get ready for one more horizontal valley fold.
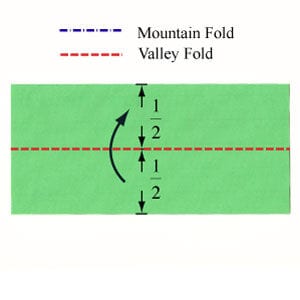
STEP 6. Make the horizontal valley fold of step 5. Get ready to work four mountain folds on the front-most layers.
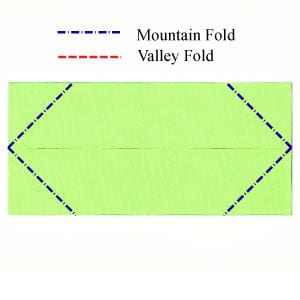
STEP 7. Make the four mountain folds of step 6 on the front-most layers. Get ready for two horizontal mountain folds.
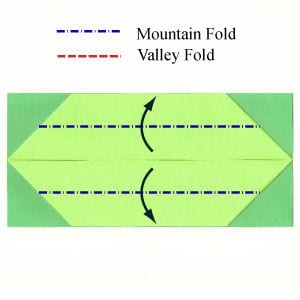
STEP 8. Make the two horizontal mountain folds of step 7. The envelope is ready to be filled, so have your letter to hand.
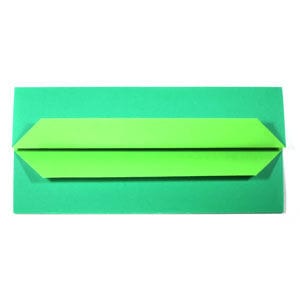
STEP 9. Start sliding the letter in, following the direction of the arrow.
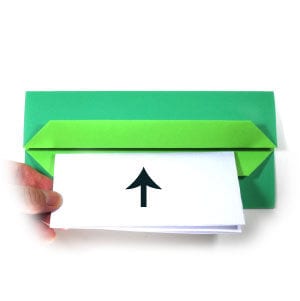
STEP 10. Finish sliding the letter in as shown in step 9. Now get ready to lift layer 1 so that it sits directly above the letter.
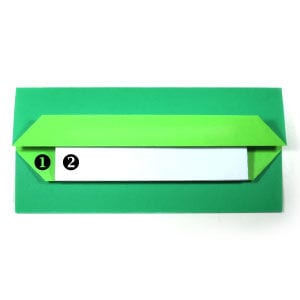
STEP 11. Lift layer 1. Get ready to fold it down over the letter.
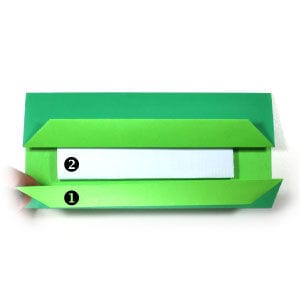
STEP 12. Fold layer 1 of step 11 down so that it rests just above the letter.
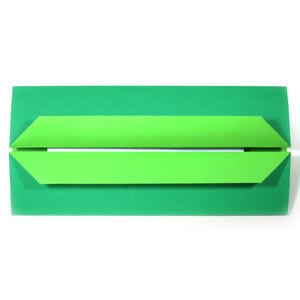
STEP 13. Get ready to make a vertical valley fold.
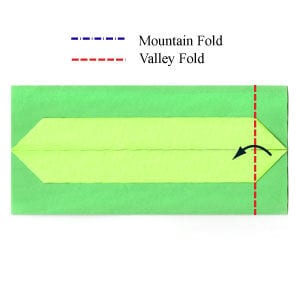
STEP 14. Make the vertical valley fold of step 13. Get ready to make two valley folds and then unfold them.
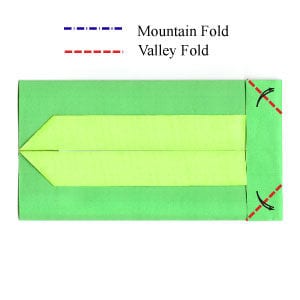
STEP 15. Make the valley fold of step 14 and then unfold it again. Get ready to apply two swivel folds.
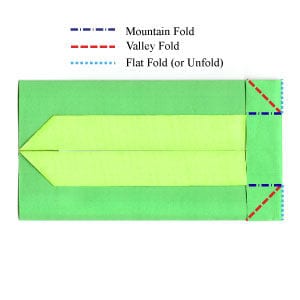
STEP 16. Start applying the upper swivel fold of step 15.
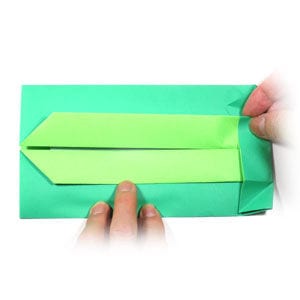
STEP 17. Continue applying the upper swivel fold of step 15.
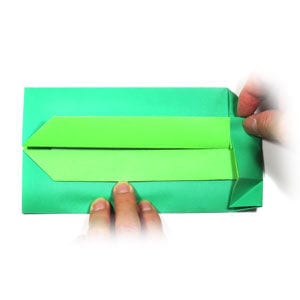
STEP 18. Complete the upper swivel fold of step 15. Get ready to apply the lower swivel fold.
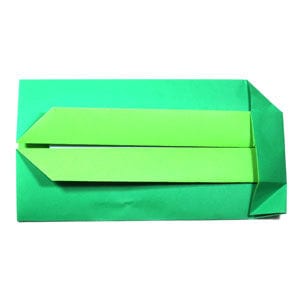
STEP 19. Start applying the lower swivel fold of step 15.
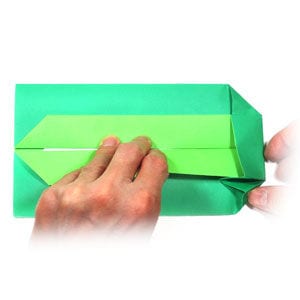
STEP 20. Continue applying the lower swivel fold of step 15.
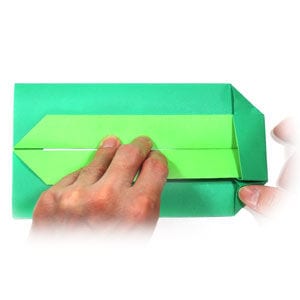
STEP 21. Complete the lower swivel fold of step 15.
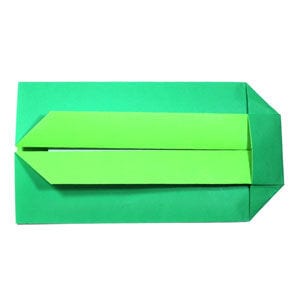
STEP 22. Get ready to apply two more swivel folds by repeating steps 15 to 21.
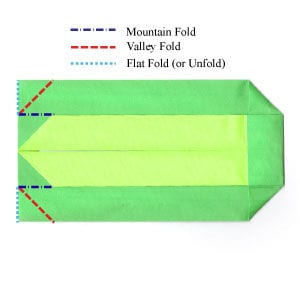
STEP 23. Apply the two swivel folds by repeating steps 15 to 21. Now get ready to turn the envelope over.
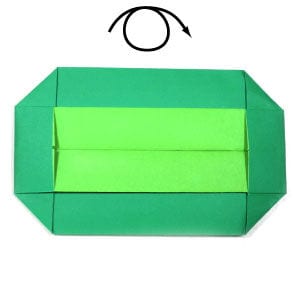
STEP 24. Turn the envelope over. Get ready to write the address and add a stamp.
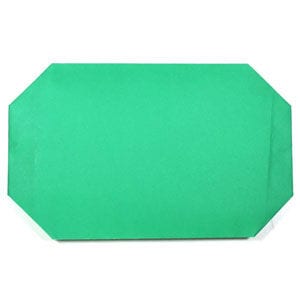
STEP 25. Write the address and put a stamp on the envelope. Congratulations — you have finished your double-bar origami envelope!




