
Flying Origami Crane II (Short Tutorial)
The Flying Origami Crane II is a more advanced take on the classic crane, built from a bird base and finished with two of origami's signature moves — the open sink fold and the inside reverse fold. Those techniques give this crane its swept-back wings and pointed, dynamic silhouette, making it a satisfying project for folders who have already mastered the traditional crane. Expect a longer sequence of precise rotations, valley folds, and reversals, but take it one step at a time and the model comes together beautifully. A square around 18 cm is a comfortable size to learn with. Let's build your flying crane.
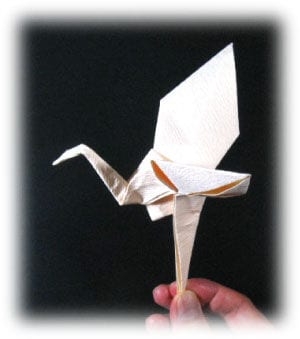
This page is for anyone who wants instructions for folding the Flying Origami Crane II.
This Flying Origami Crane II starts from a bird base. The two special techniques it uses are the open sink fold and the inside reverse fold.
Before attempting this model, you should know what a valley fold and a mountain fold are. If you’re comfortable with those two basics, you’ll have no trouble making this crane.
If you are ready, then let’s get started.
You can use any kind of paper to fold the crane. It helps a little if the front and back of the paper differ slightly in texture or color.
Make sure your paper is a square (all sides equal, all corners 90 degrees). I’m using an 18 cm × 18 cm sheet here. Once you’re familiar with the model, you can try smaller paper.
This is the front side of the paper.
This is the back side of the paper.

Step 1.
Let’s start with a bird base. If you don’t know what a bird base is, learn it from the link above. Prepare to rotate the bird base by 90 degrees.
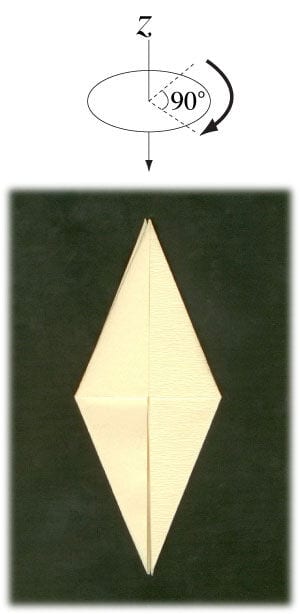
Step 2.
Rotate the bird base by 90 degrees. Prepare to rotate the bird base by 90 degrees.
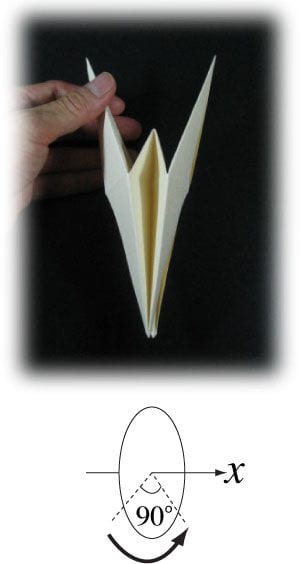
Step 3.
Rotate the bird base by 90 degrees.
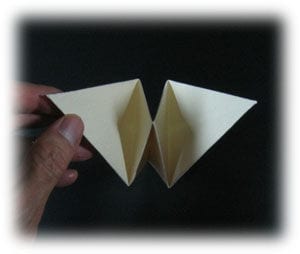
Step 4.
Prepare to stretch two wings following the arrow directions.
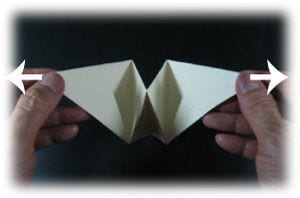
Step 5.
Stretch two wings following the arrow directions from Step 4. Prepare to sharpen two edges by applying two mountain folds.
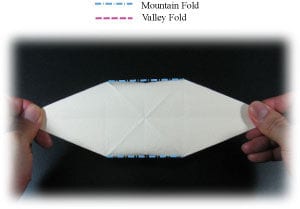
Step 6.
Sharpen two edges by applying the two mountain folds from Step 5. Prepare to turn the origami crane model over.
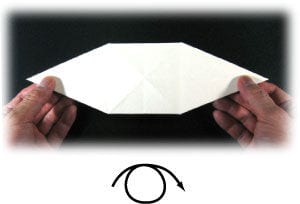
Step 7.
Turn the origami crane model over. You should have the same view as shown on the left. Prepare to turn the origami crane model over.
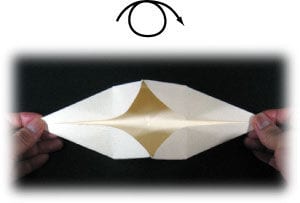
Step 8.
Turn the origami crane model over. Prepare to apply an open sink fold.
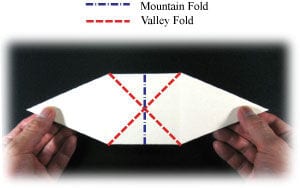
Step 9.
Apply the open sink fold from Step 8. Prepare to apply two valley folds.
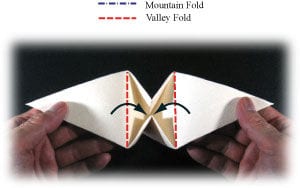
Step 10.
Apply the two valley folds from Step 9. Prepare to rotate the origami crane model by 90 degrees.
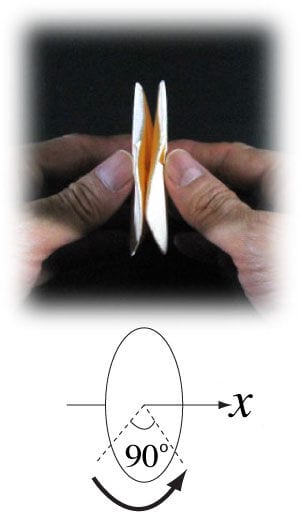
Step 11.
Rotate the origami crane model by 90 degrees. Prepare to rotate the origami crane model by 90 degrees.
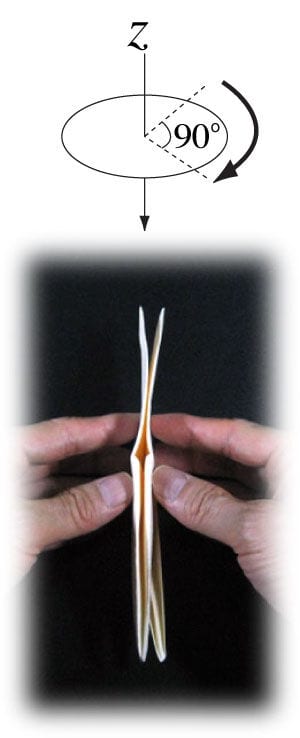
Step 12.
Rotate the origami crane model by 90 degrees. Prepare to apply two valley folds.
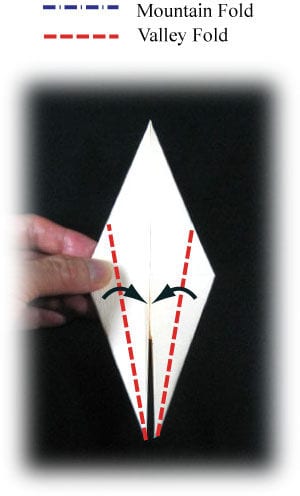
Step 13.
Apply the two valley folds from Step 12. Prepare to turn the origami crane model over.
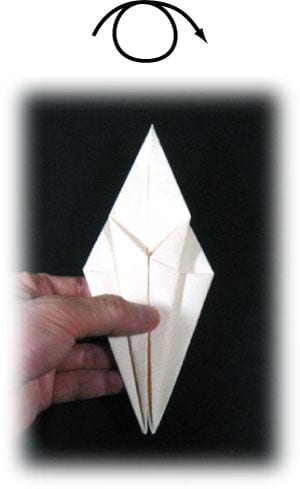
Step 14.
Turn the origami crane model over. Prepare to apply two valley folds.
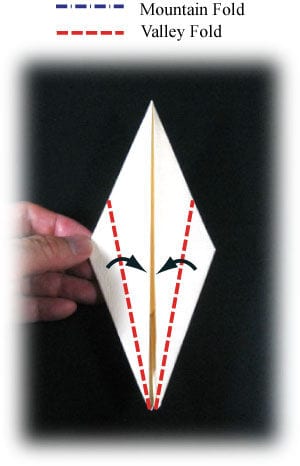
Step 15.
Apply the two valley folds from Step 14.
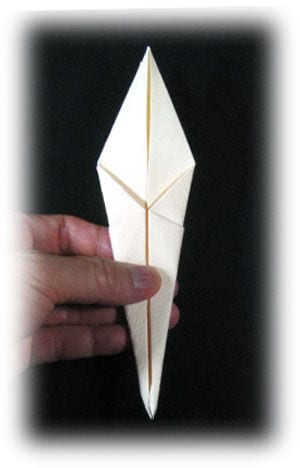
Step 16.
Rotate the origami crane model by 90 degrees. Prepare to pull two flaps following the arrow directions.
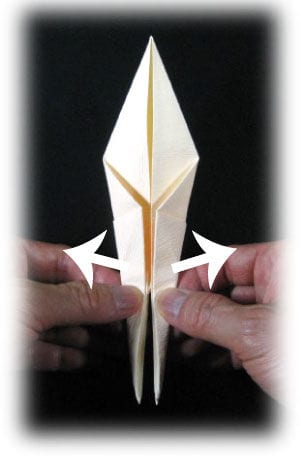
Step 17.
Pull two flaps following the arrow directions from Step 16.
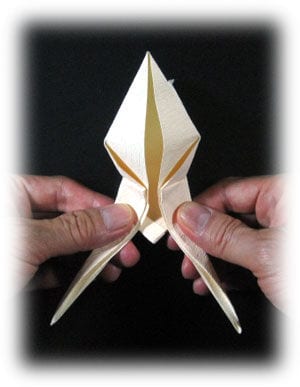
Step 18.
Prepare to apply an inside reverse fold.
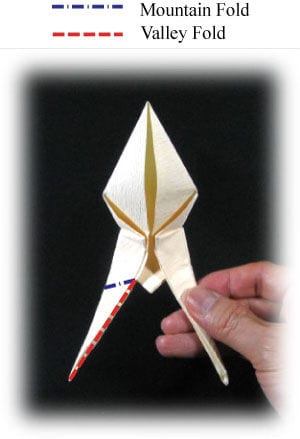
Step 19.
Apply the inside reverse fold from Step 18. Prepare to apply another inside reverse fold.
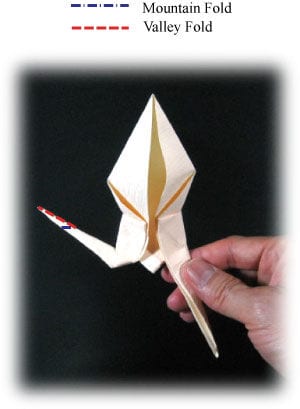
Step 20.
Apply the inside reverse fold from Step 19. Prepare to apply a valley fold.
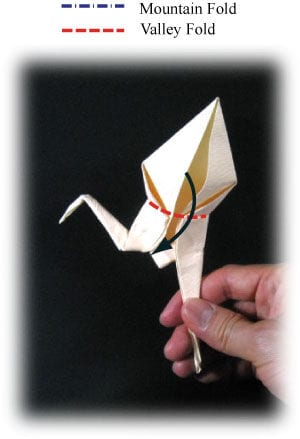
Step 21.
Apply the valley fold from Step 20. Repeat Step 20 on the other side. Congratulations! You have completed folding a Flying Origami Crane II.




