
Goat
There's something delightful about turning one square of paper into a little goat that seems ready to nibble the grass. This thirteen-step tutorial is an easy, photo-led build that's perfect once you've got the basic folds under your belt.
Along the way you'll meet a squash fold and finish with an inside-reverse fold that pops the neck and head into place—two moves that make the goat feel alive. Let's fold one.
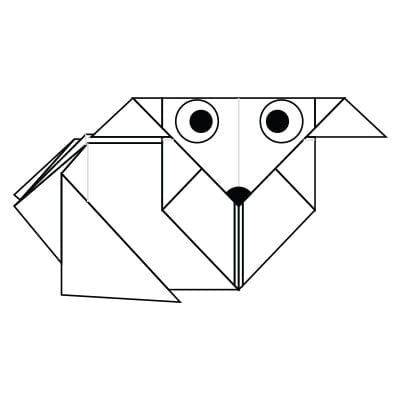
These instructions will teach you how to make an easy origami goat. If you’ve never folded anything before, you may want to take a quick look at our beginner’s guide first—it covers all the basic folds and skills you’ll need.
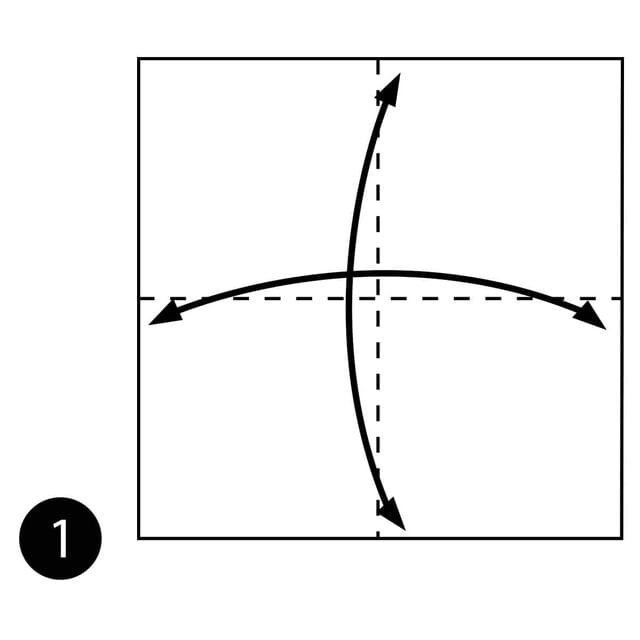
STEP 1. Fold and unfold the paper in half both ways.
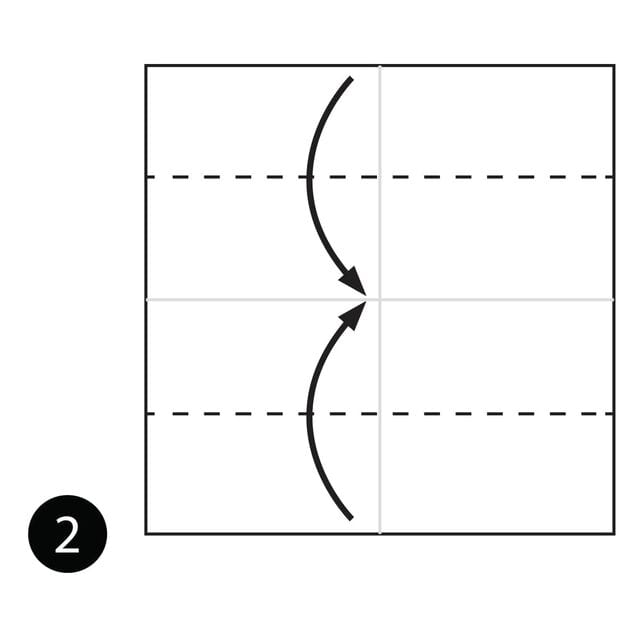
STEP 2. Fold the top and bottom edges to the center along the dotted lines.
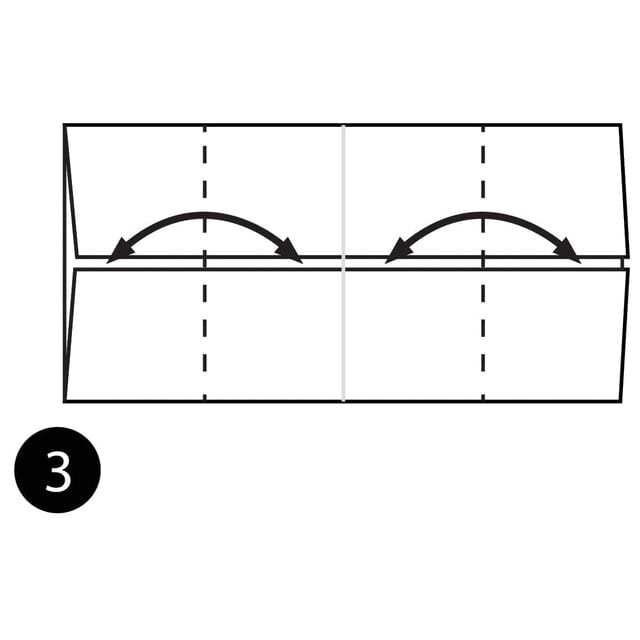
STEP 3. Fold and unfold both sides to the center along the dotted lines.
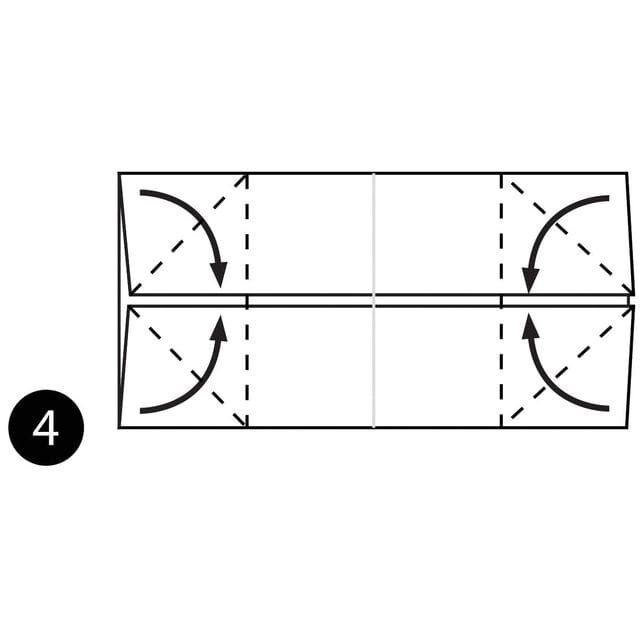
STEP 4. Open each corner and flatten it along the dotted lines (see the next step for the finished shape).
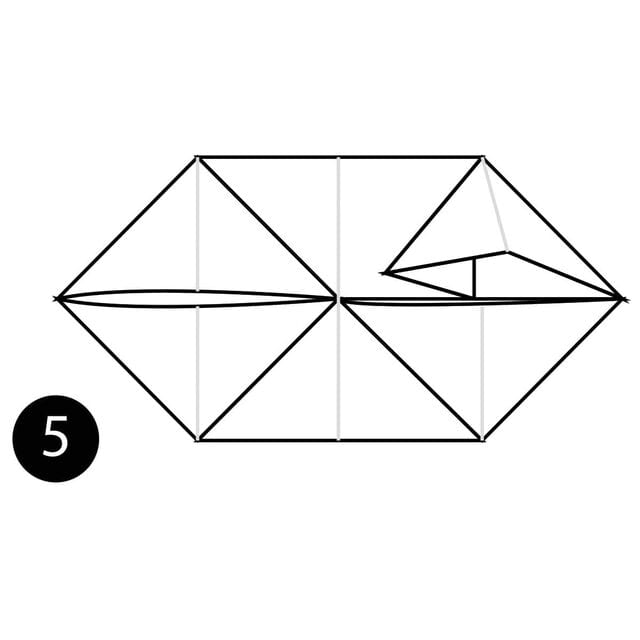
STEP 5. Push everything flat.
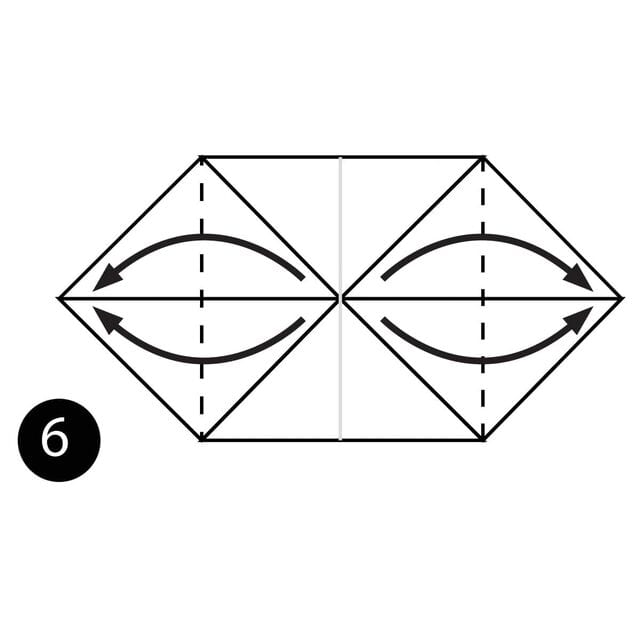
STEP 6. Fold both sides outward along the dotted lines.
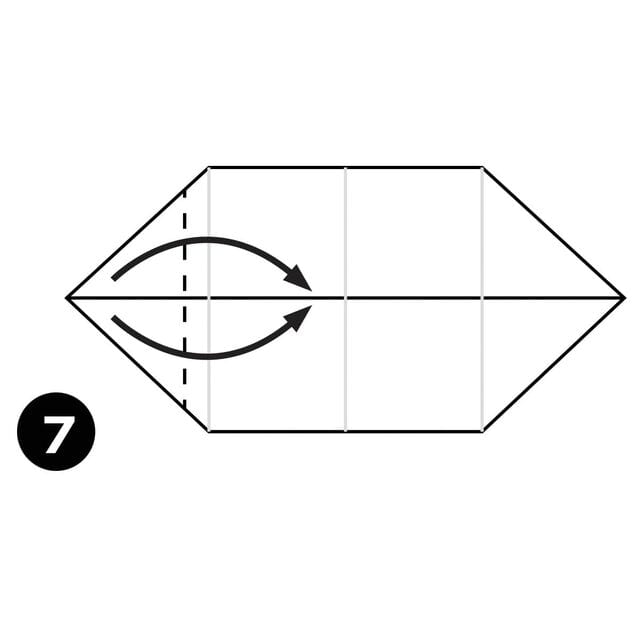
STEP 7. Fold the left side inward along the dotted line.
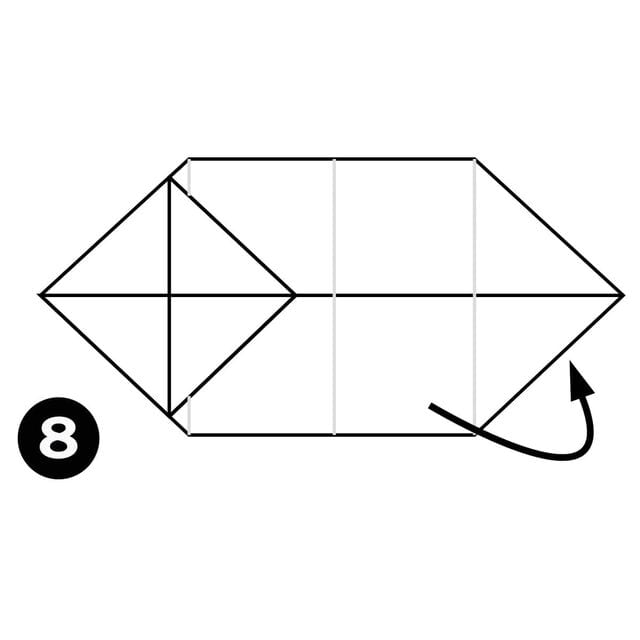
STEP 8. Fold the bottom half of the model behind the model.
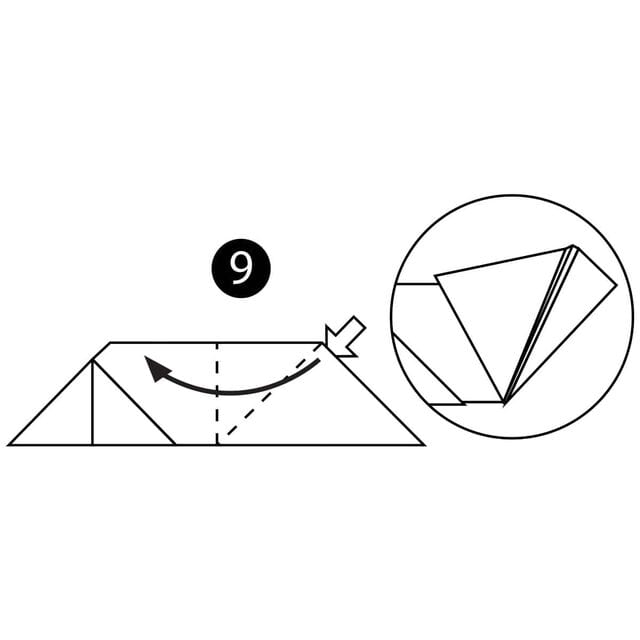
STEP 9. Open the paper along the dotted lines, then squash-fold everything flat.
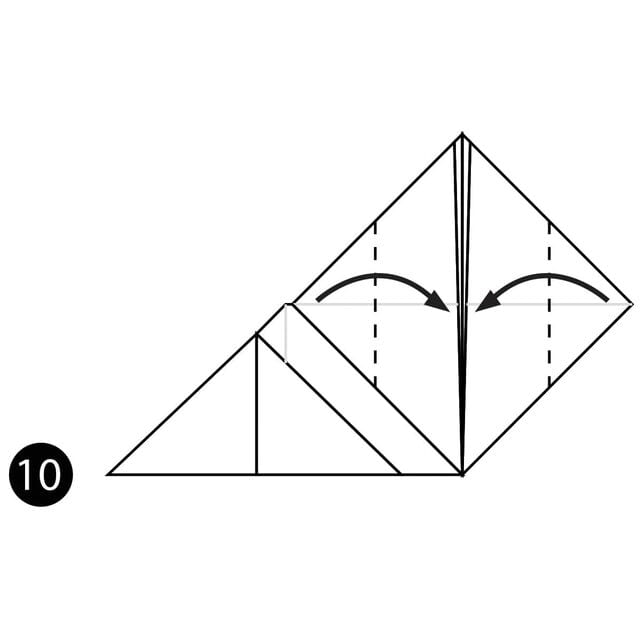
STEP 10. Fold both sides inward along the dotted lines.
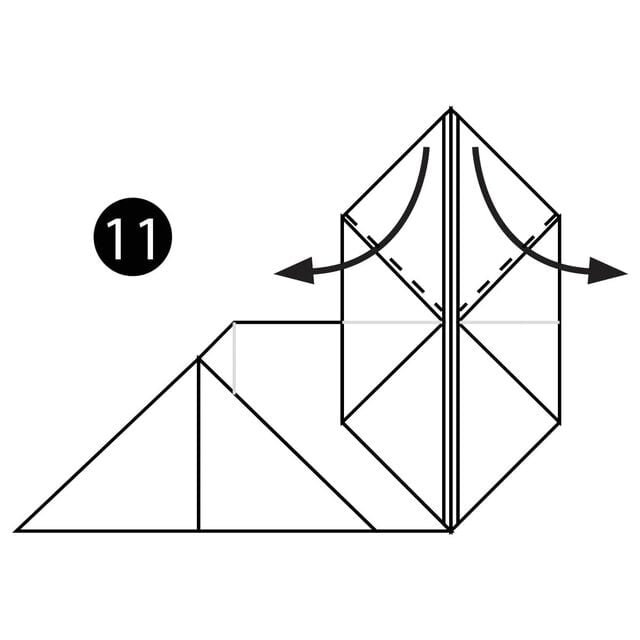
STEP 11. Fold the two flaps at the top down along the dotted lines.
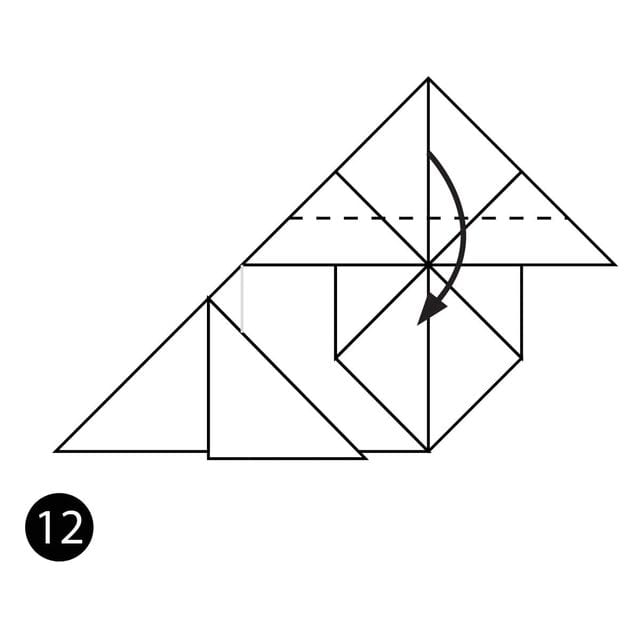
STEP 12. Fold the top of the paper down along the dotted line.
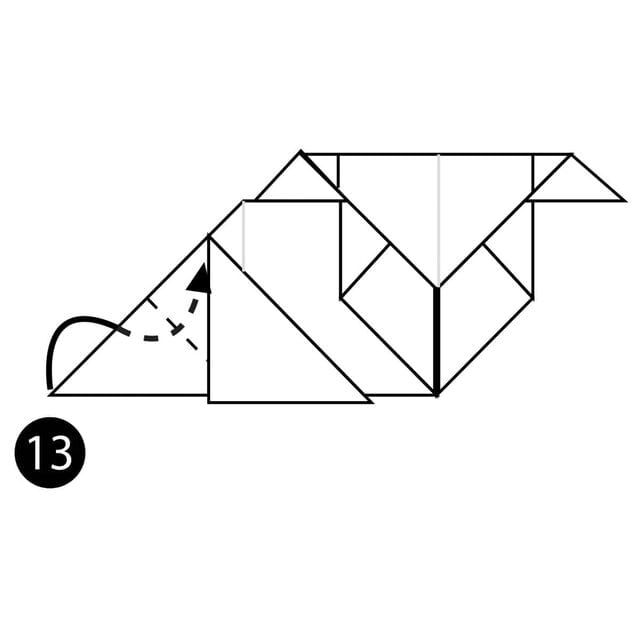
STEP 13. Make an inside-reverse fold along the dotted line to form the neck and head.
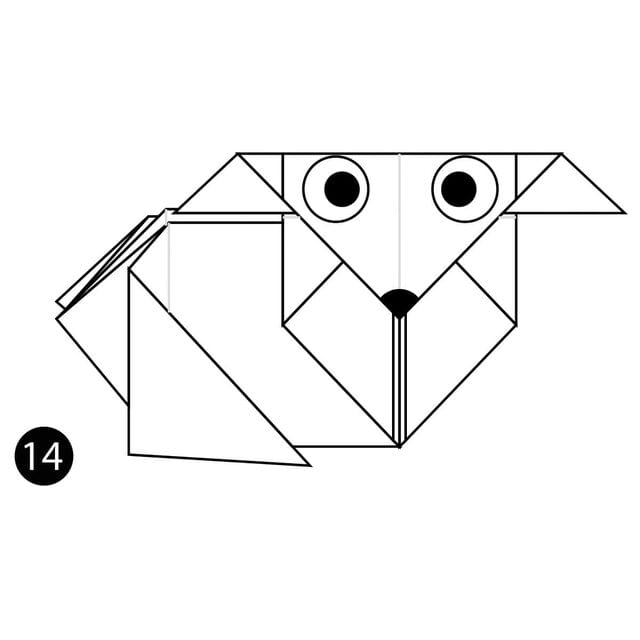
Your goat is complete!




